Step 1: Open the POS Dashboard
Log in to the POS Dashboard.
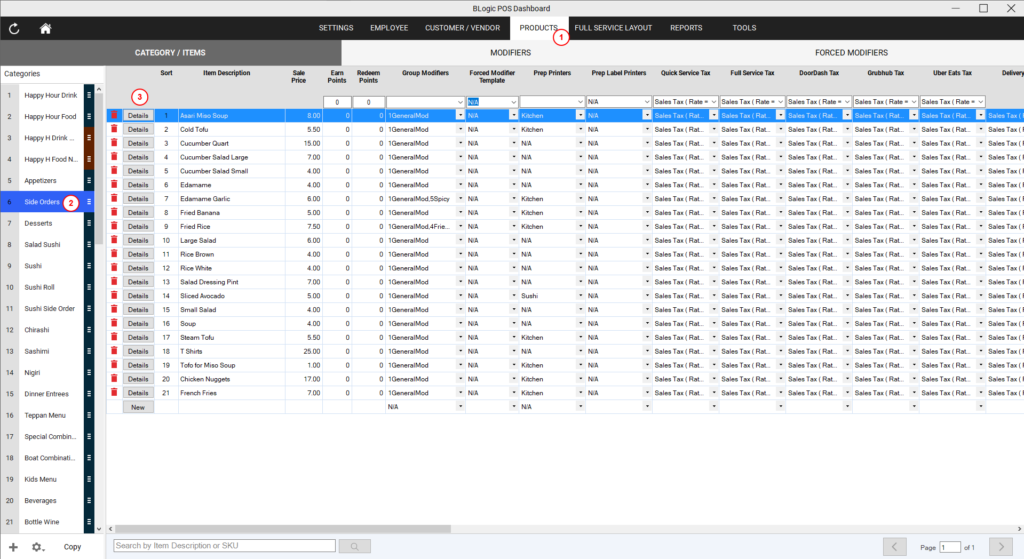
Step 2: Access the Products Section
Navigate to the Products section from the dashboard.
Step 3: Select a Category
Choose the category that contains the items you want to update.
Step 4: Choose the Item
Click on the item that needs an image update, then select Detail.
Step 5: Update the Image
- In the Detail view, locate the Image section.
- Here, you’ll find two options:
- Button Image: The image that will display in the list of menu items.
- Item for Details Page: The image shown when viewing the detailed product page.
Step 6: Select Image for Online Apps
- Ensure to check the option Online Apps to make the image visible on online ordering platforms.
- Upload or choose the appropriate image for the item.
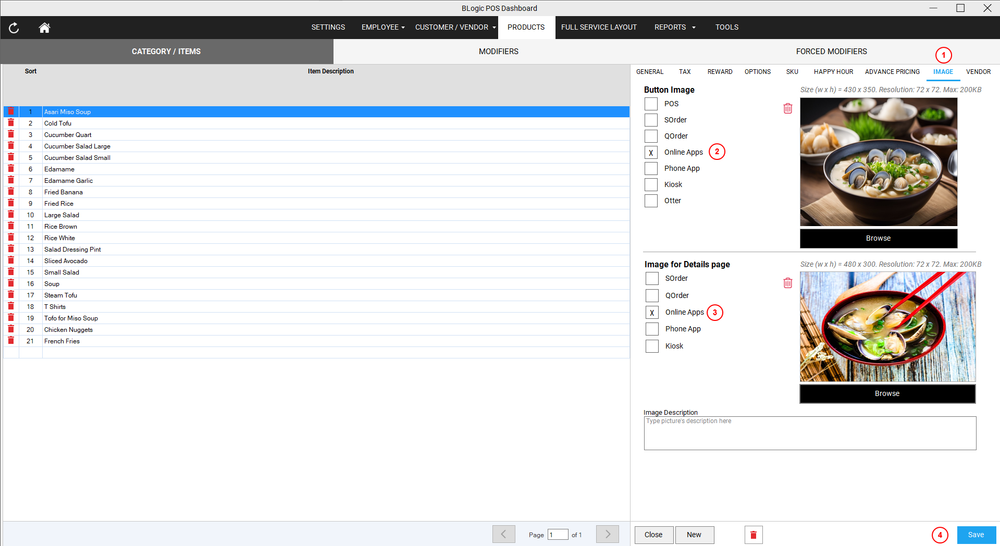
Step 7: Save Changes
Click Save to confirm the updates.
Step 8: Verify Online
Visit your online ordering site and check to ensure the images are displaying correctly.