Introduction
This article shows you how to rename the “Add-Ons” label that customers see on the kiosk item screen, and how to display your own custom message on the kiosk “Order placed” screen after checkout. You will learn where to find these settings in BLogic View and how they appear on the kiosk. These options let you match the kiosk wording to your store — for example, showing “Customize” instead of “Add-Ons”, or reminding customers to take their receipt to the counter.
Version Support
| Product / Module | Supported Version |
|---|---|
| BLogic View (Dashboard) | Build 08.26.2026 or later |
| Kiosk | Build 08.26.2026 or later |
Note: If you do not see the Kiosk tab or these options, please contact Support to confirm your store is on a supported version.
Table of Contents
- Rename the Add-Ons label
- Show a custom message on the confirmation screen
- Where to view the result on the kiosk
- FAQ
Rename the Add-Ons label
Use this setting to change the “Add-Ons” heading that appears above the modifiers on the kiosk item detail screen.
Step 1: Open the Kiosk configuration
- Log in to your BLogic View dashboard.
- Go to Setup > Configurations.
- In the left menu, under Ordering Channels, select Kiosk.
Step 2: Enter your custom label
- In the General section, find Add-Ons section label.
- Type the wording you want to show, for example
Customize. - Click Save.
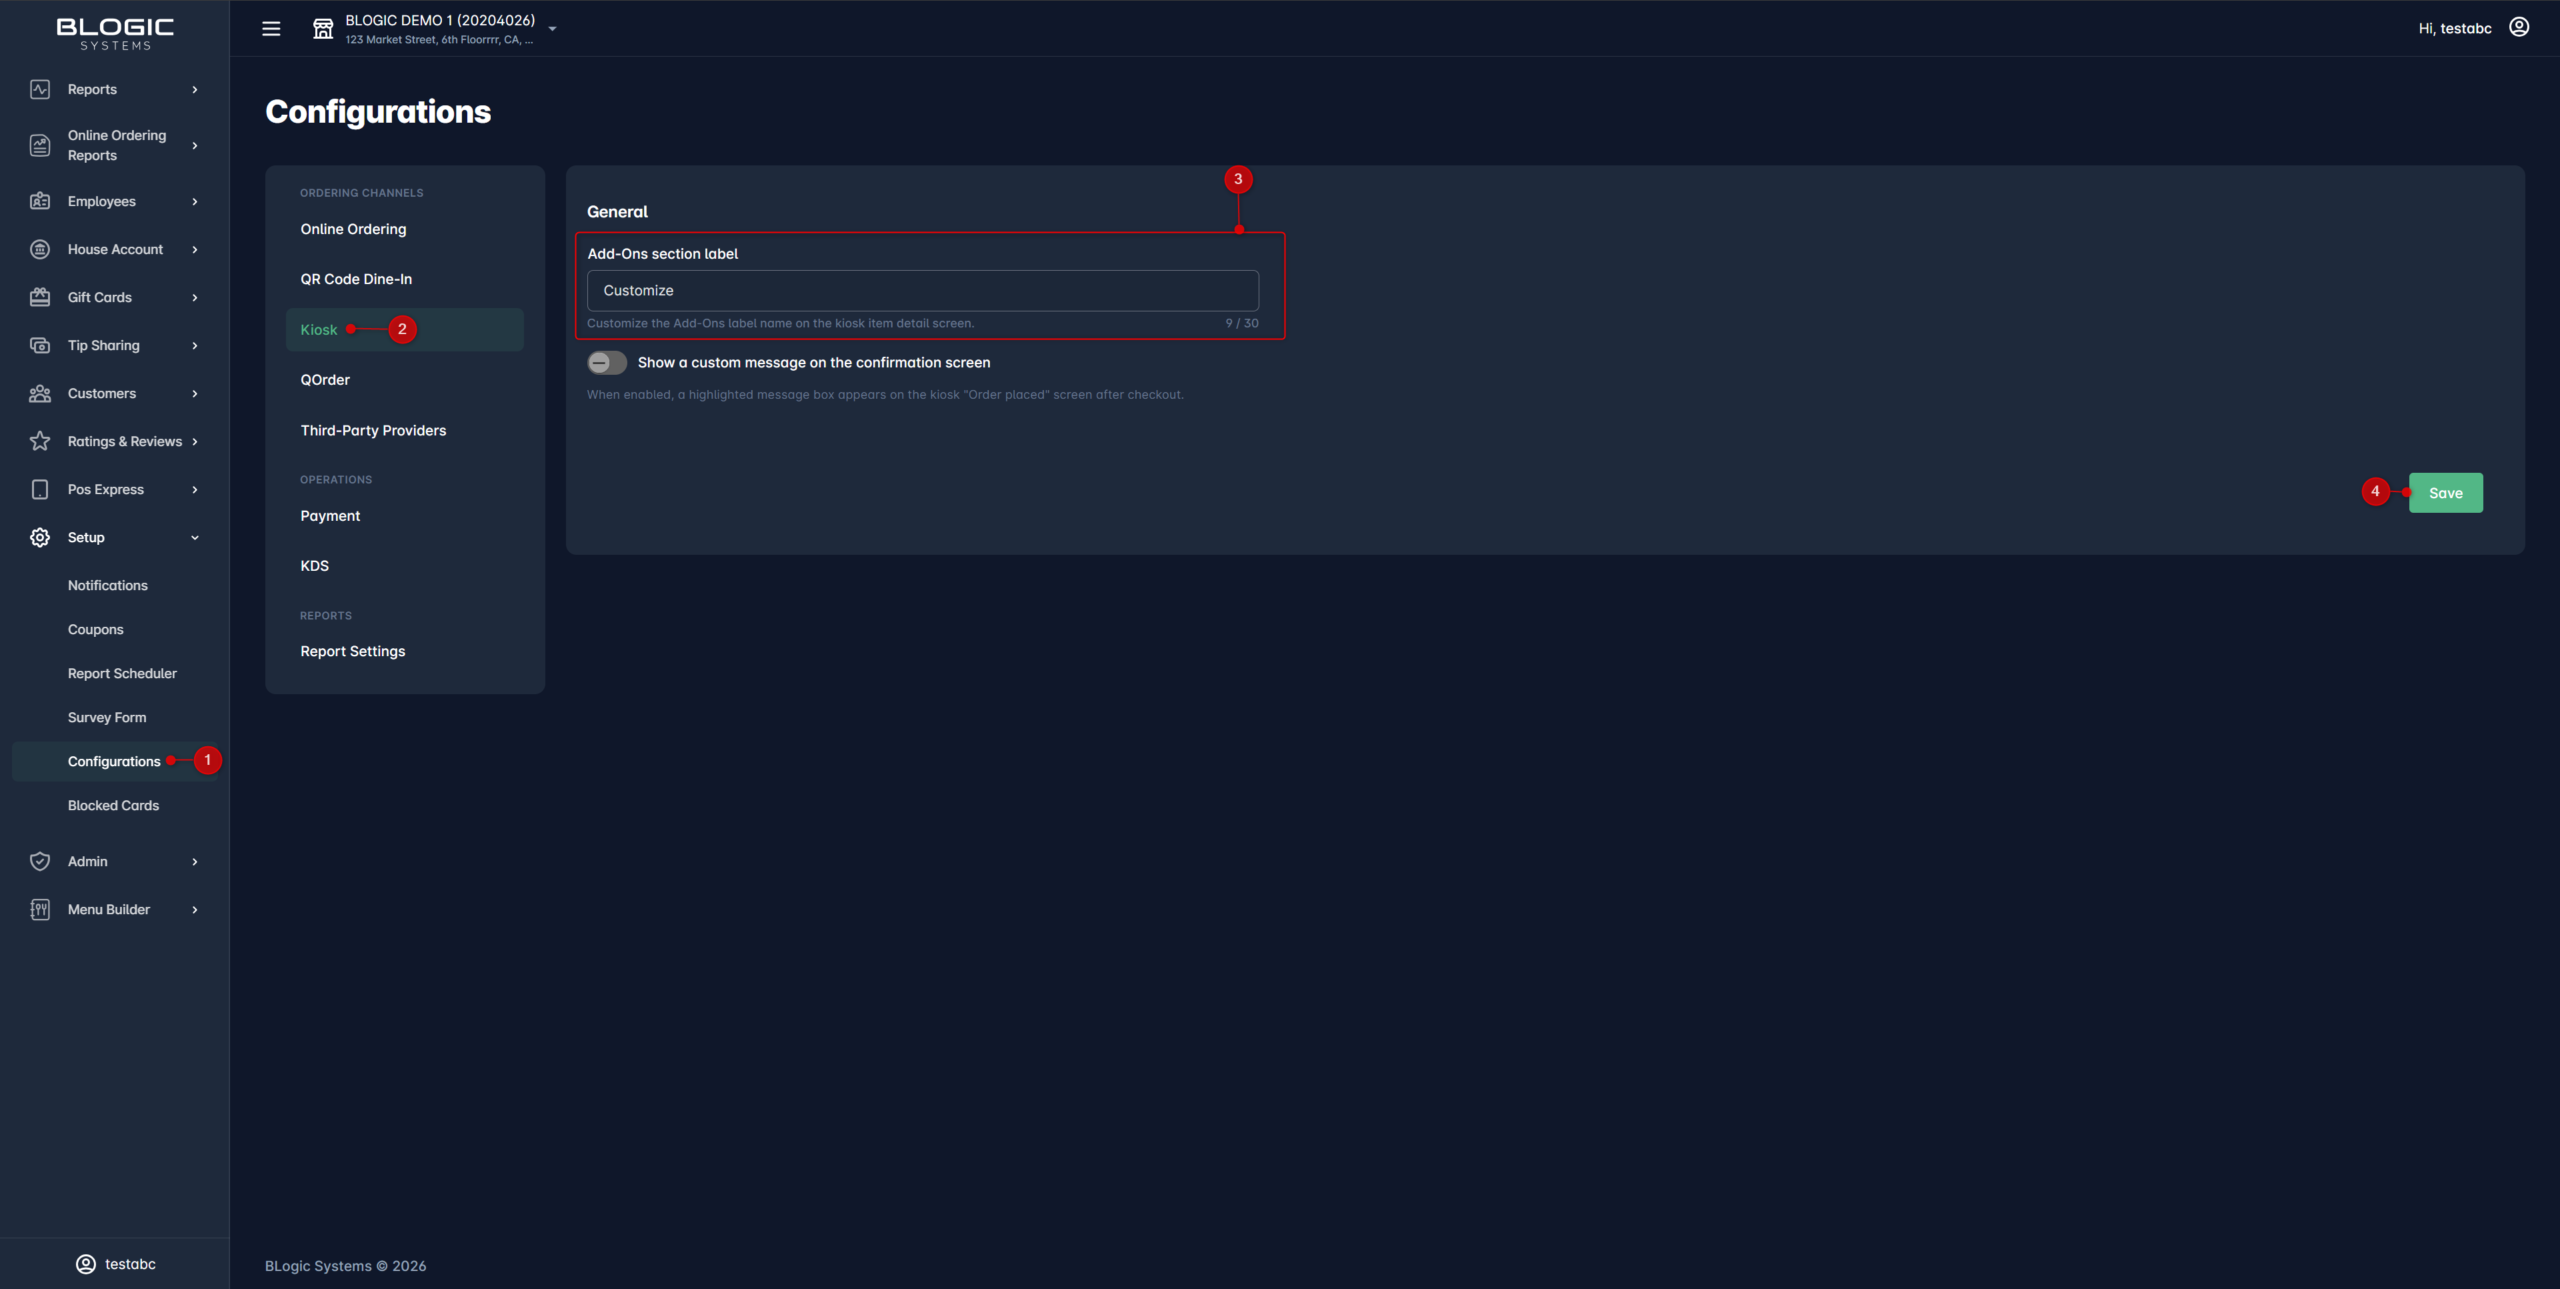
ℹ️ Note: The label can be up to 30 characters. If you leave it blank and save, it returns to the default Add-Ons.
Show a custom message on the confirmation screen
Use this setting to display a highlighted message box on the kiosk “Order placed” screen after a customer completes checkout — for example, a reminder to take the receipt to the counter.
Step 1: Turn on the message
- Go to Setup > Configurations > Kiosk.
- In the General section, turn on Show a custom message on the confirmation screen.
Step 2: Enter your message
- In the Confirmation screen message box, type your message, for example
Your order has been placed. - Click Save.
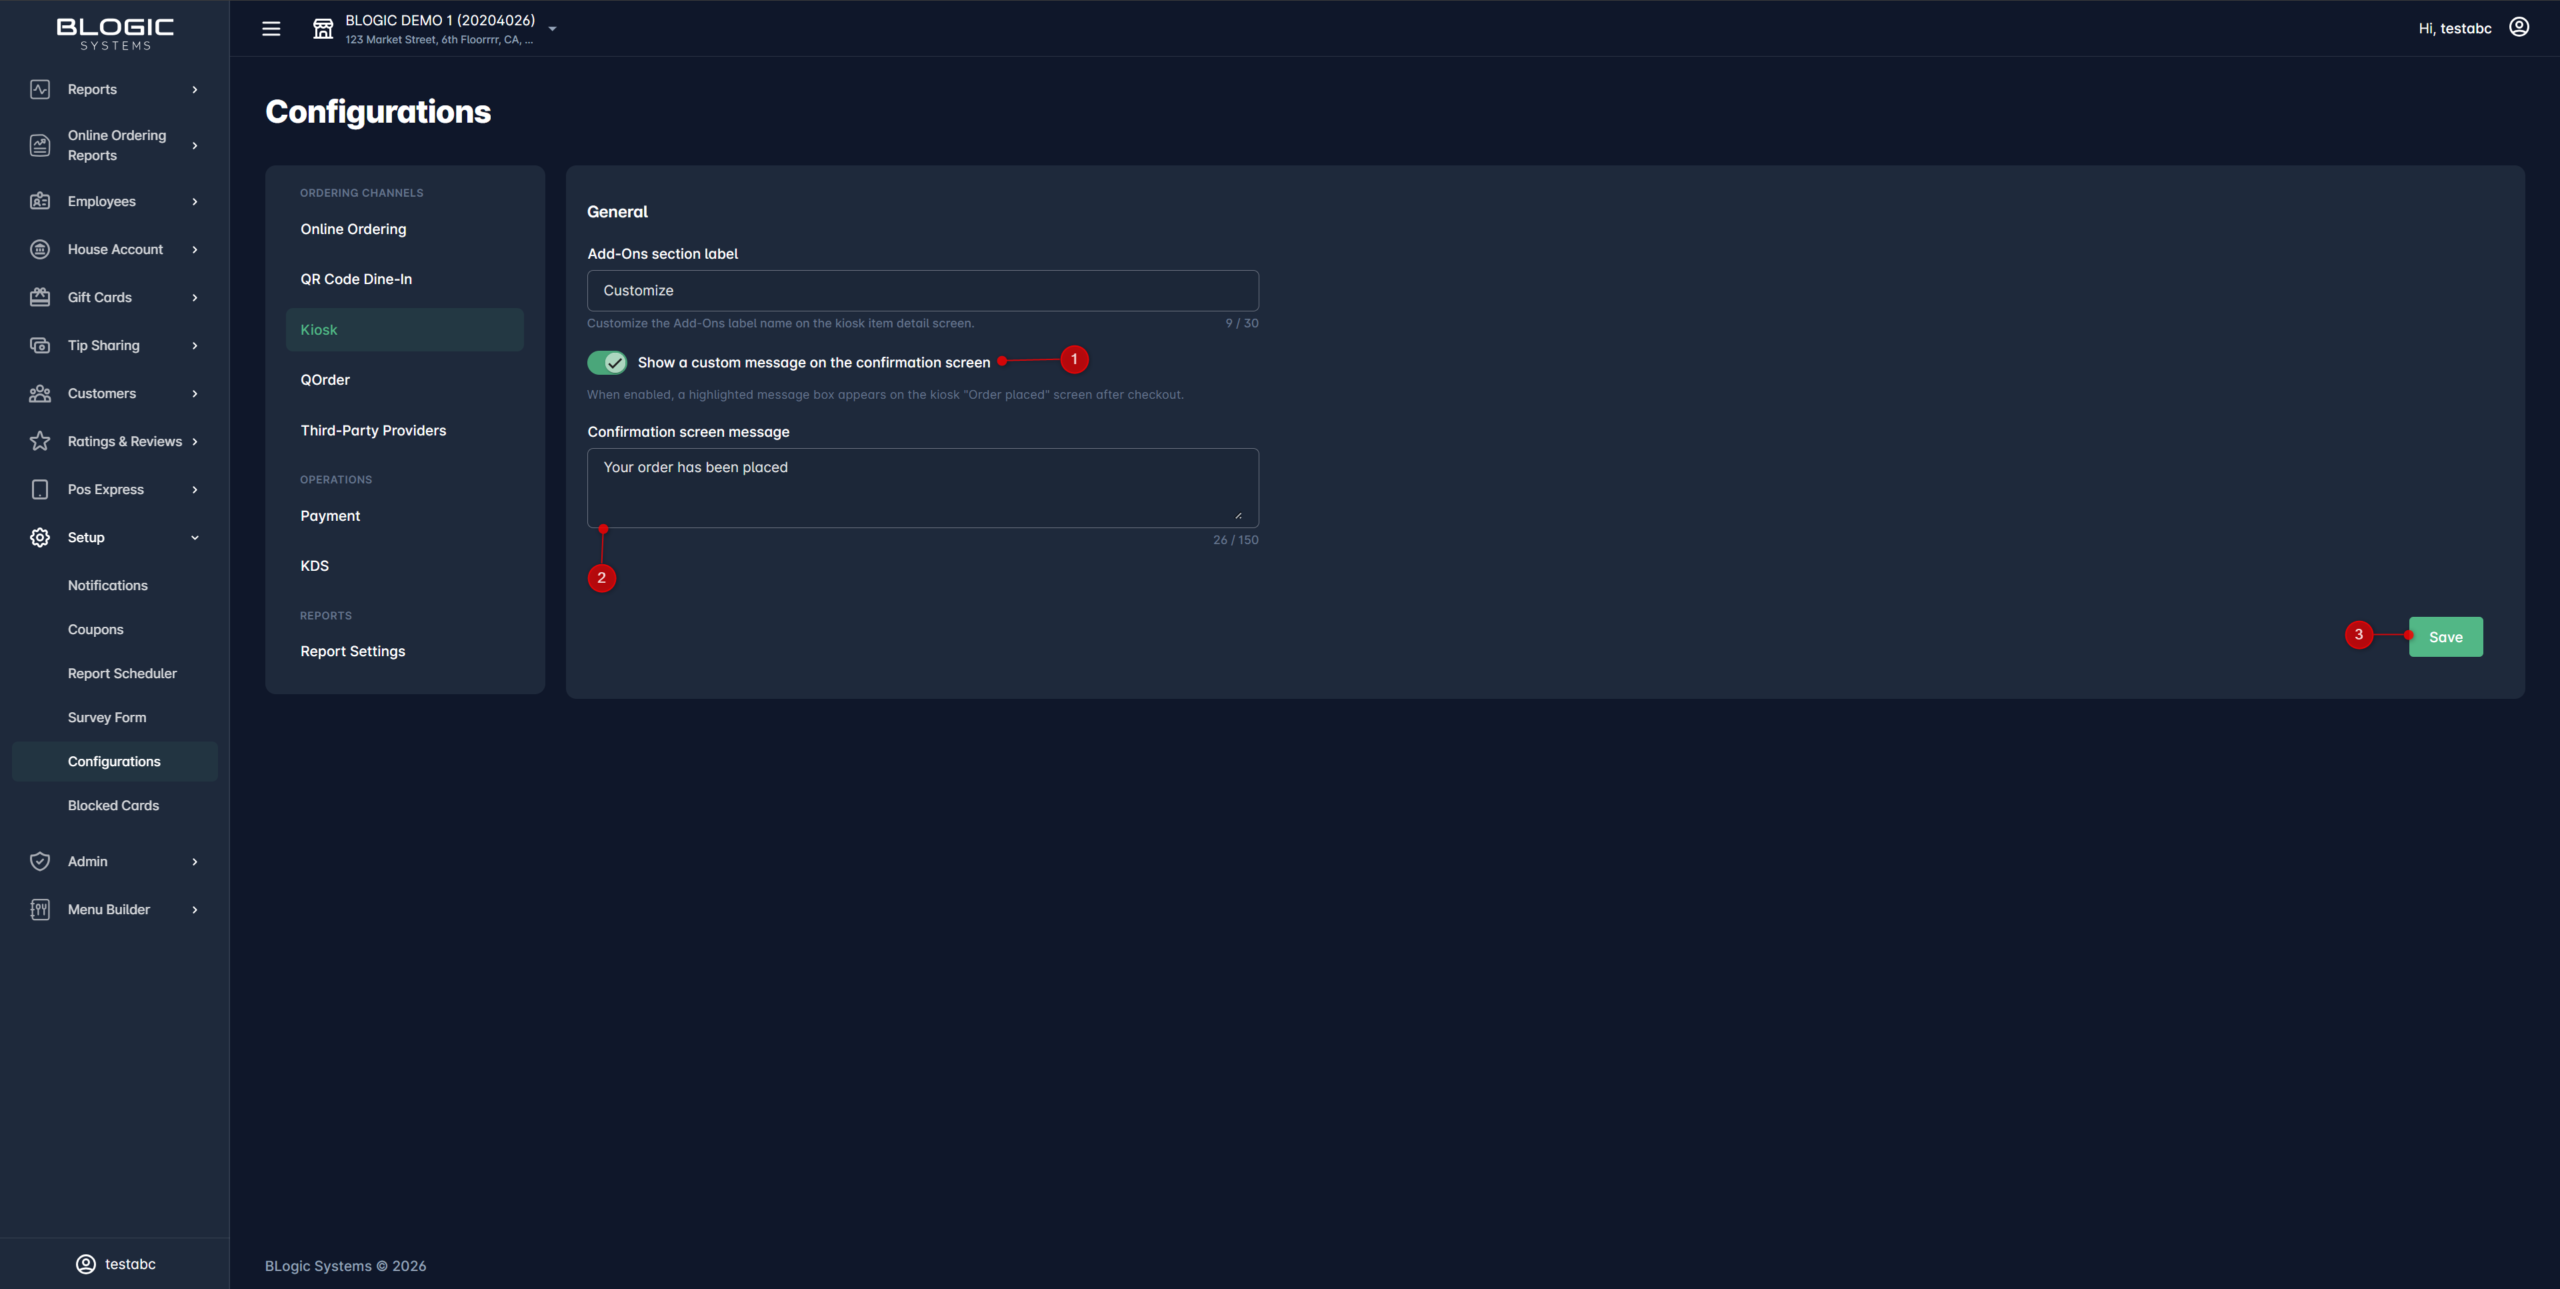
⚠️ Warning: When the toggle is on, the message is required. You must enter a message before you can save. If you turn the toggle off, the message box will not appear on the kiosk, and any text you saved is kept for next time.
ℹ️ Note: The message can be up to 150 characters.
Where to view the result on the kiosk
After you save, the changes appear on the kiosk for that store:
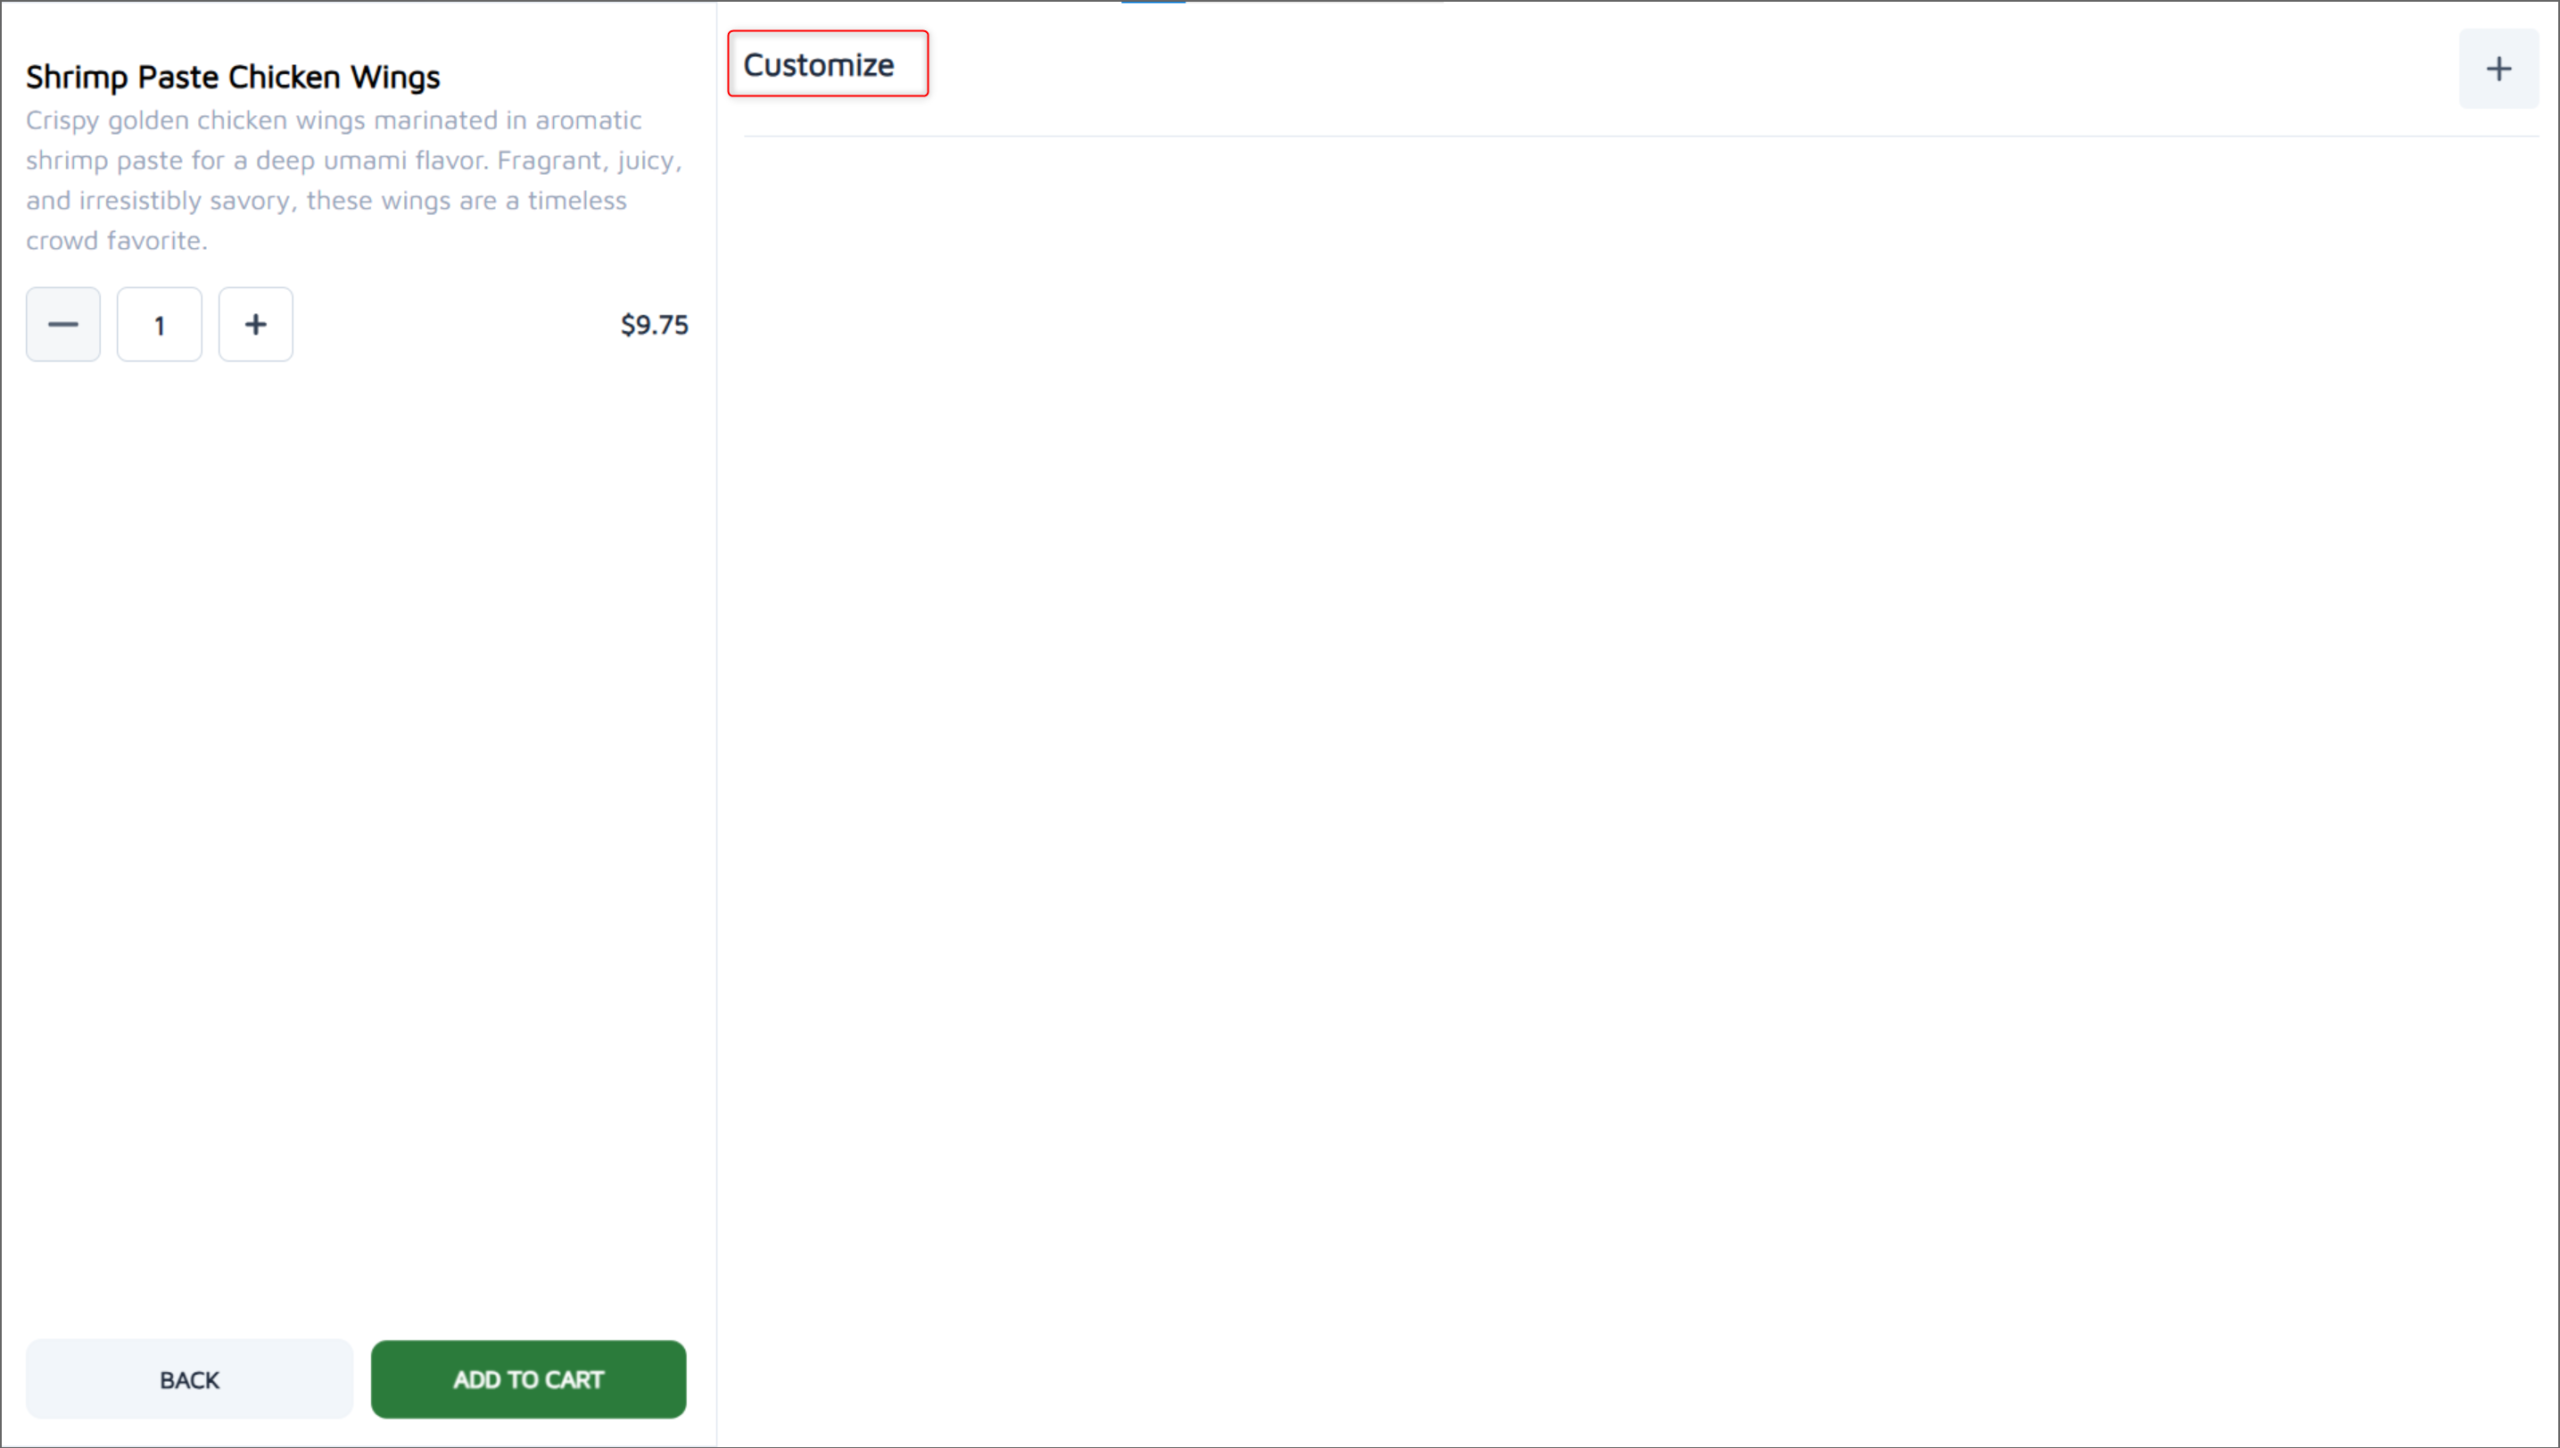
- Item detail screen: the heading above the modifiers shows your custom label (for example,
Customize) instead ofAdd-Ons.
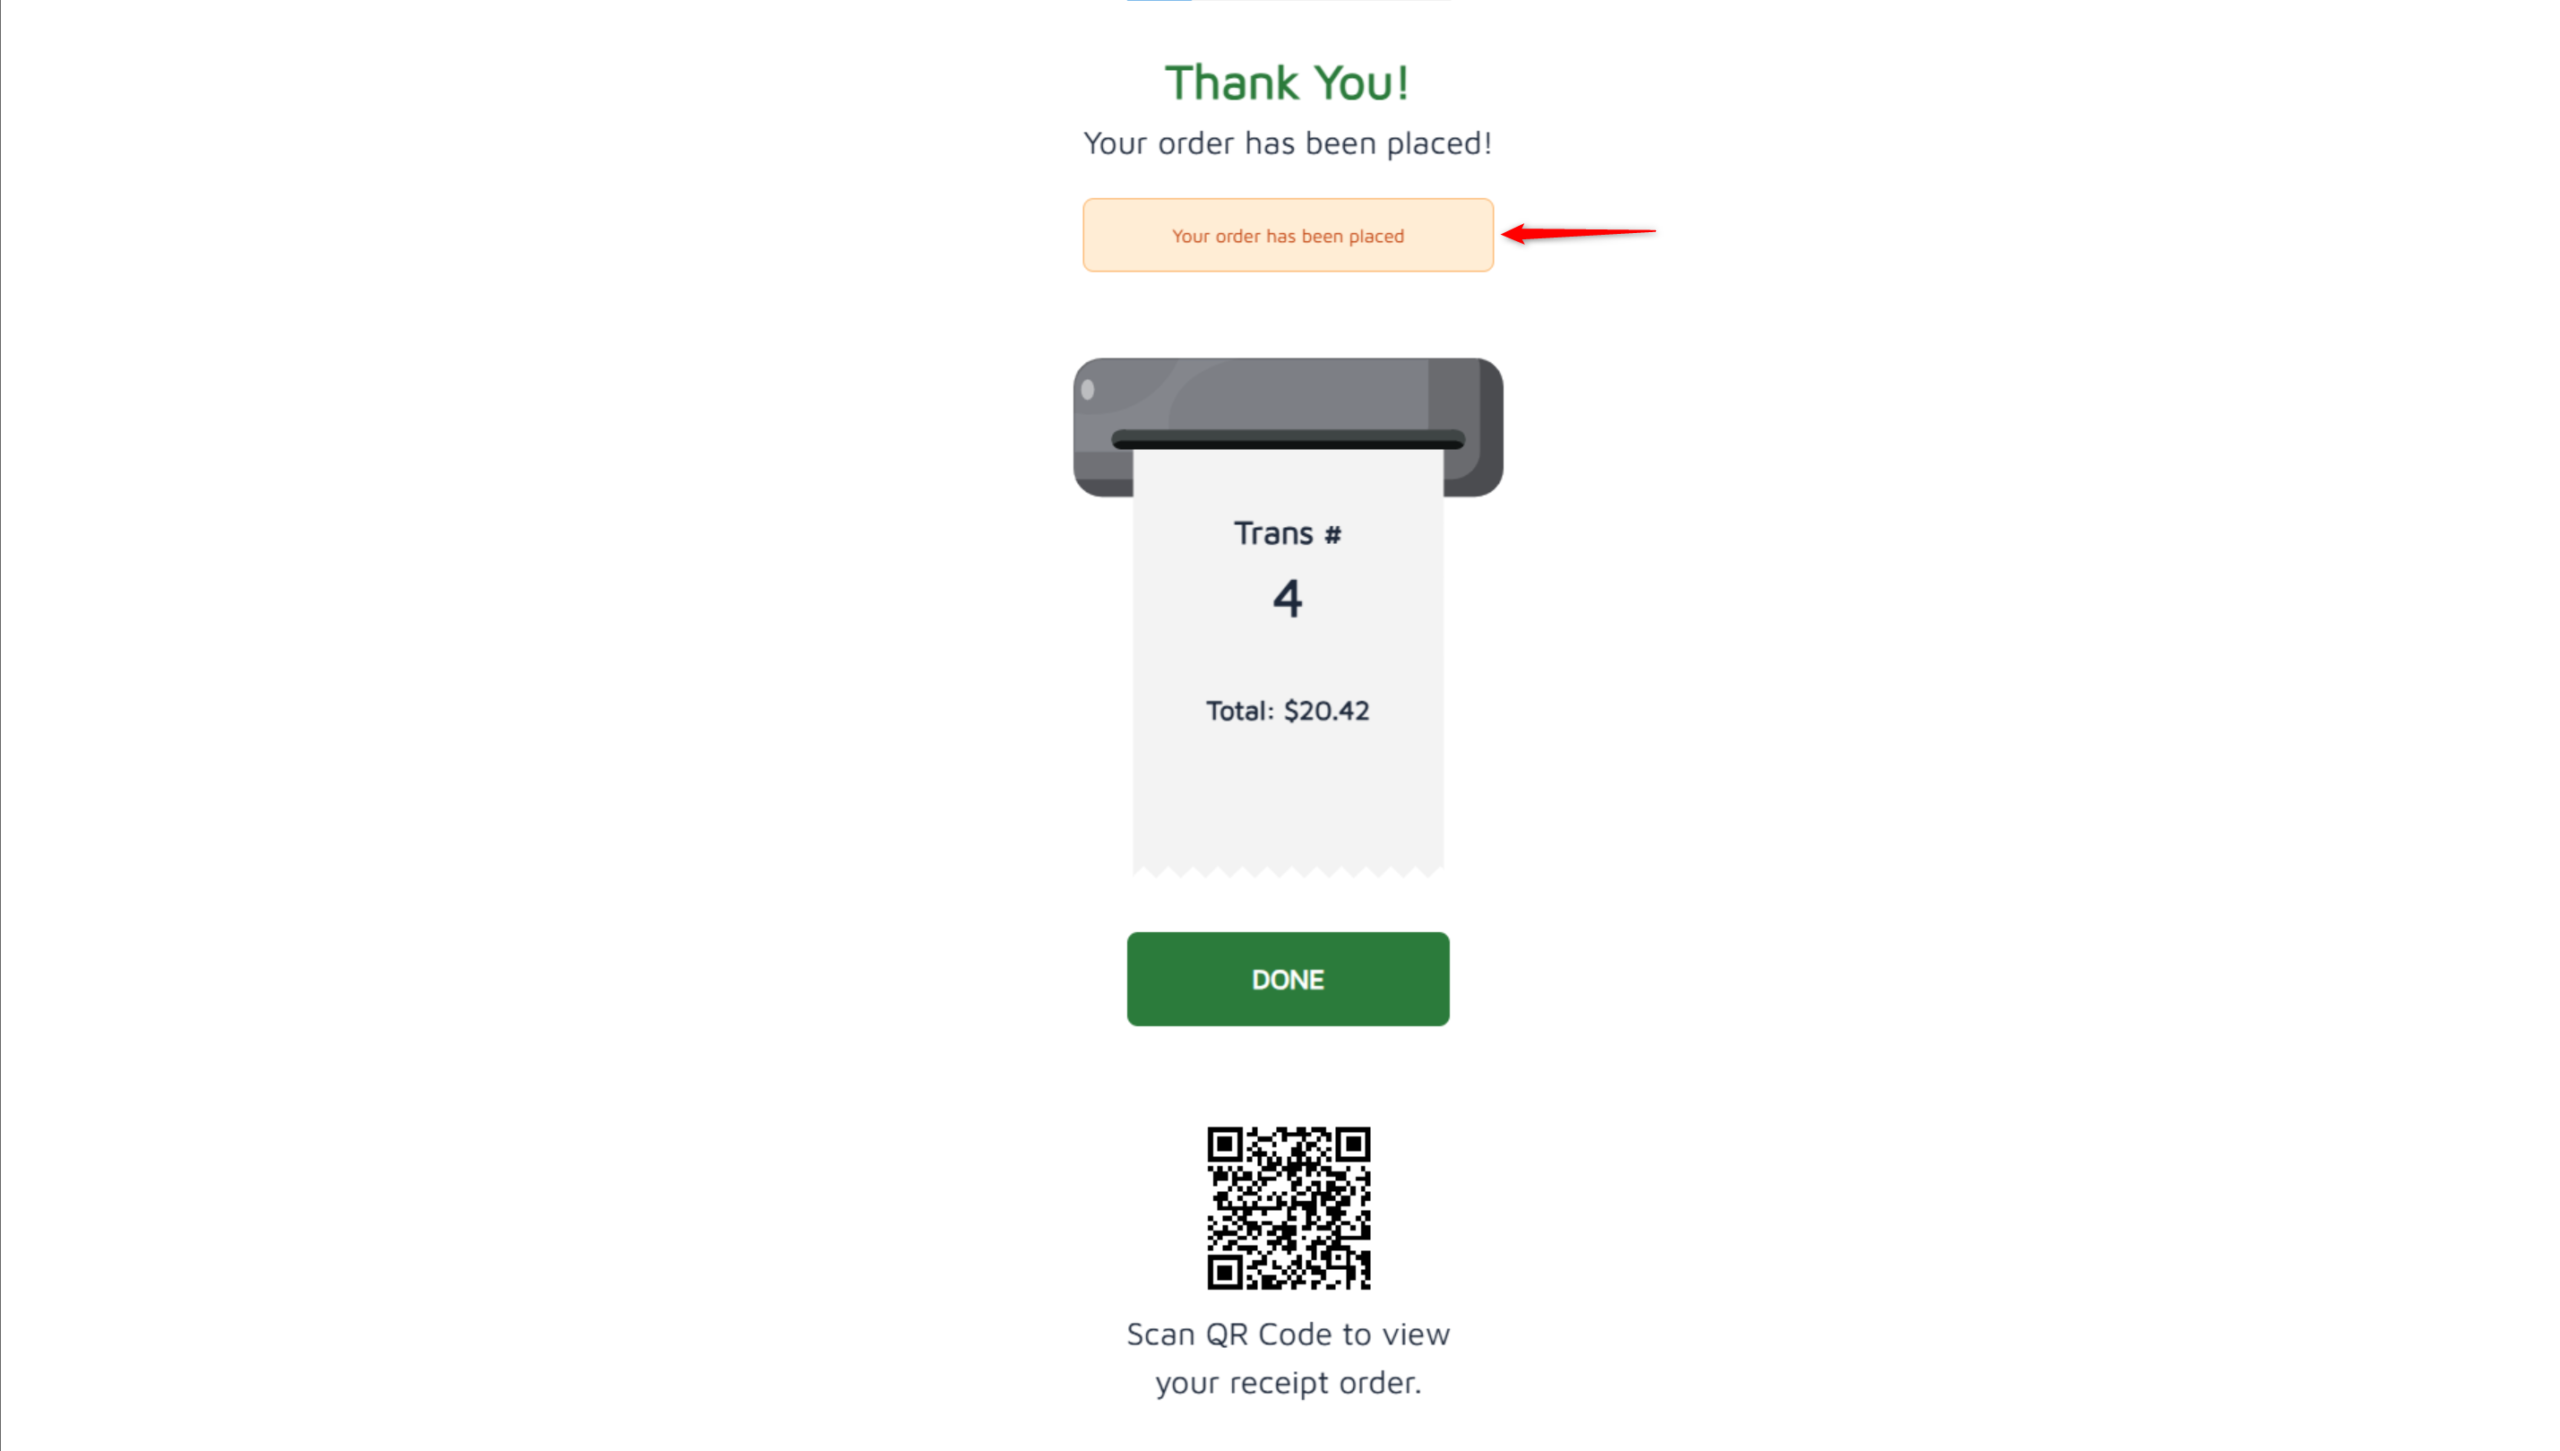
- Order placed screen: your custom message appears in a highlighted box after checkout, below the “Your order has been placed!” heading.
✅ Tip: These settings apply per store/location, so you can use different wording at each of your stores.
FAQ
1. Why can’t I see the Kiosk tab or these options? You may not be on a supported version, or your user role may not have permission to access this setting. Please contact Support if the option is not visible.
2. What happens if I leave the Add-Ons label blank? The label goes back to the default Add-Ons when you save. It will never be empty on the kiosk.
3. Why can’t I save the confirmation message? If the toggle is on, a message is required. Enter your message in the box, then click Save. If you do not want a message, turn the toggle off.
4. Will these changes affect my other stores? No. These settings are saved per store/location. Each store keeps its own label and message.
5. What should I do if the change does not appear on the kiosk? Confirm you saved the setting, check that your store is on a supported version, and make sure the kiosk has refreshed/reloaded. Contact Support if the issue continues.
Closing
If you still need help, please contact Support for further assistance.