ow to add a printer to your POS
| 1. Go to Desktop > Windows Icon on lower left > Settings |  |
| 2. Select “Devices“ |  |
| 3. Select Printers & Scanners on left hand and then “+ Add Printer or Scanner“ |  |
| 4. The program will scan. If the printer does not show up, select “The printer that I want isn’t listed” |  |
| 5. Select “Add a printer using a TCP/IP address or hostname.” Click Next. |  |
| 6. Under device type, select “TCP/IP Device.” Enter in your IP address under Hostname or IP address. Click Next. |  |
| 7. After the system scans, you may receive a window that states “Additional Port Information required.”Again, double check that The device is turned on.The network is connected.The device is properly configured.The address on the previous page is correct. Click Next. |  |
| 8. Select your printer from the list. Example: POSBANK > PB-A11P Miniprinter |  |
| 9. Select “Use the driver that is currently installed” |  |
| 10. Enter a printer name. Click Next. Example: Kitchen Printer 1 |  |
| 11. Select “Do not share this printer.” Click Next. |  |
| 12. Unselect “Set as the default Printer.” Click “Print a test page” to ensure printer has been successfully added. Select Finish. |  |
Refer to the video below for a detailed, step-by-step guide through the aforementioned process.
——————-
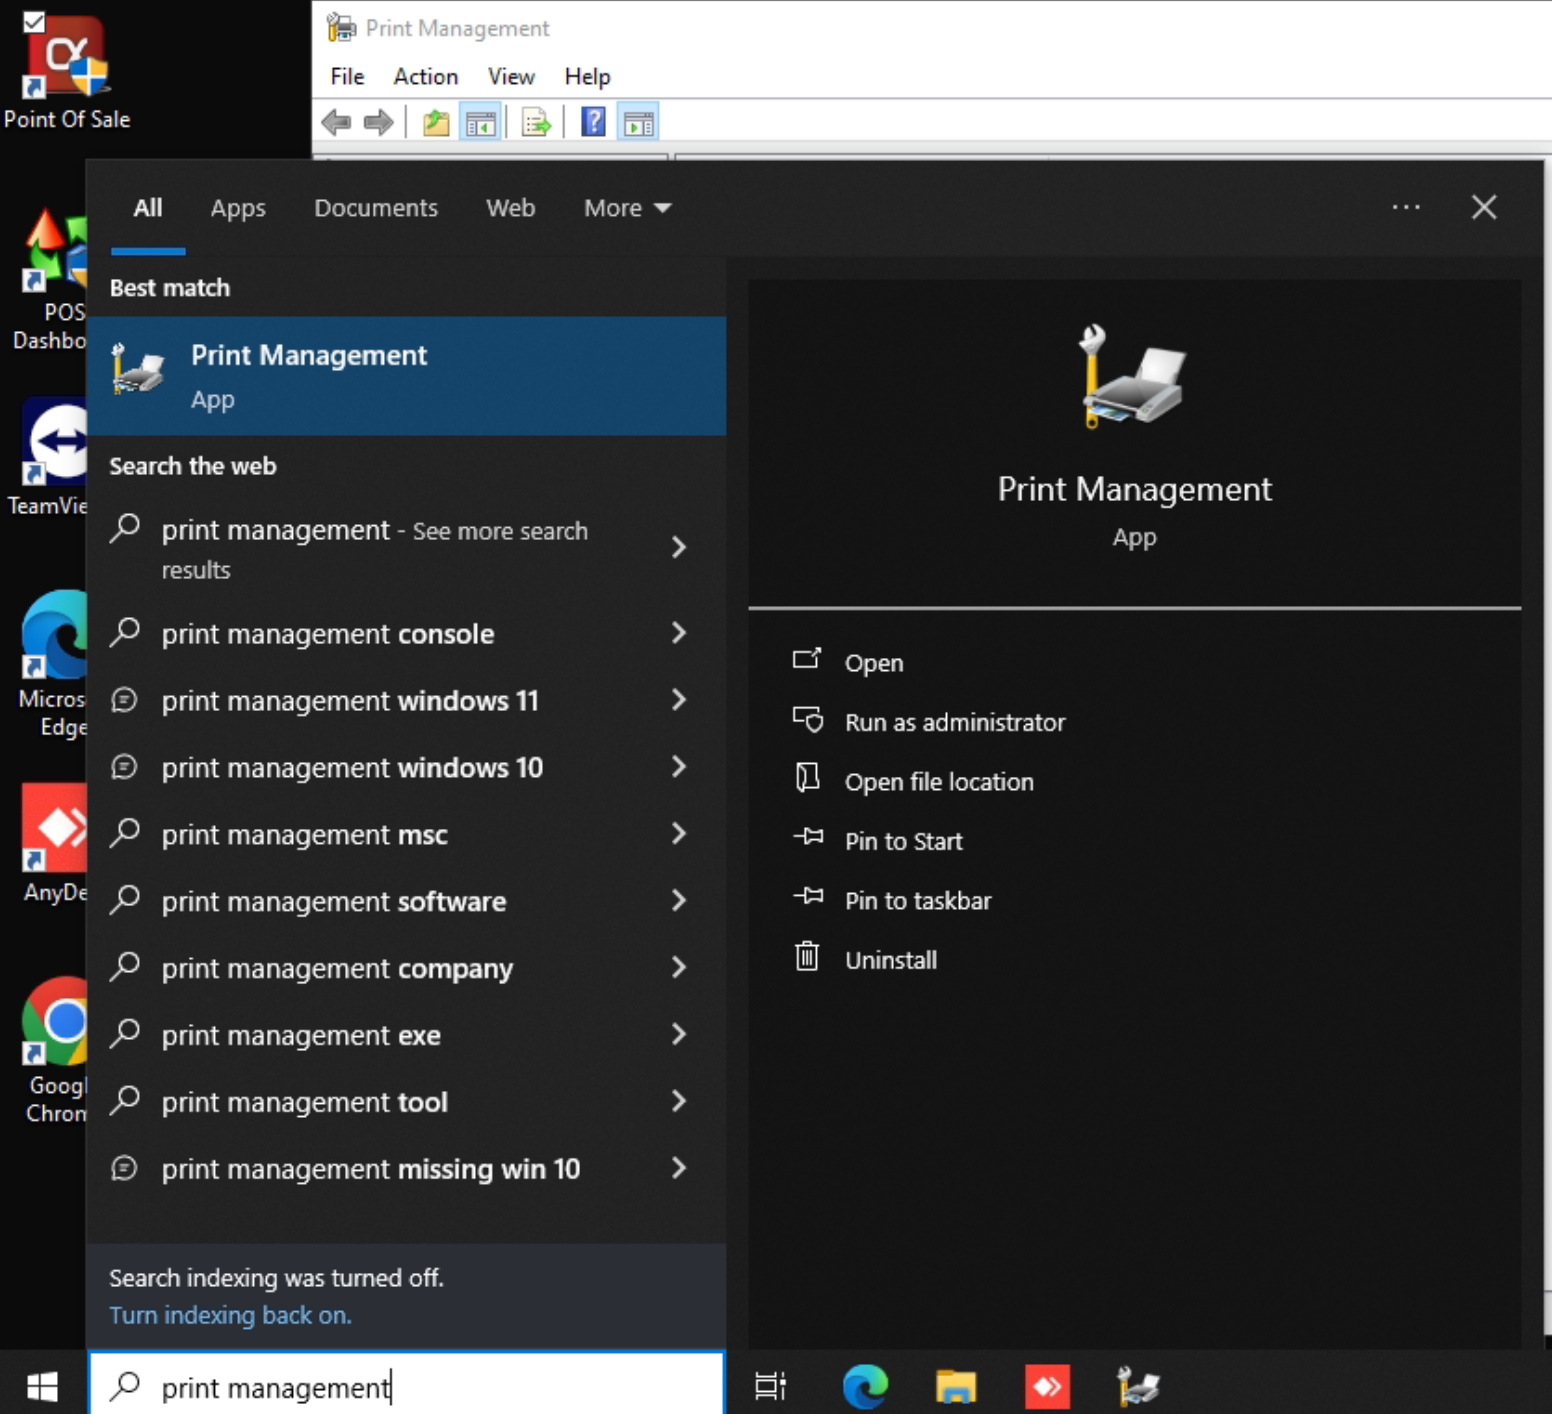
| 1. Open Print Management app Desktop > search for app |  |
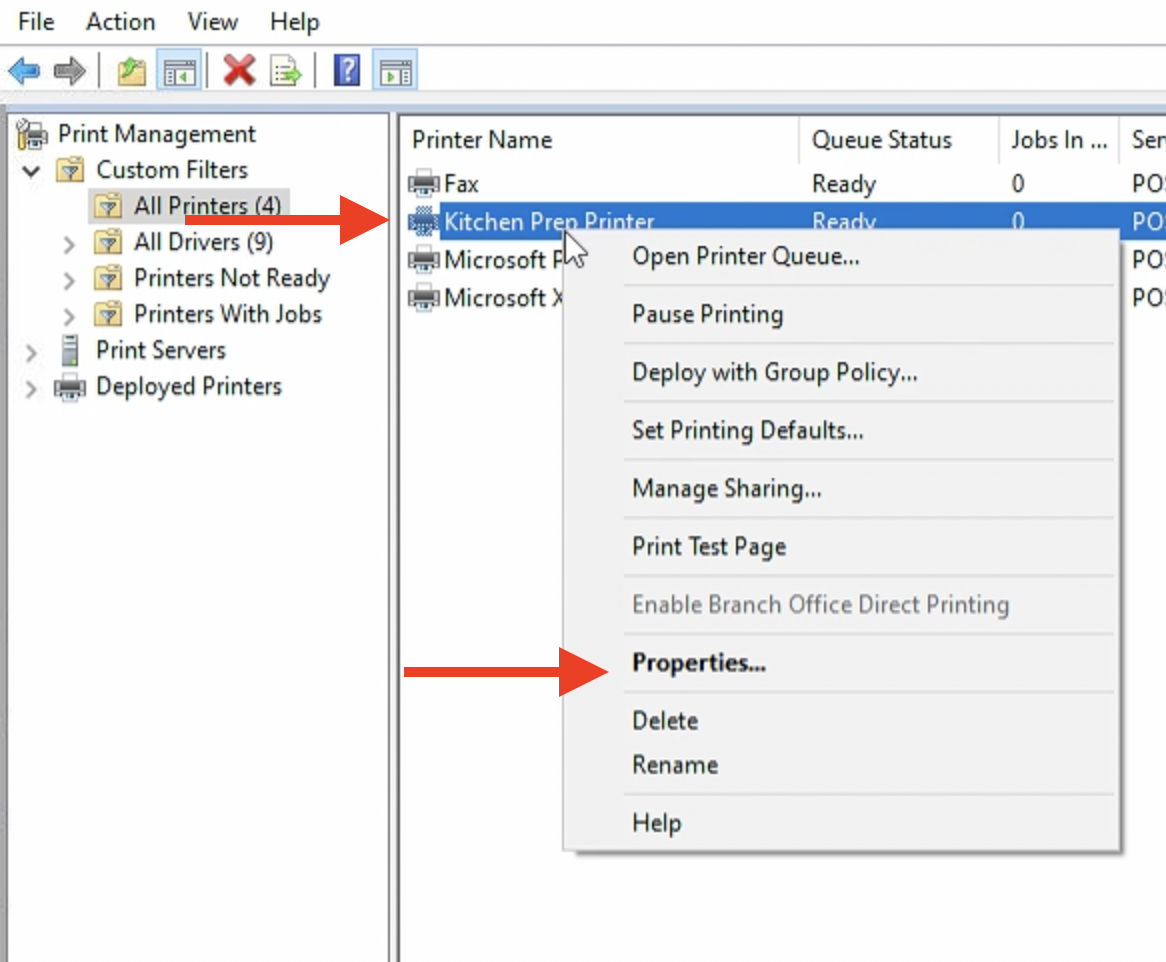
| 2. Select your printer > right click “Properties” |  |
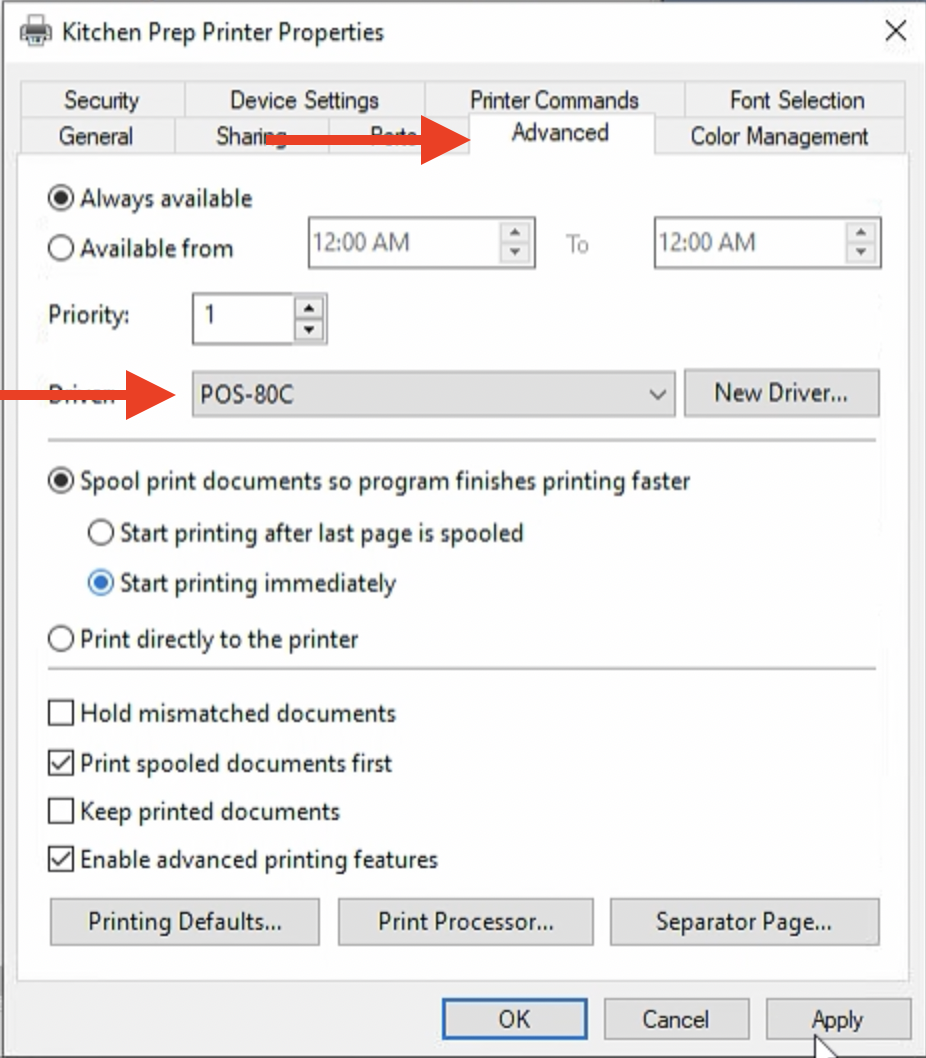
| 3. Select Advanced from upper toolbar > “POS-80C” from drop down menu > Select Apply. |  |