Step 1: Open the POS Dashboard
Log in to the POS Dashboard.
Step 2: Access Settings
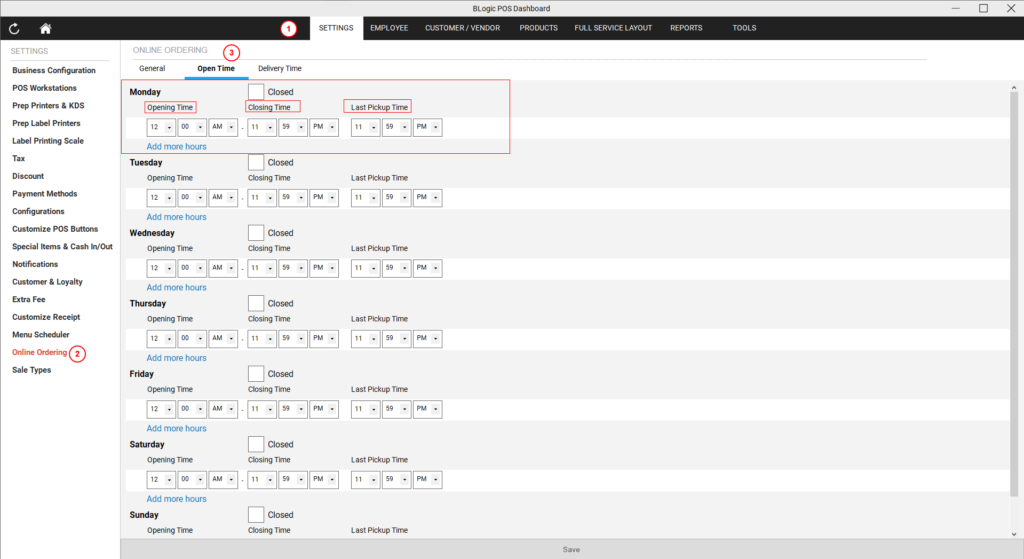
- Go to the Settings section.
- Select Online Ordering.

Step 3: Configure Open Time
- Navigate to the Open Time tab.
- You will see a list of days from Monday to Sunday.
Step 4: Set Store Hours
For each day, configure the following:
- Opening Time: The time your store opens for online orders.
- Closing Time: The time your store closes for online orders.
- Last Pickup Time: The latest time an order can be placed for pickup.
Step 5: Create Multiple Time Frames
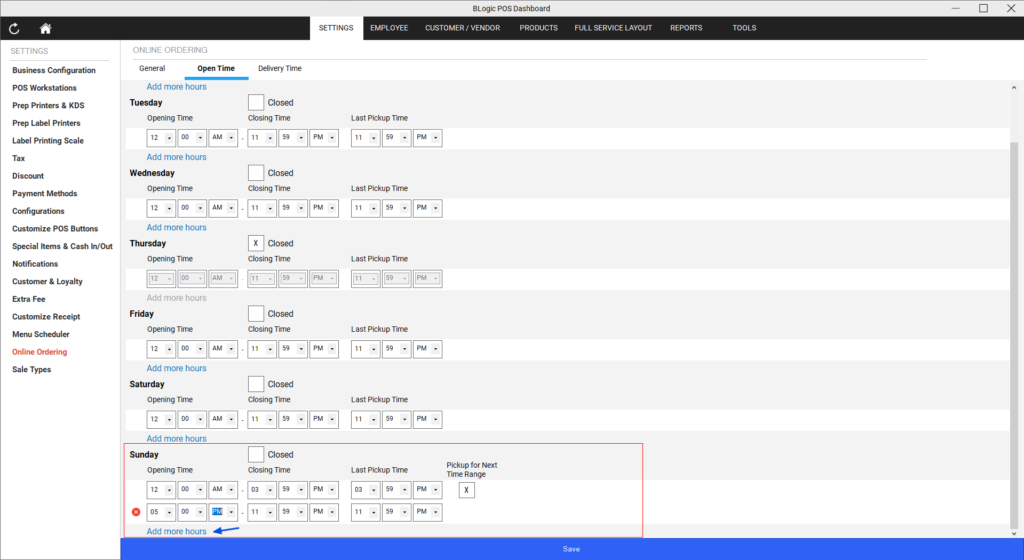
If your store operates with multiple time frames in a single day, you can create additional time slots.
- Select Add More Hours to create extra time frames within the same day.
- Ensure that the time frames do not overlap to avoid conflicts.
💡 There is an option called Pickup for Next Time Range. When this option is checked, even if the store is still open, customers will be able to see and select pickup times from the next available time range.

Step 6: Set Closed Days
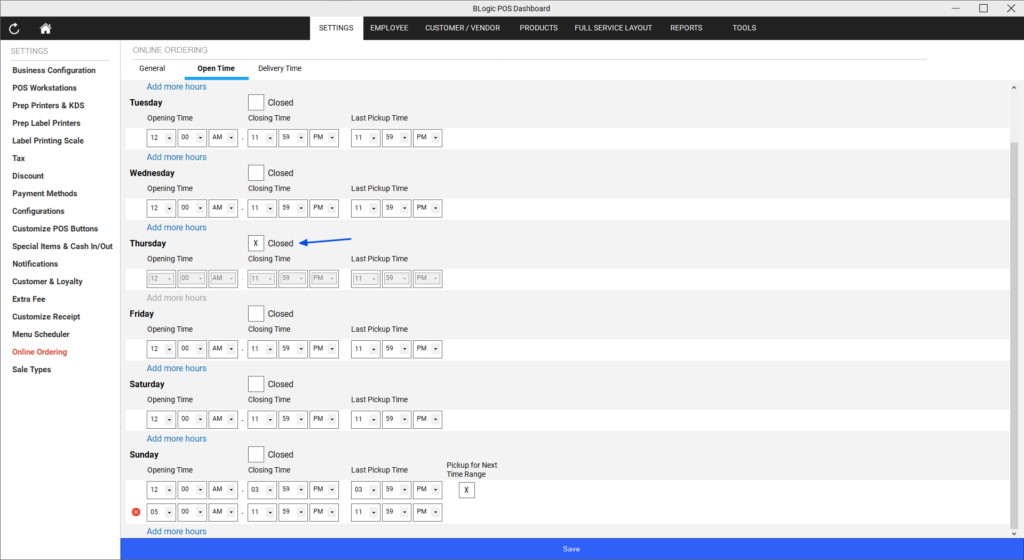
You can mark specific days of the week as Closed if your store is not operating on those days.

Step 7: Save Changes
After setting the hours, click Save to confirm your changes.
