Steps to Partial Refund an Item on a Ticket
1. Open the Point of Sale (POS) System
Launch your POS system and ensure you’re logged in with the appropriate permissions.
2. Access Paid Tickets
- Click on the Paid Tickets button.
- A list of all paid tickets will be displayed.
3. Select the Ticket to Refund
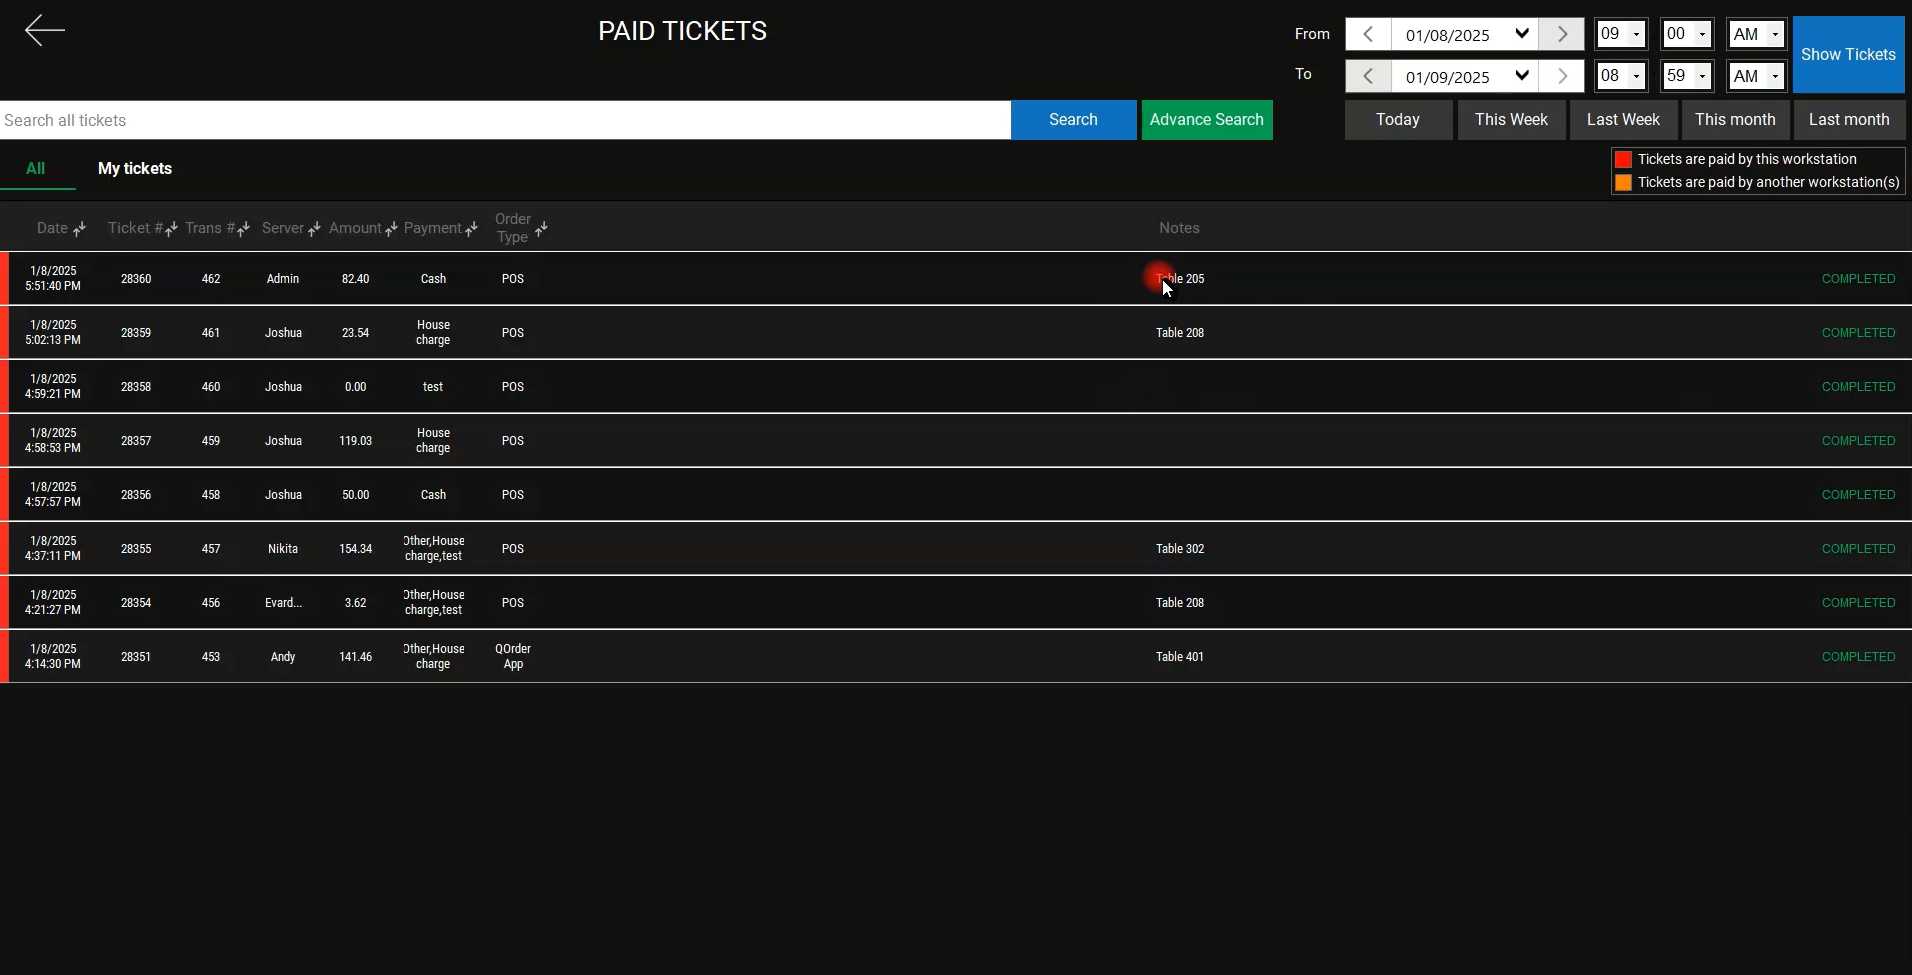
- Locate the ticket needing a partial refund.
- Click on the ticket row to open it.
4. Initiate Refund Process
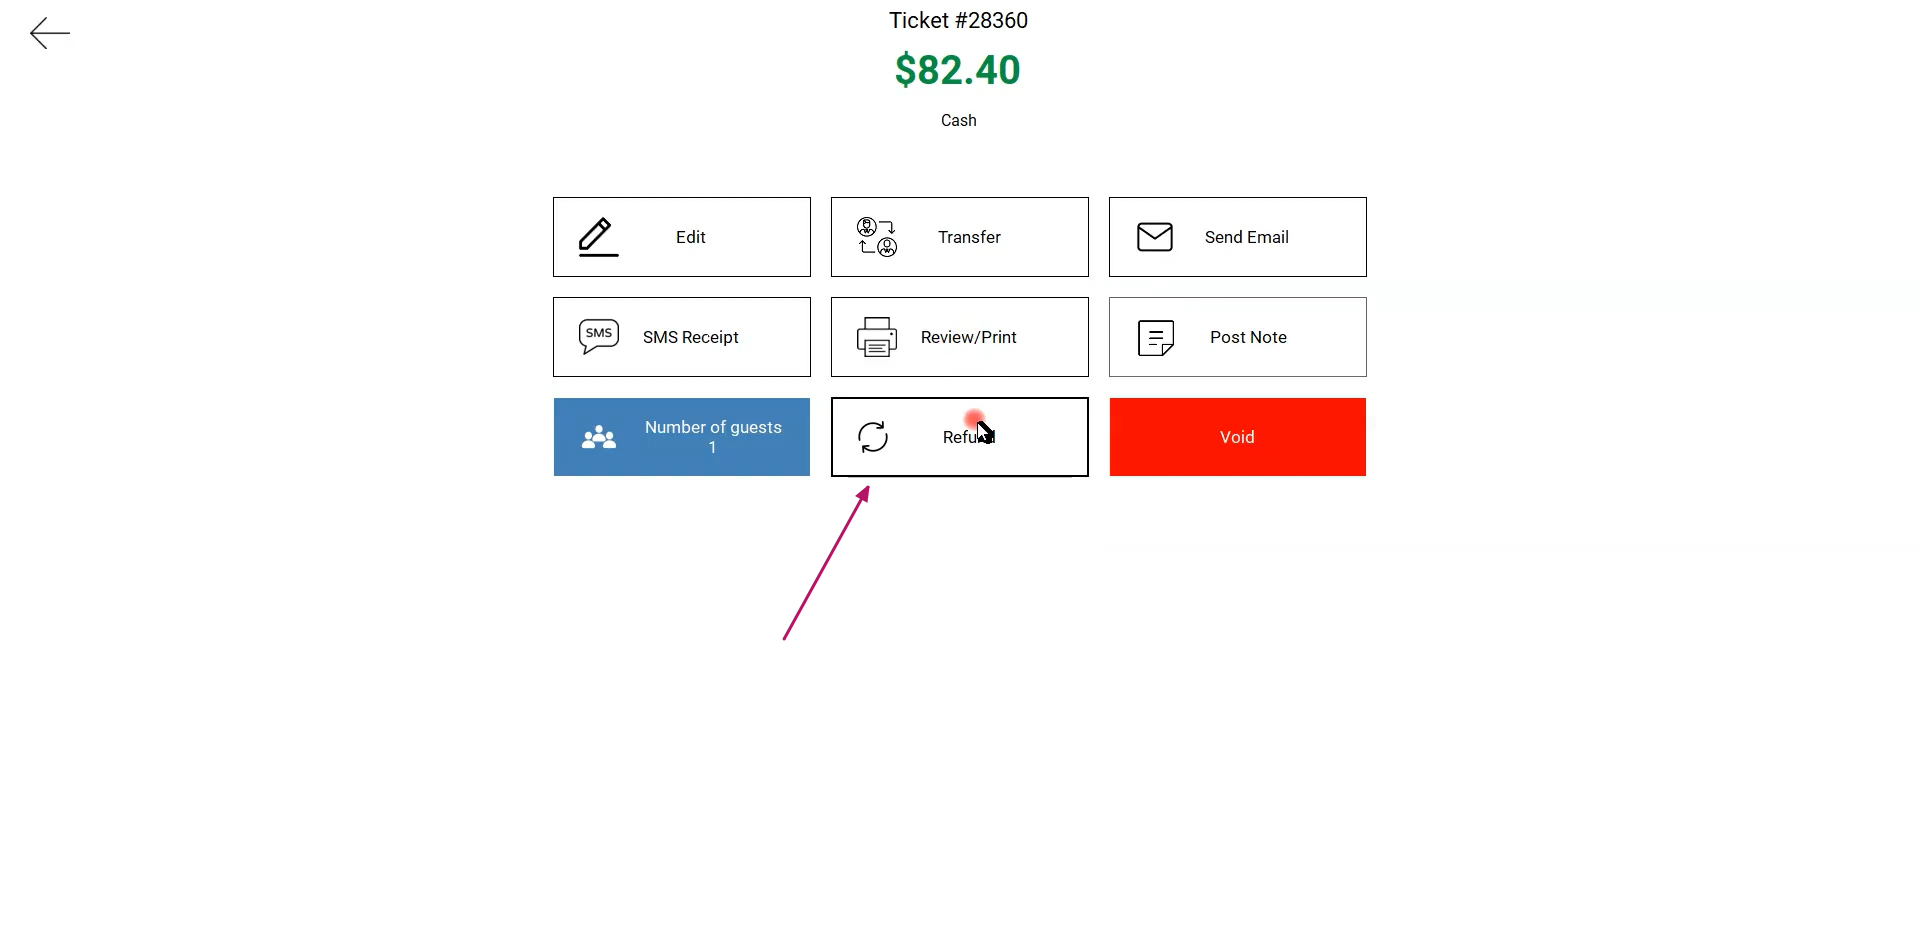
- Once the ticket details are displayed, look for the Refund button.
- Click the Refund button to proceed.
5. Refund Screen Overview
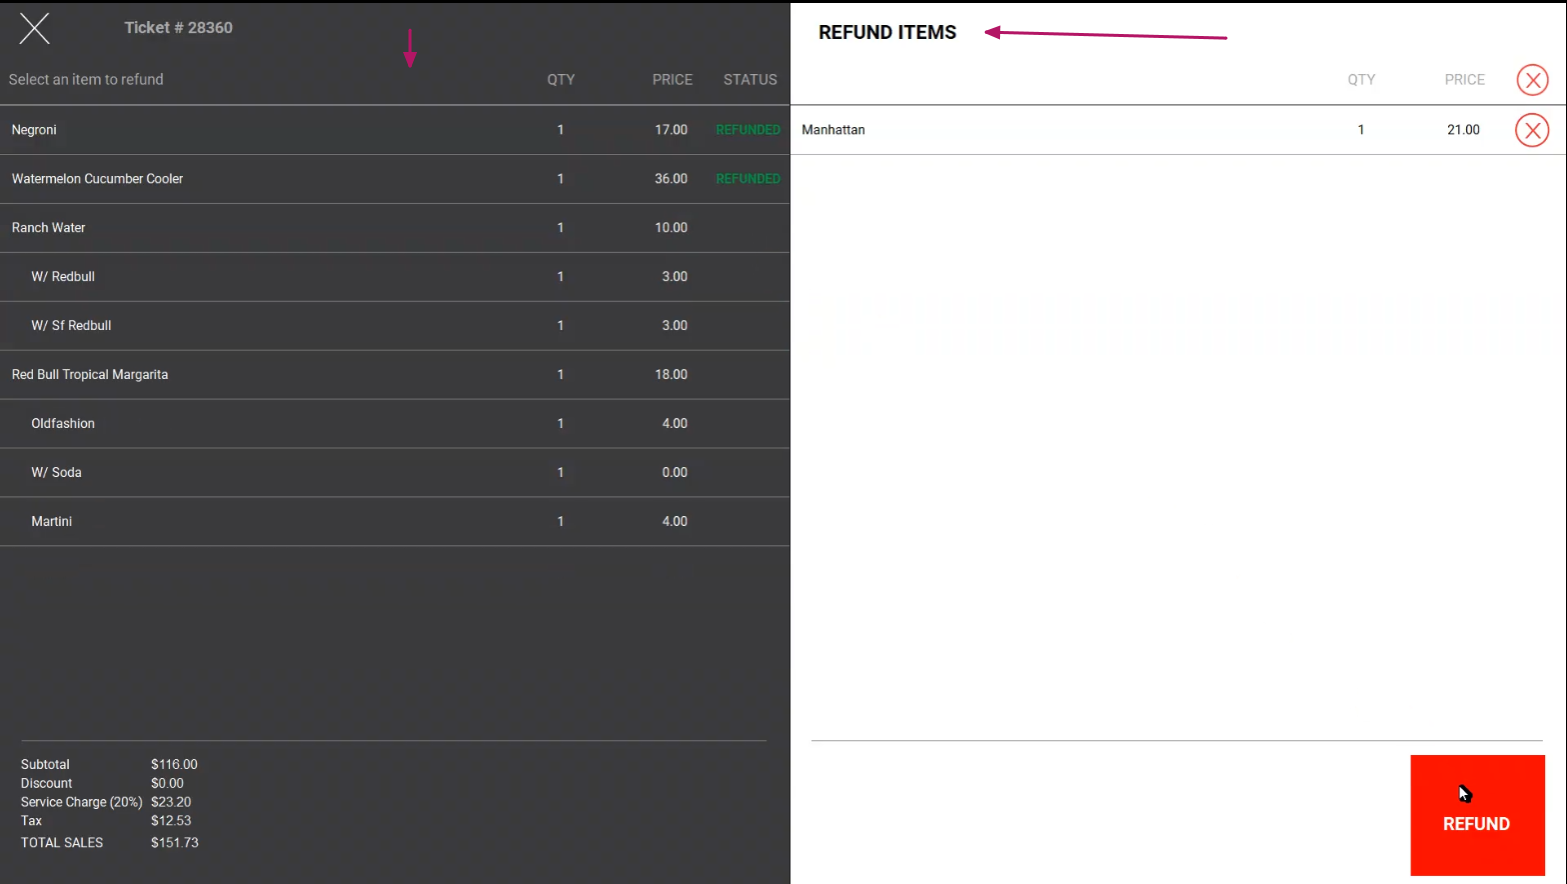
- The refund screen will display all items from the selected ticket.
- Left Section: Lists all items with the following columns:
- Item Name: Name of the item.
- QTY: Quantity of the item.
- Price: Price of the item.
- Status: Indicates if the item has already been refunded (Empty = Not refunded, Refunded = Already refunded).
- Right Section: Displays items chosen for a refund under Refund Items along with their QTY and Price.
6. Choose Items to Refund
- Select the items you wish to refund (only items without the status Refunded).
- Selected items will automatically appear in the right section under Refund Items.
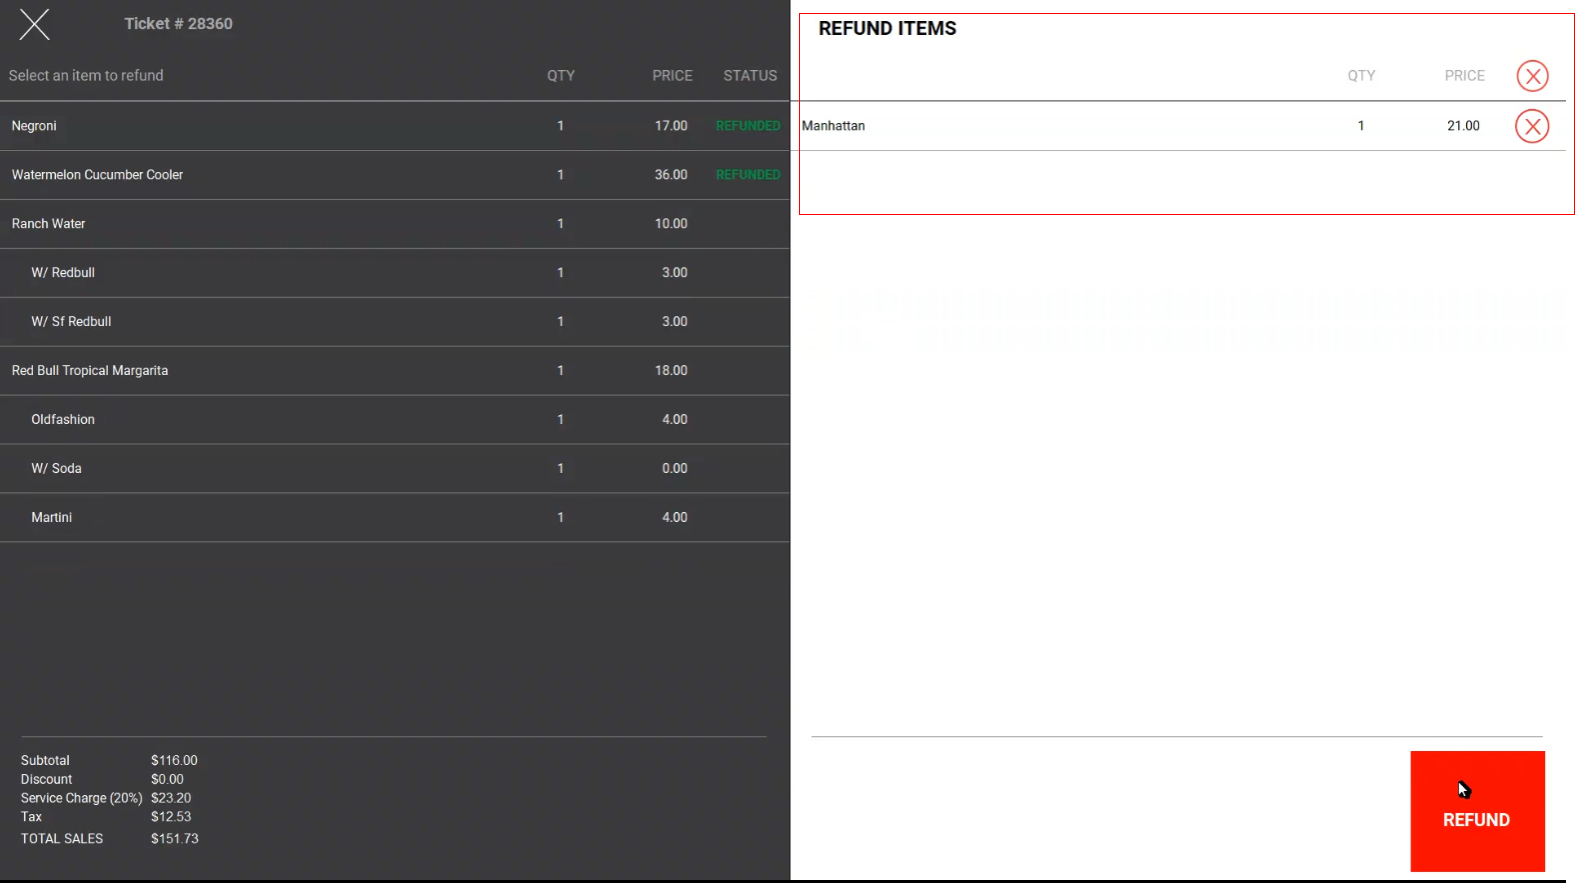
7. Review and Confirm Refund
- Once items are selected, review them in the Refund Items section.
- Click the Refund Button (red button).
8. Confirm Refund Details
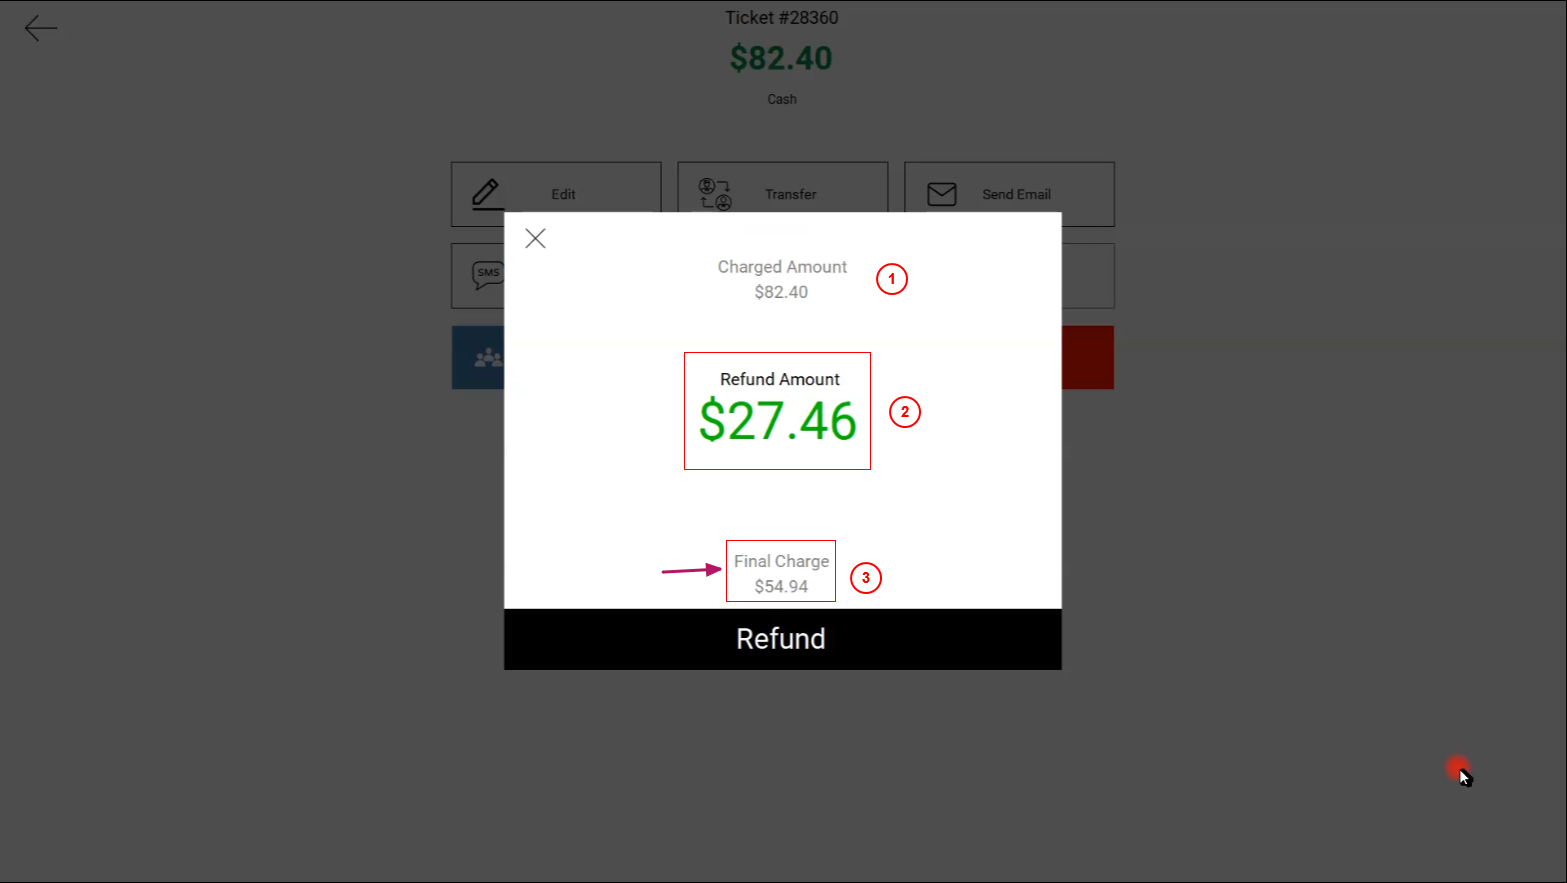
- A confirmation dialog will appear with the following details:
- Charged Amount: The total amount charged for the ticket.
- Refund Amount: The amount being refunded for the selected items.
- Final Charge: The remaining amount after the refund.
- Click the Refund button (black button) to complete the partial refund process.
9. Finalize and Review Updated Ticket
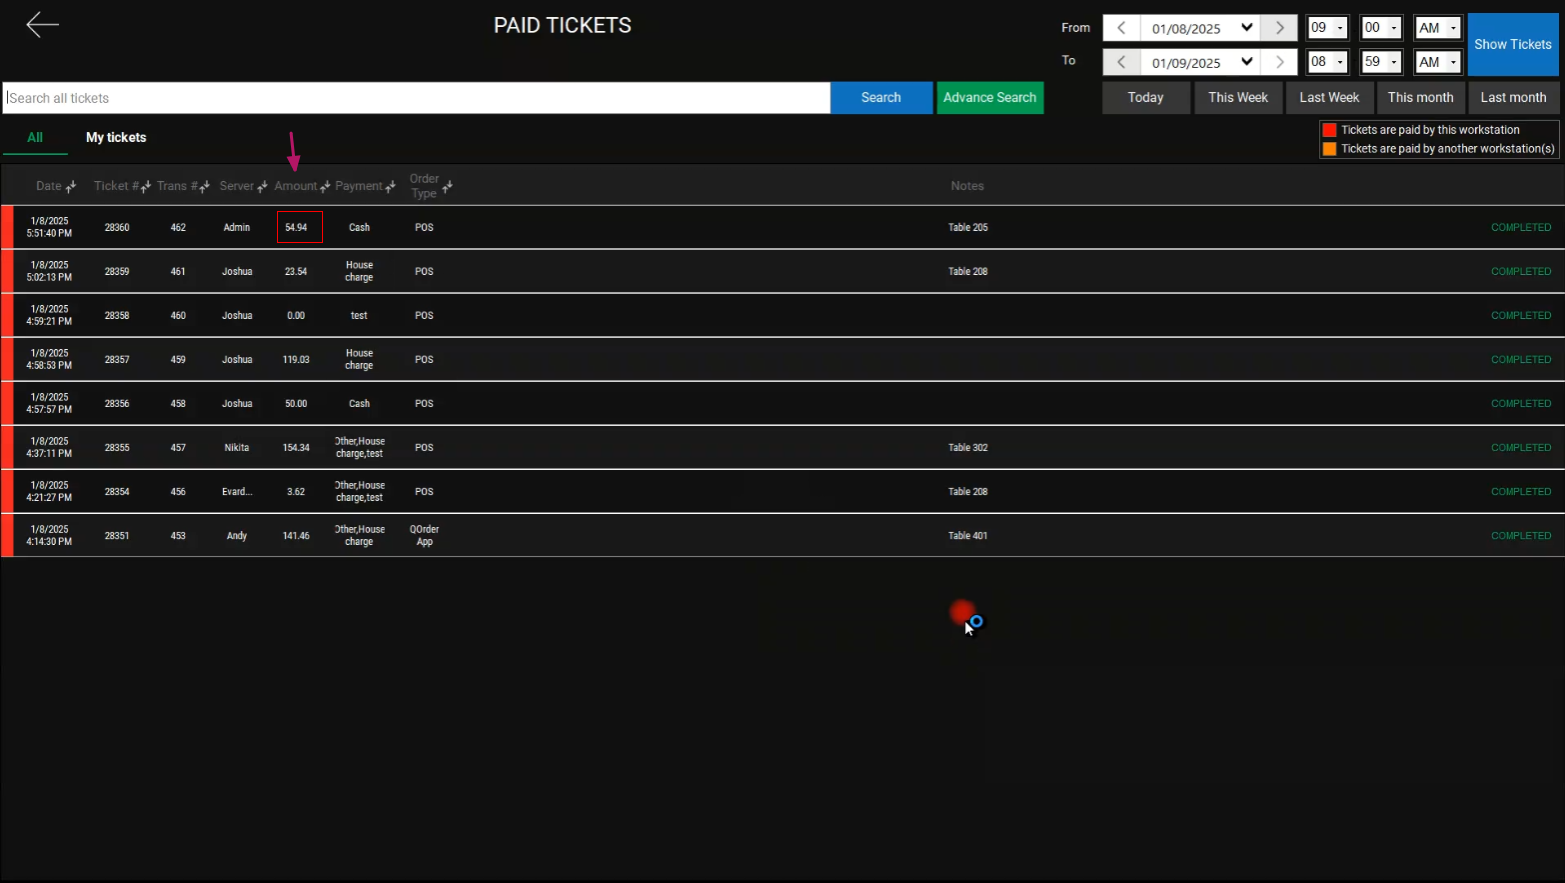
- Once the refund is completed, the system will navigate back to the Paid Tickets screen.
- The Amount column for the refunded ticket will be updated to reflect the new total.
10. Review Updated Ticket
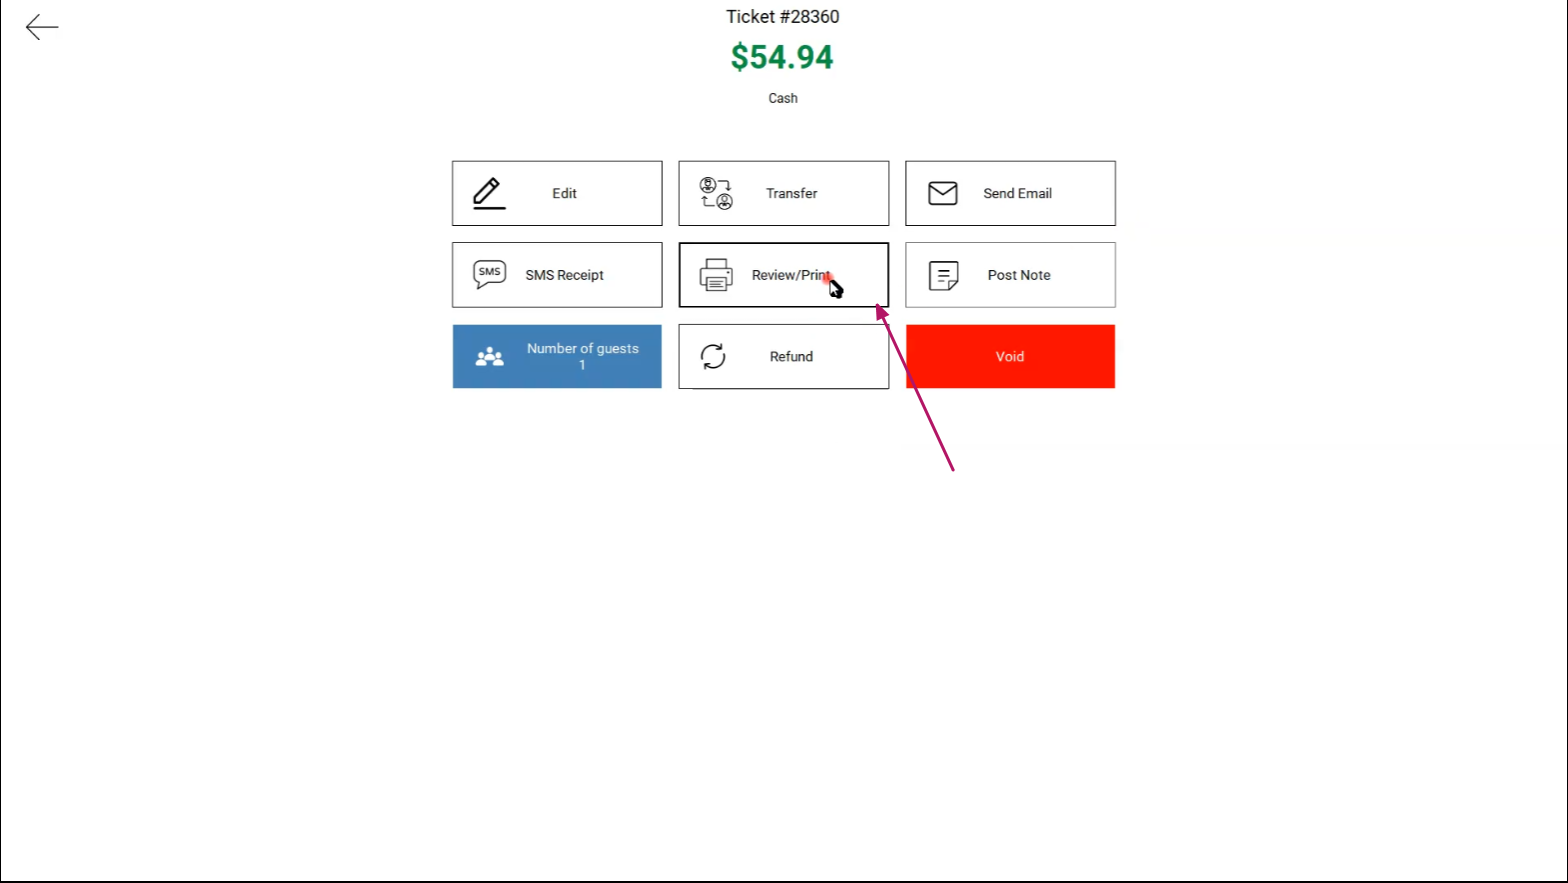

- Select the refunded ticket again from the Paid Tickets list.
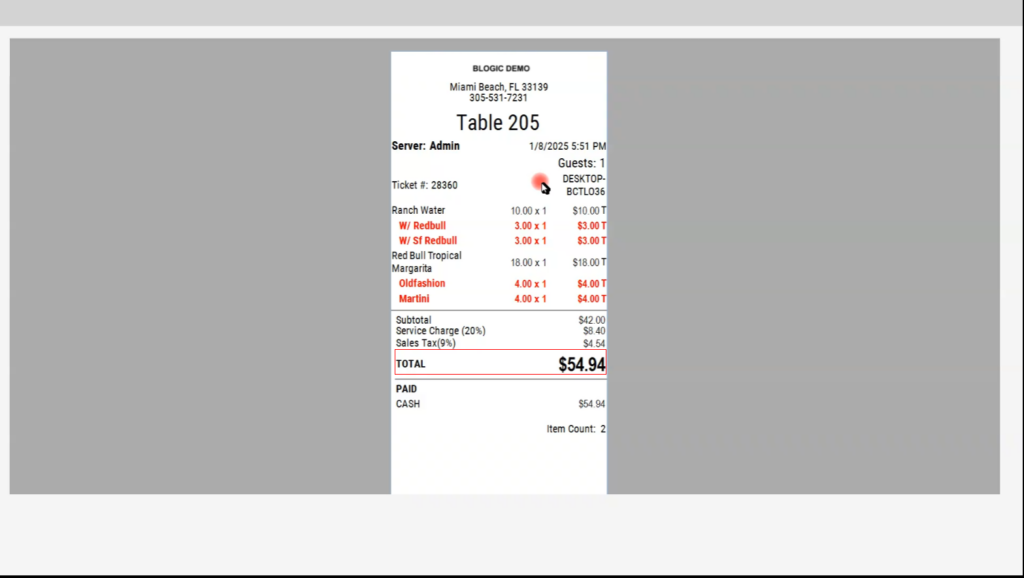
- Click Review/Print to view the updated ticket.
- Items refunded will no longer appear in the ticket.
Additional Notes
- Once an item is refunded, its Status will change to Refunded on the left section of the refund screen.
- Refunded items cannot be selected again for another refund.
By following these steps, you can efficiently process partial refunds for specific items on a paid ticket.