Introduction
The BLogic Wait & Order App is designed to enhance restaurant service efficiency by managing waitlists, assigning tables, and tracking table activities seamlessly. With the Dynamic QR Code feature, customers can scan a static QR code to join the waitlist and interact with a dynamic QR code once assigned to a table, streamlining the ordering and pre-ordering process.
How to Use
Step 1: Setting Up the BLogic Wait & Order App
1. Download the App
- Install the BLogic Wait & Order app from your device’s app store.
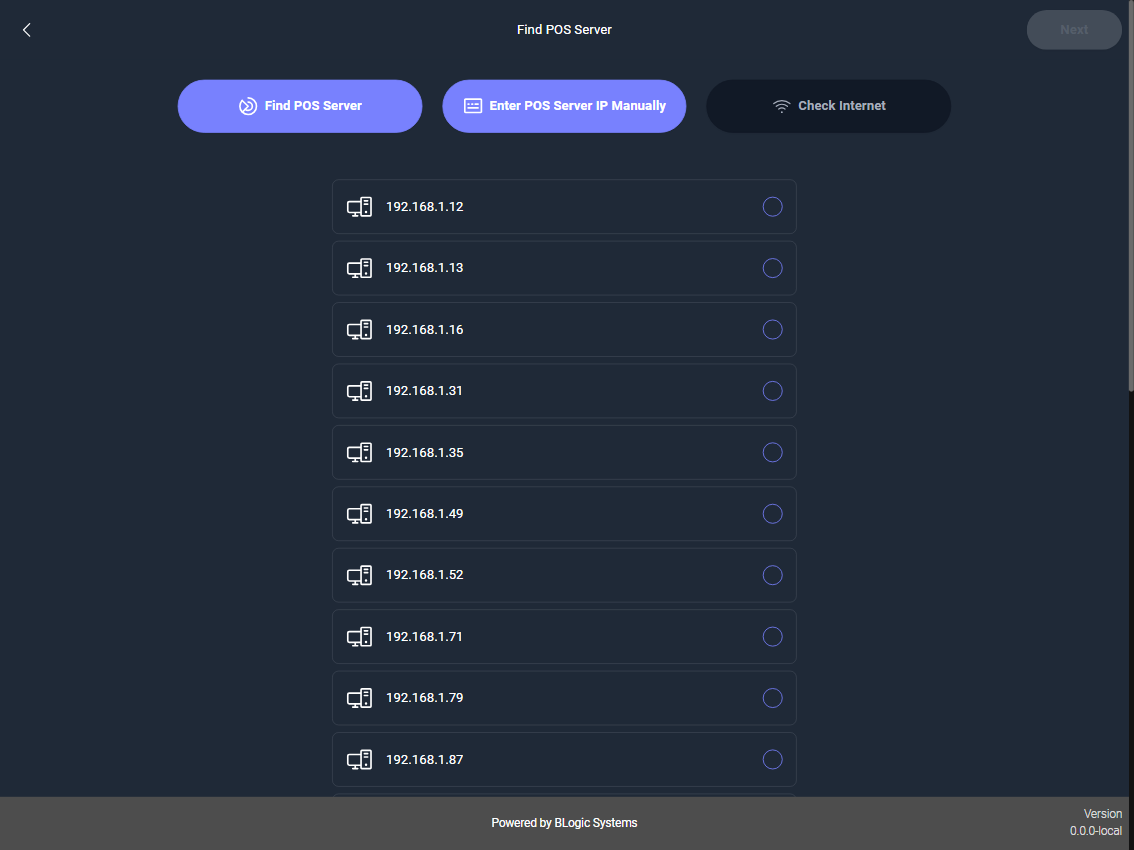
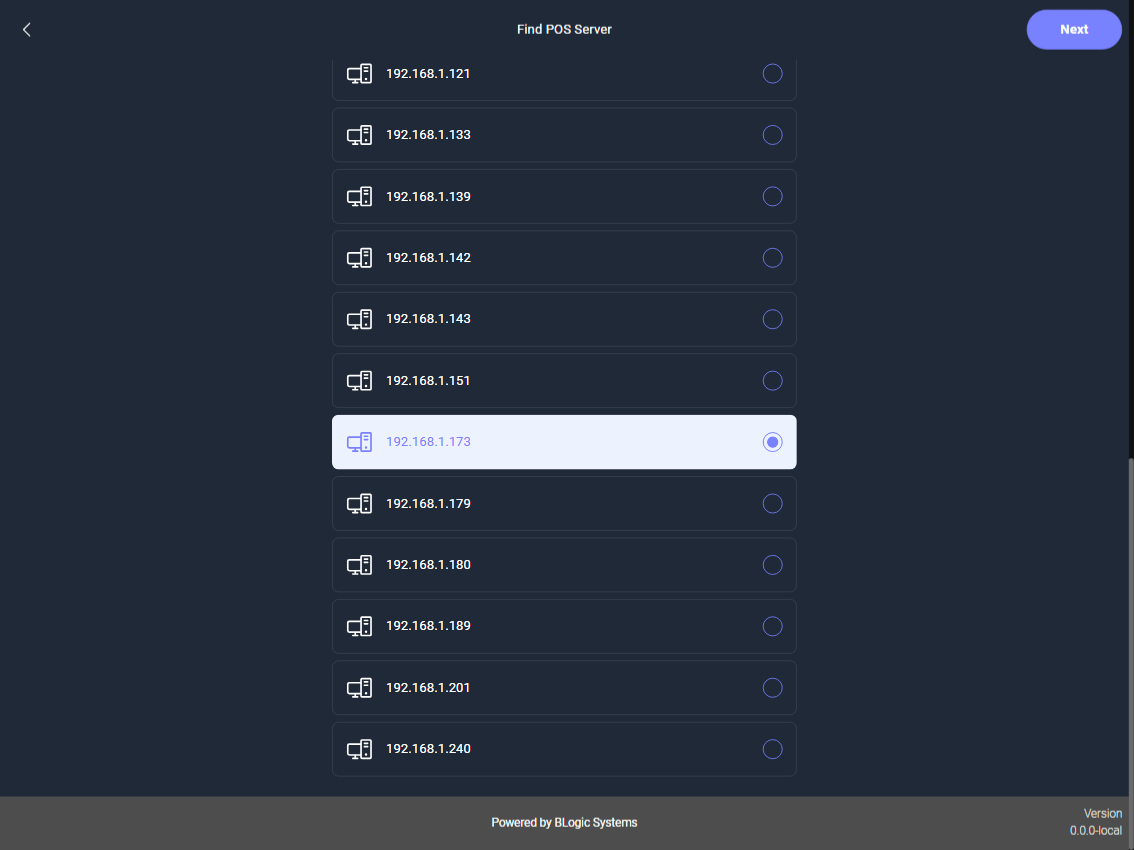
2. Configure the Server
- On the first setup, choose a server:
- Find POS Server: Automatically locate the server in the store.
- Enter POS Server IP Manually: Input the server’s IP address manually.
- Press “Next” to navigate to the waitlist management screen.
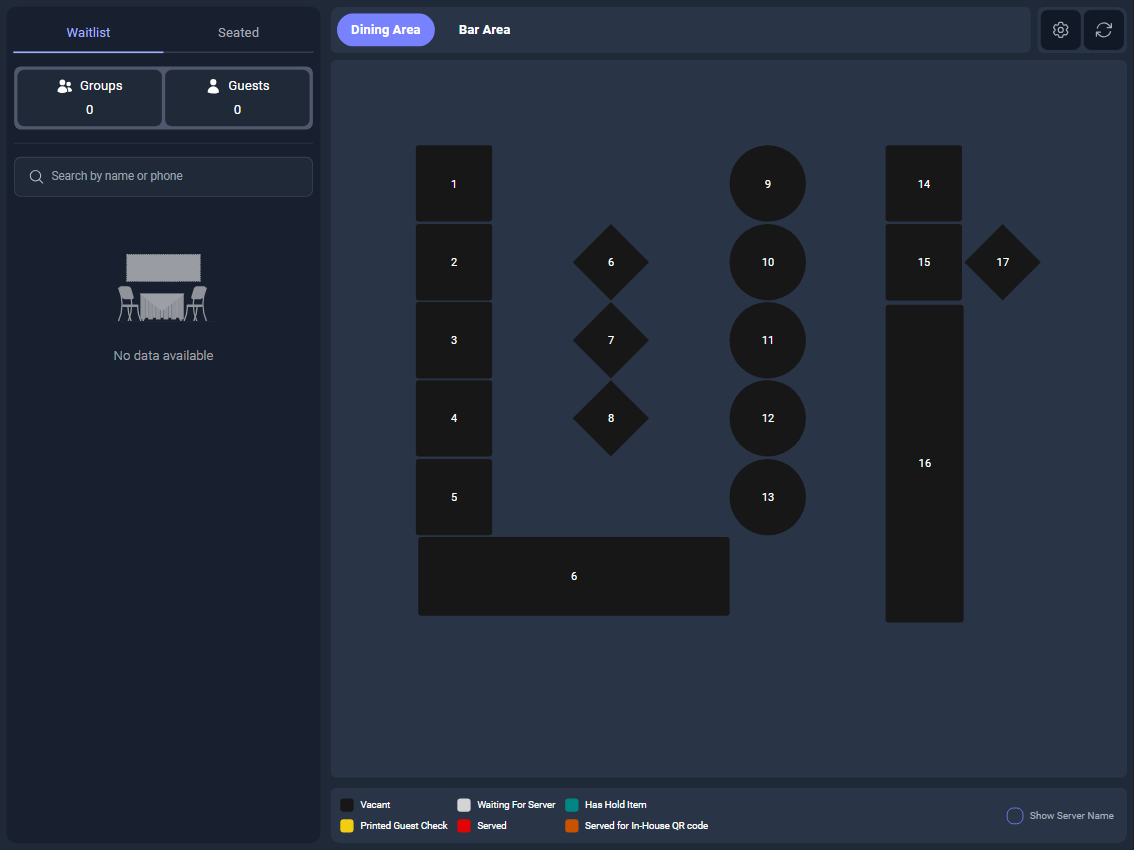
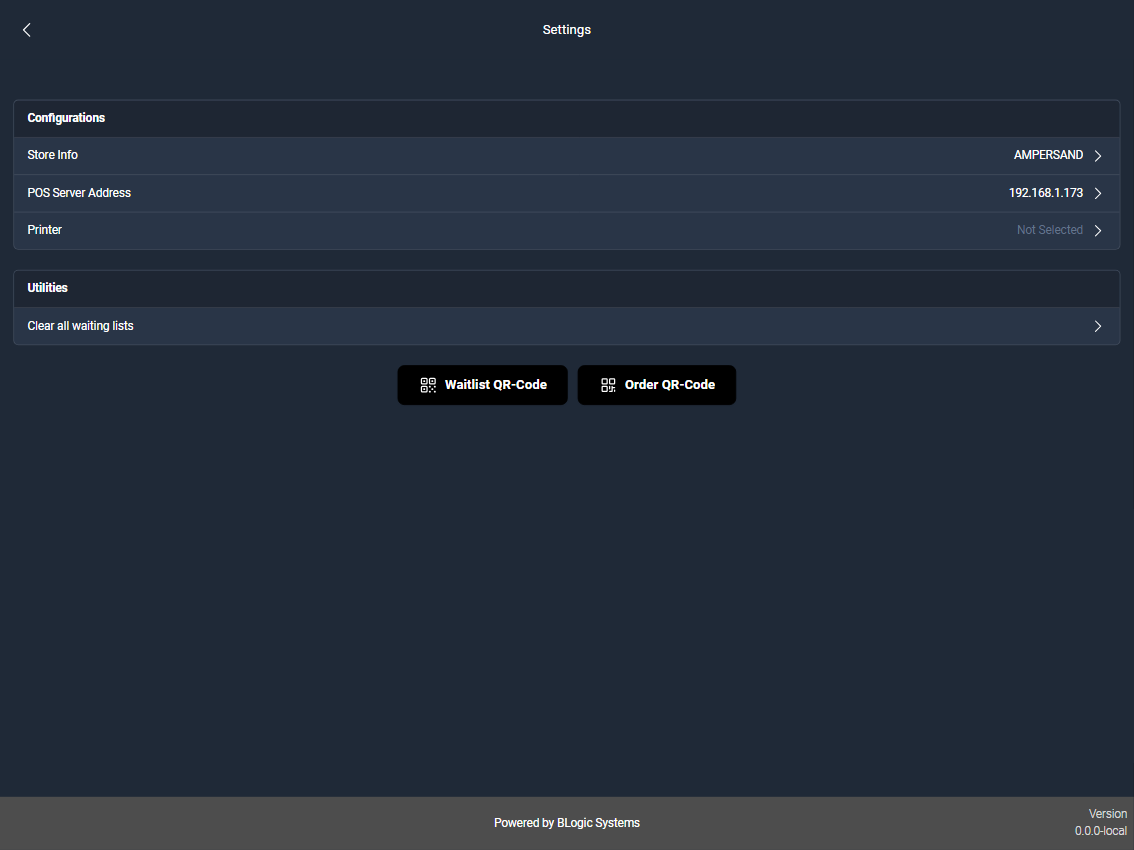
3. Understand the Layout
- Left Sidebar: Displays the waitlist and assigned tables.
- Right Section: Visual table layout for real-time monitoring.
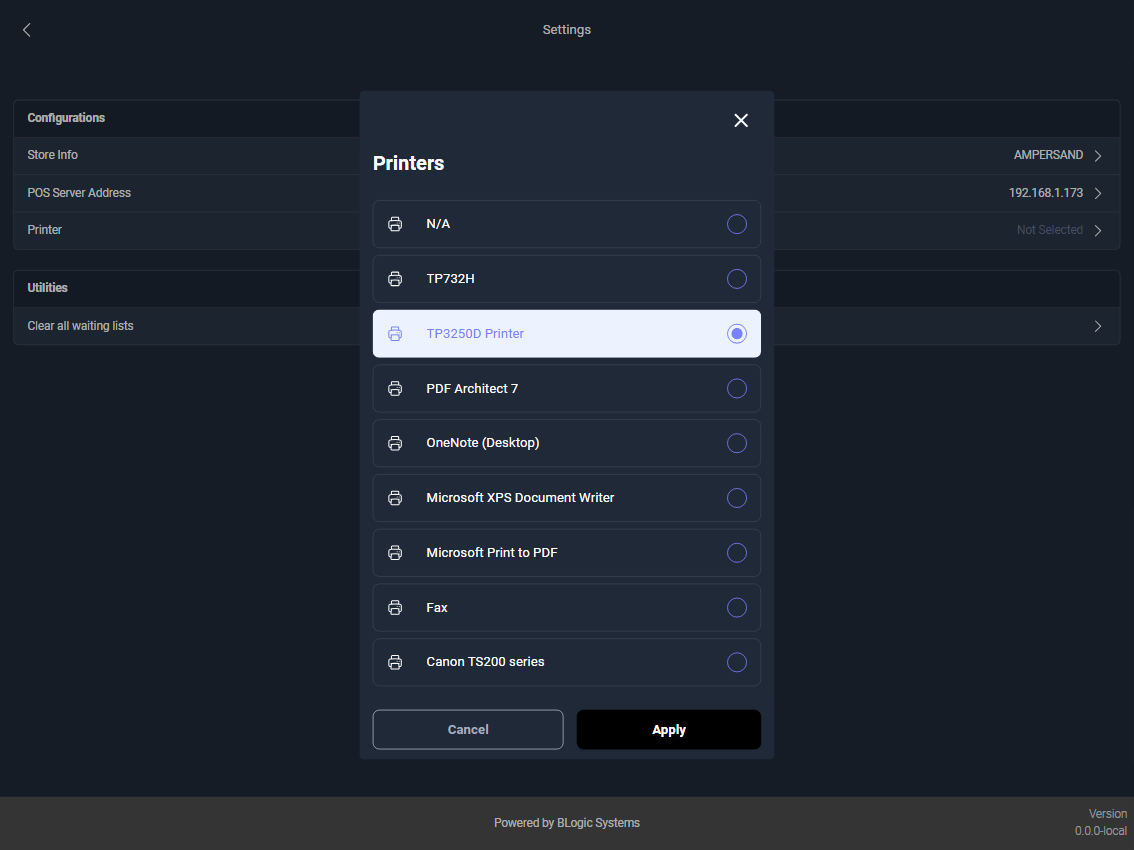
4. Set Up the Printer
- Go to Settings (Click Settings Icon) > Printers and select an available printer.
- Use this setup to print static (waitlist) and dynamic QR codes.
This is the Waitlist QR Code (Static Code). This static code provides a fixed URL that does not change. Customers scan this code to start the process of using the dynamic QR code and to create a waitlist.
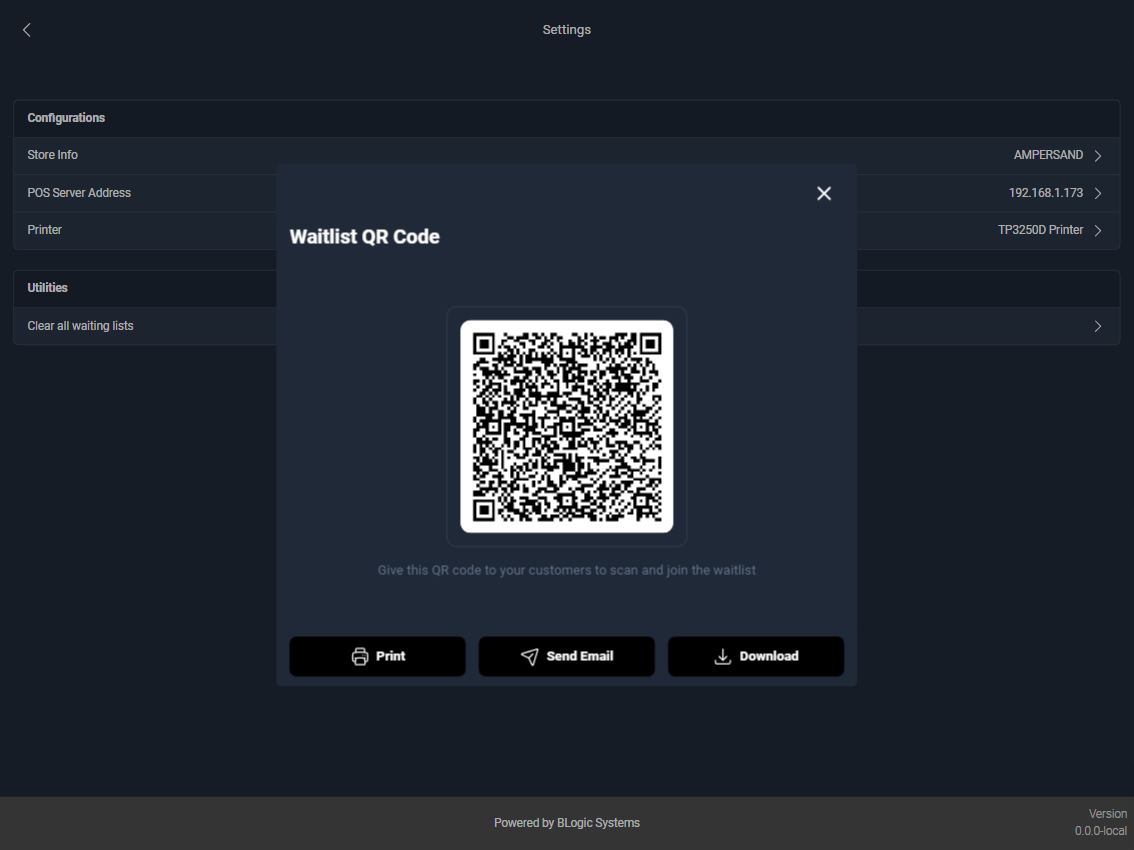
Here are the options to interact with this code:
- Print directly using the configured printer
- Send an email with an image of this QR code
- Or you can download it
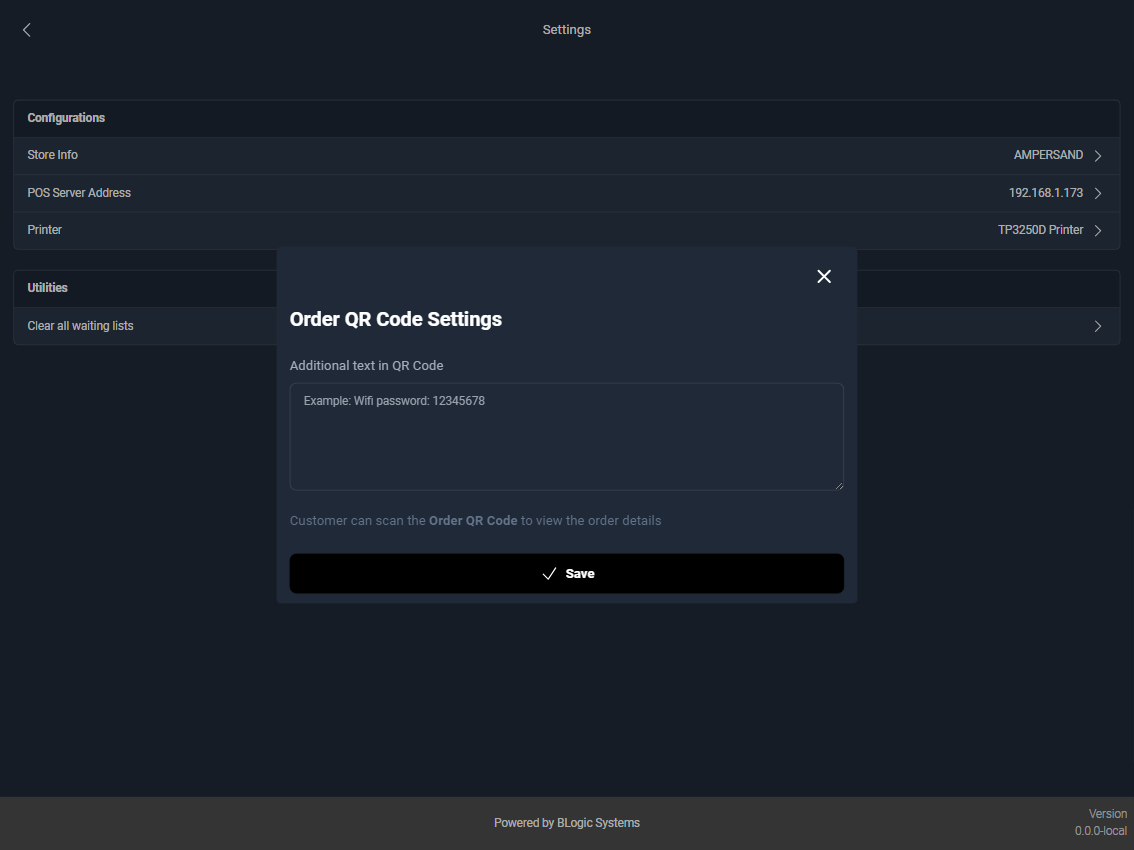
Additionally, you can configure the settings to display supplementary information on the dynamic QR code.
Step 2: Using the Waitlist
1. Creating a Waitlist
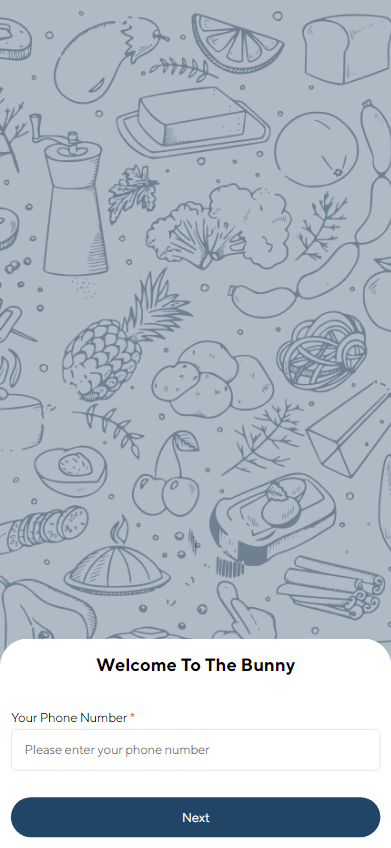
- Customers scan the static QR code to access a Dynamic QR-Code link.
- Customers provide details: name, phone, email, guest count (optional), and notes.
- Once submitted, the waitlist is updated in real-time in the app.
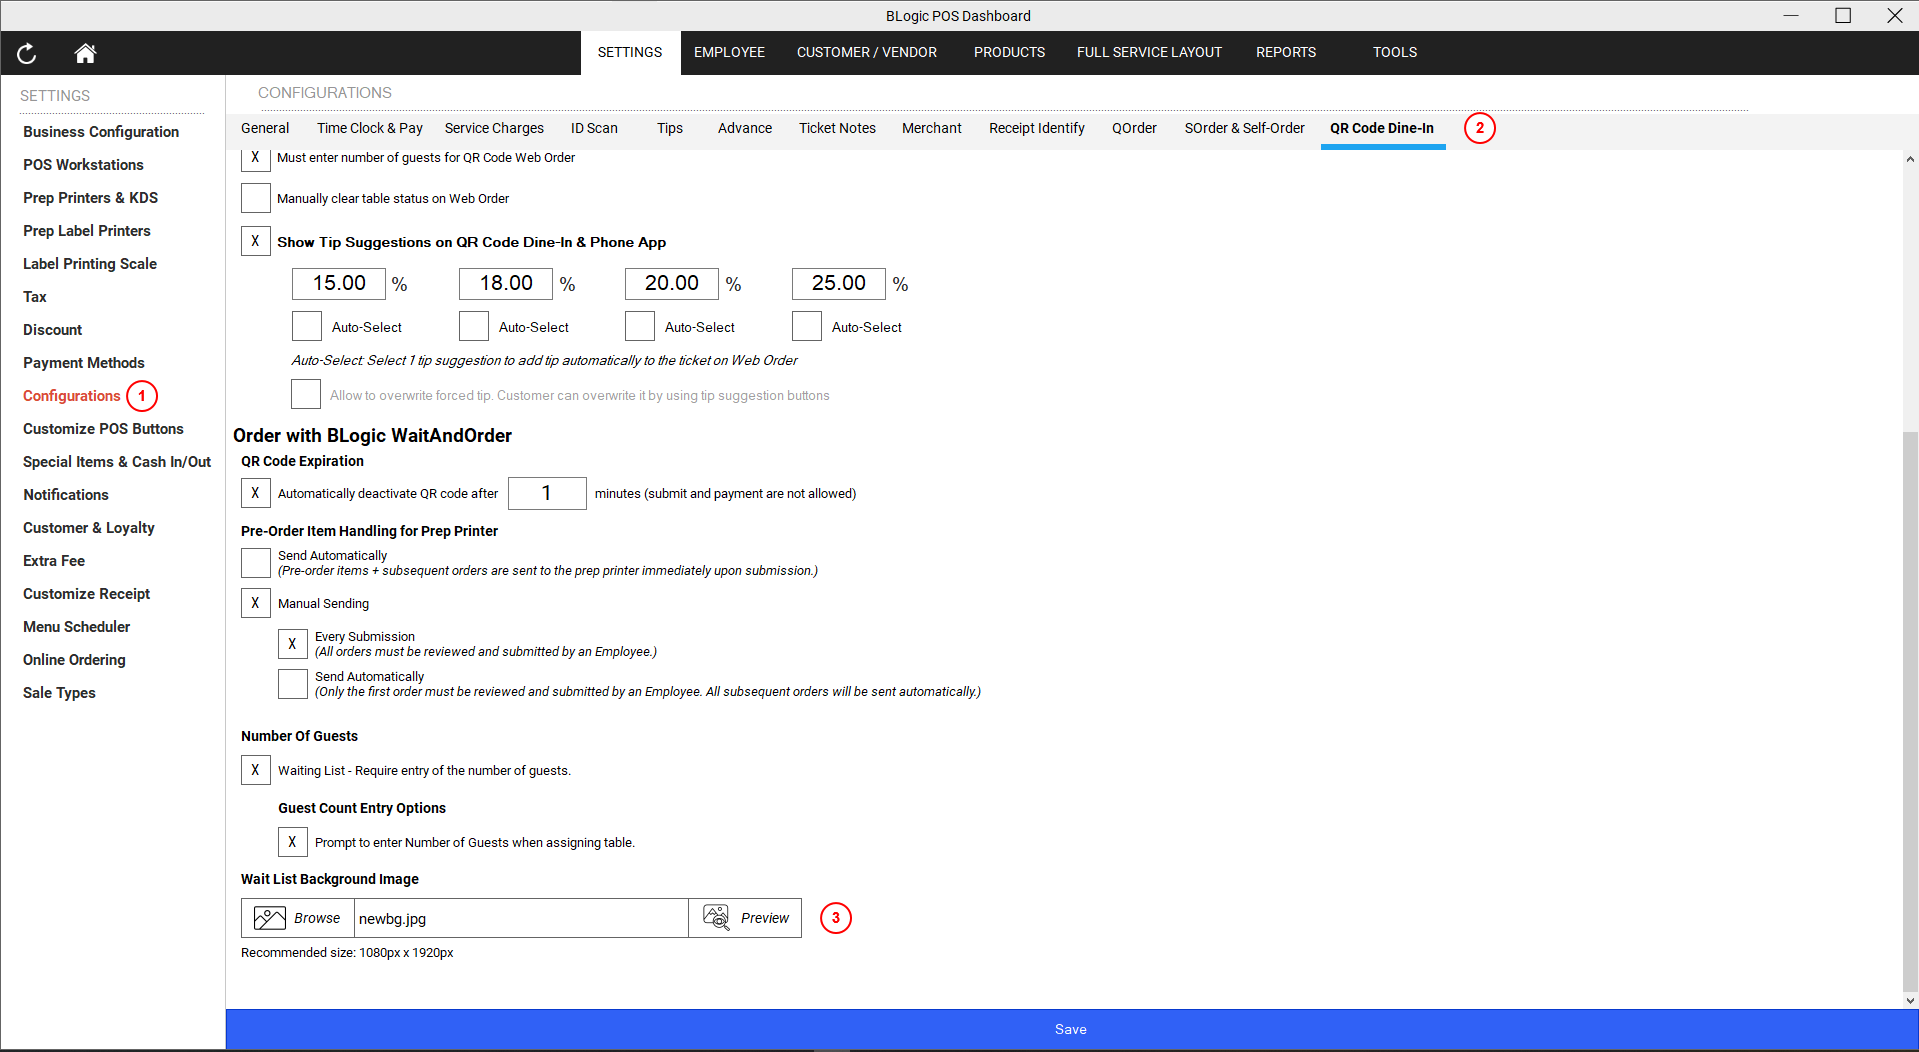
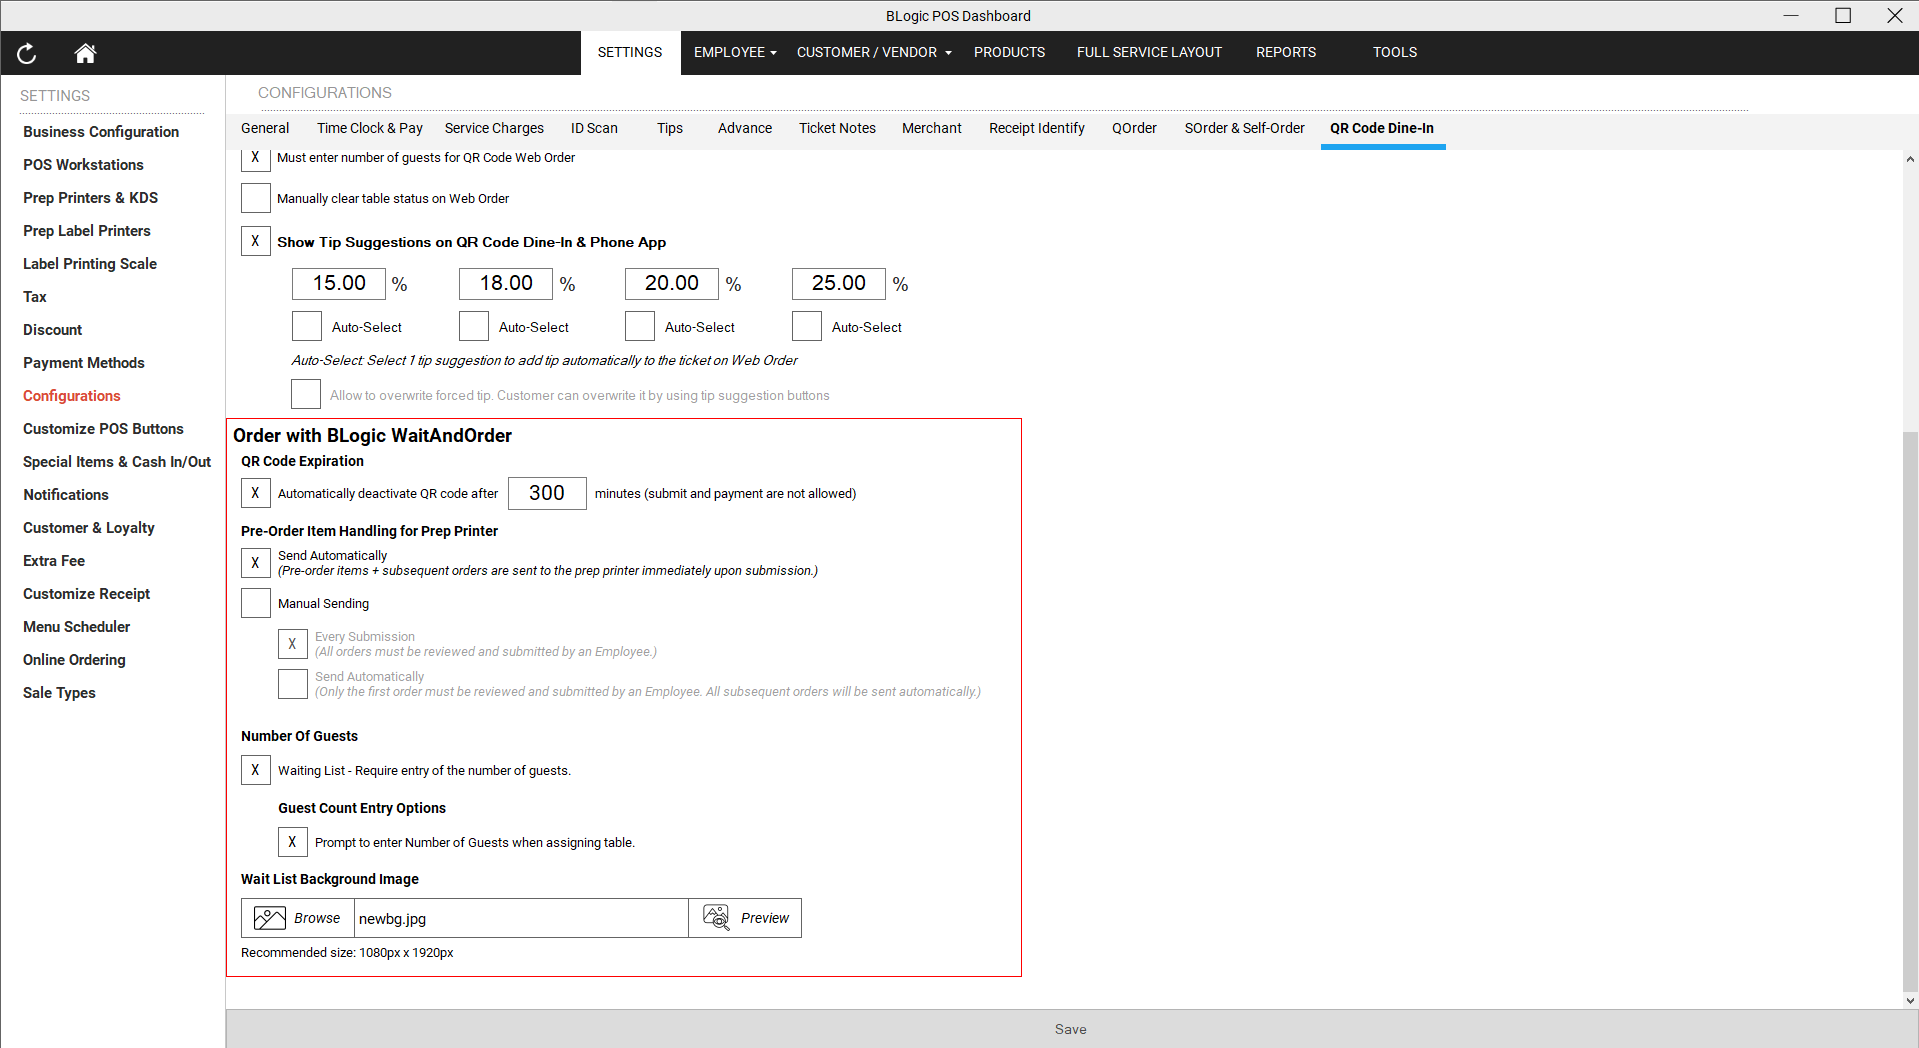
2. Customizing the Waitlist
- Change the waitlist background:
- Go to POS Dashboard > Configurations > QR Code Dine-In.
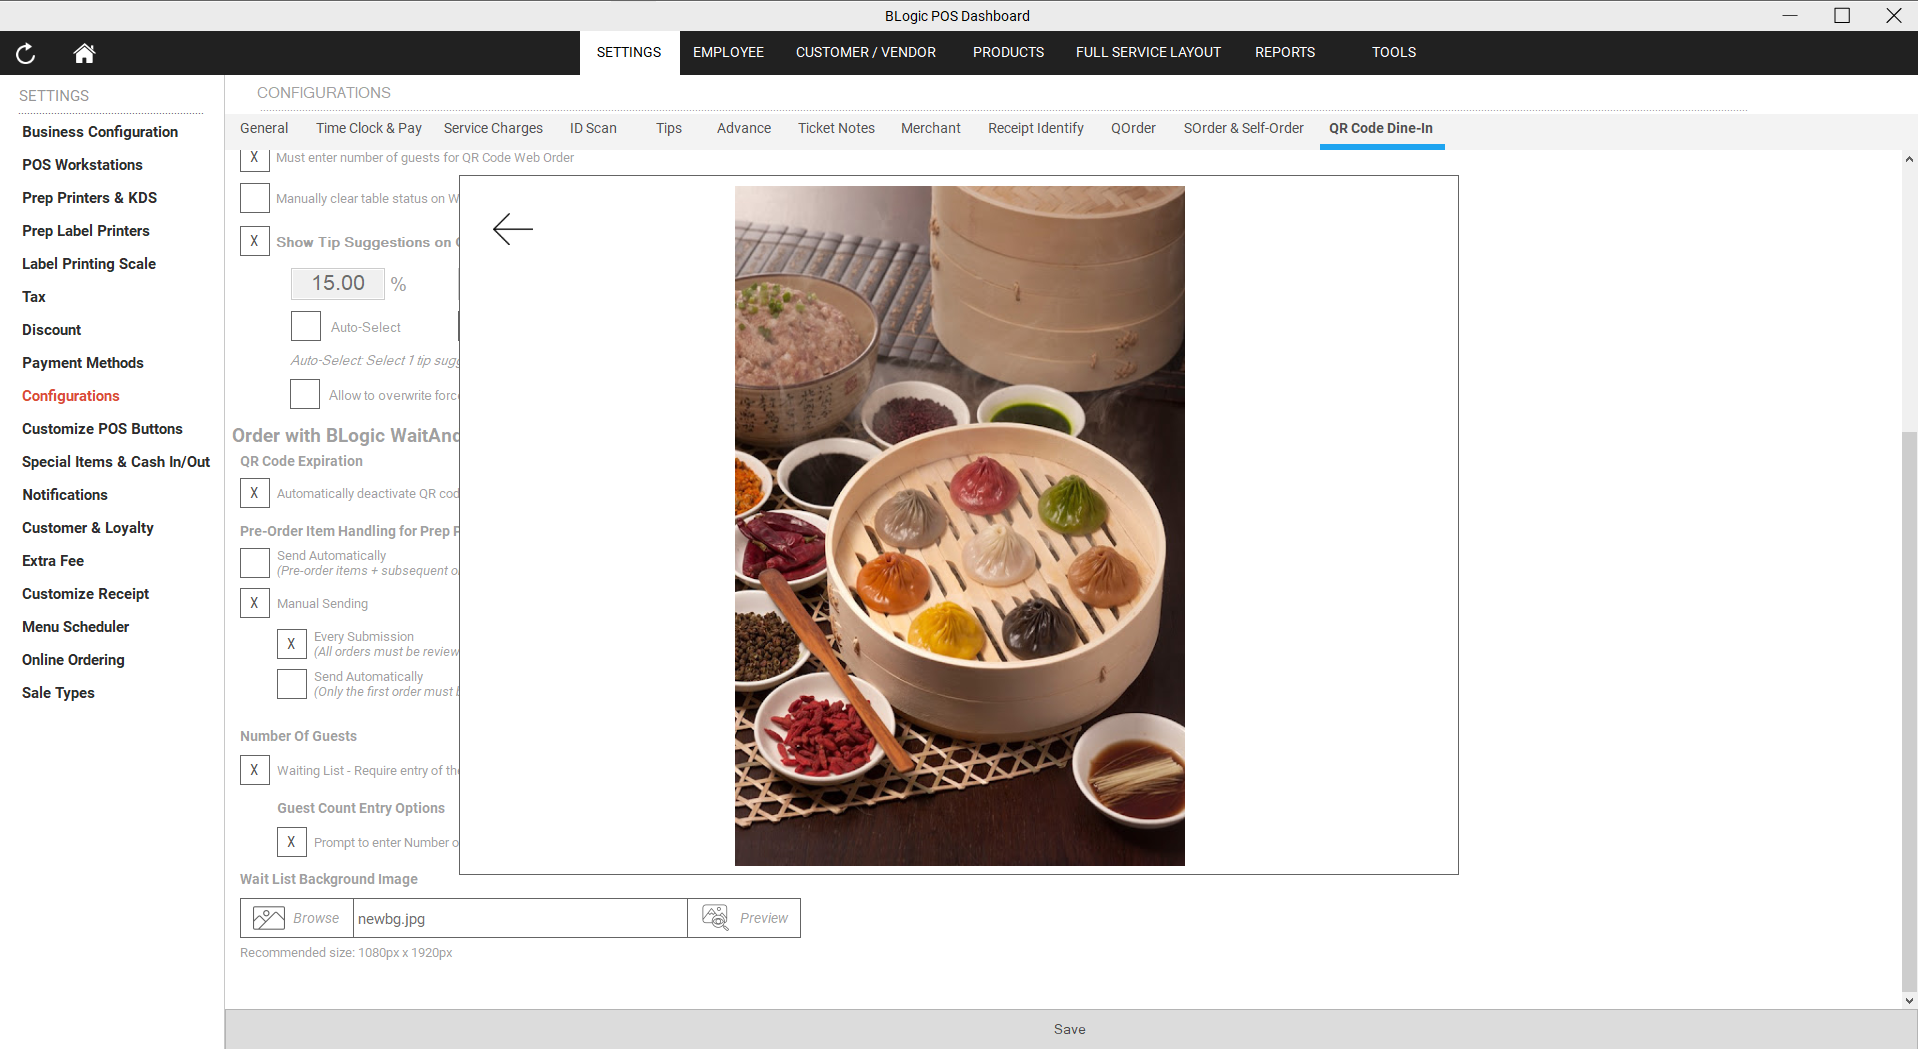
- Scroll down to the Waitlist Background Image section
- Select the image you want to replace
- Save to apply
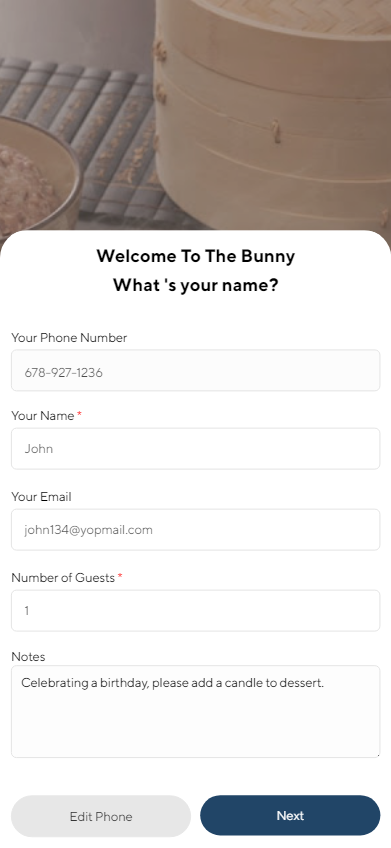
- Customers enter their phone number, name, email, number of guest and note in the form, then create a waitlist.
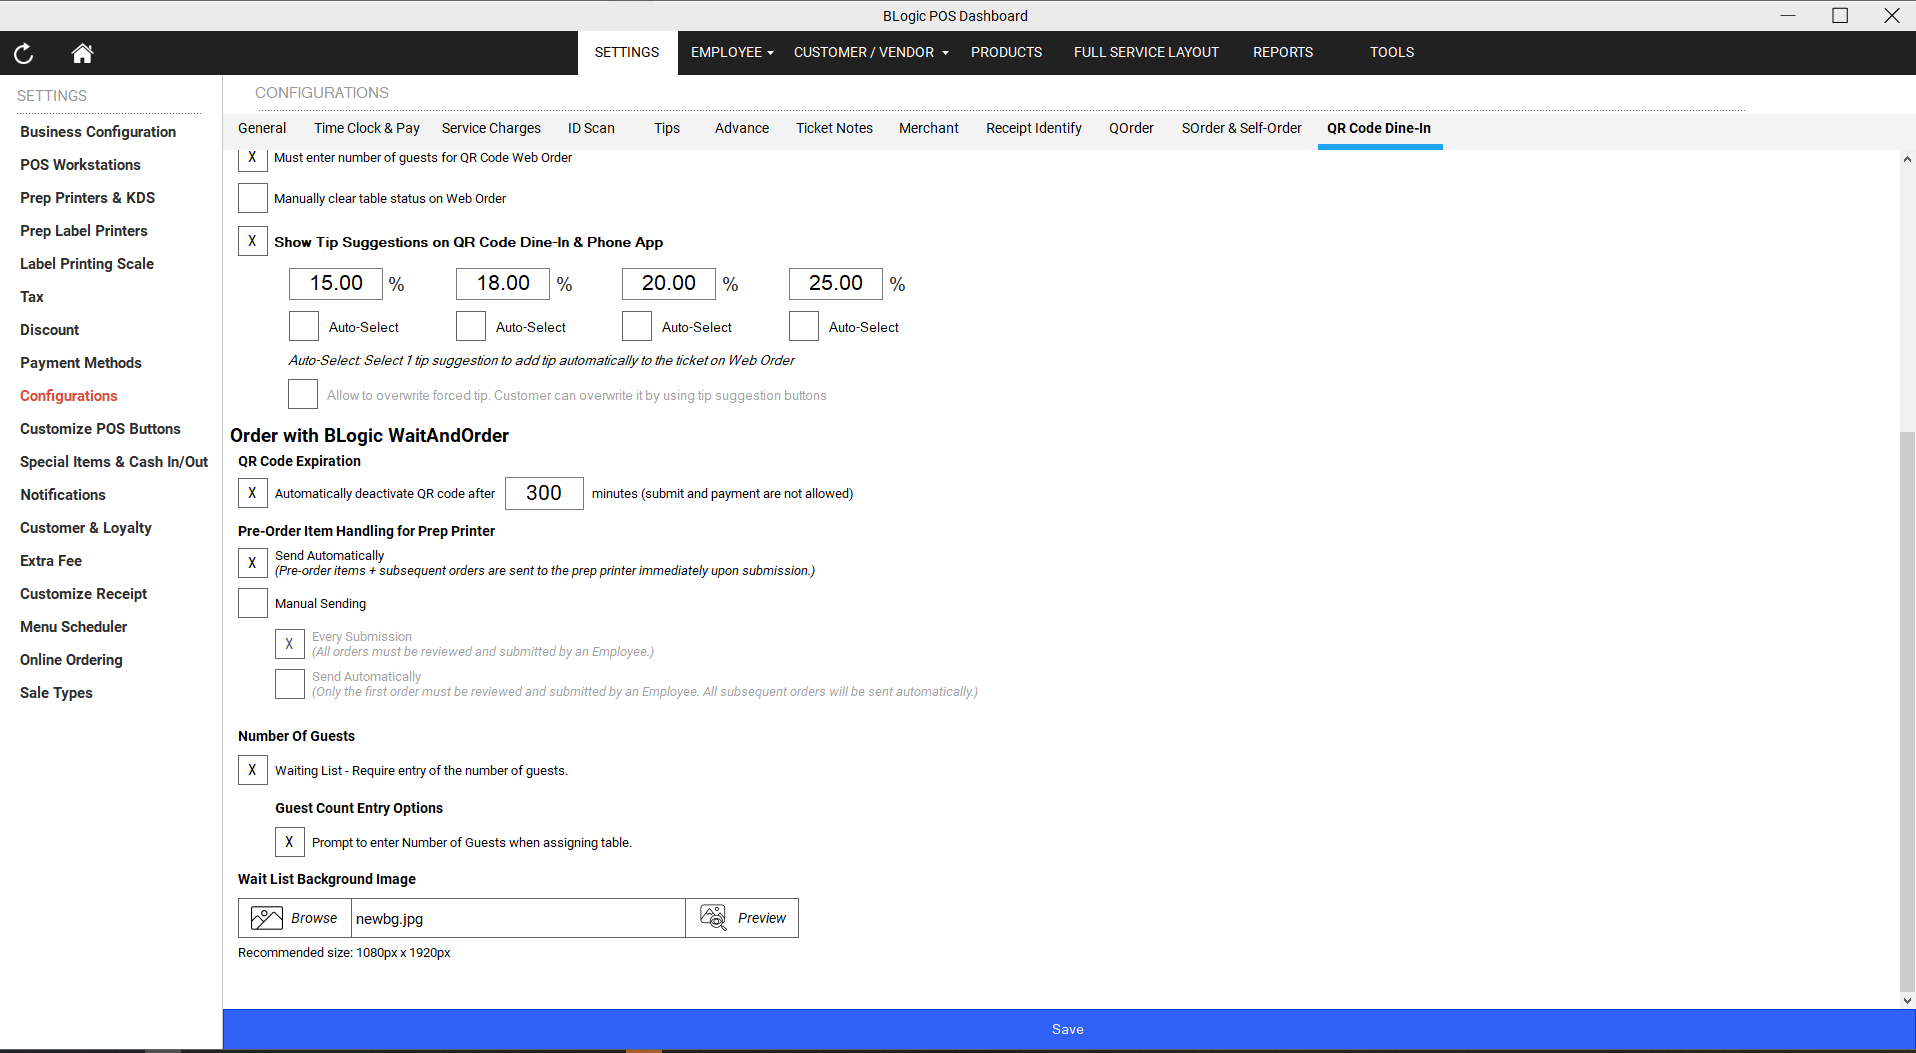
- To hide the ‘number of guests’ input field on the waitlist creation screen, go to the configuration settings. Under QR Code Dine-in, uncheck the option Waitlist – Require Entry of the Number of Guests.
3. Managing Waitlist Details
- View or update guest count and other details from the waitlist screen.
- Status updates:
- Waiting: New waitlist entry.
- Pre-Order: After pre-ordering items.
- Seated: After table assignment.
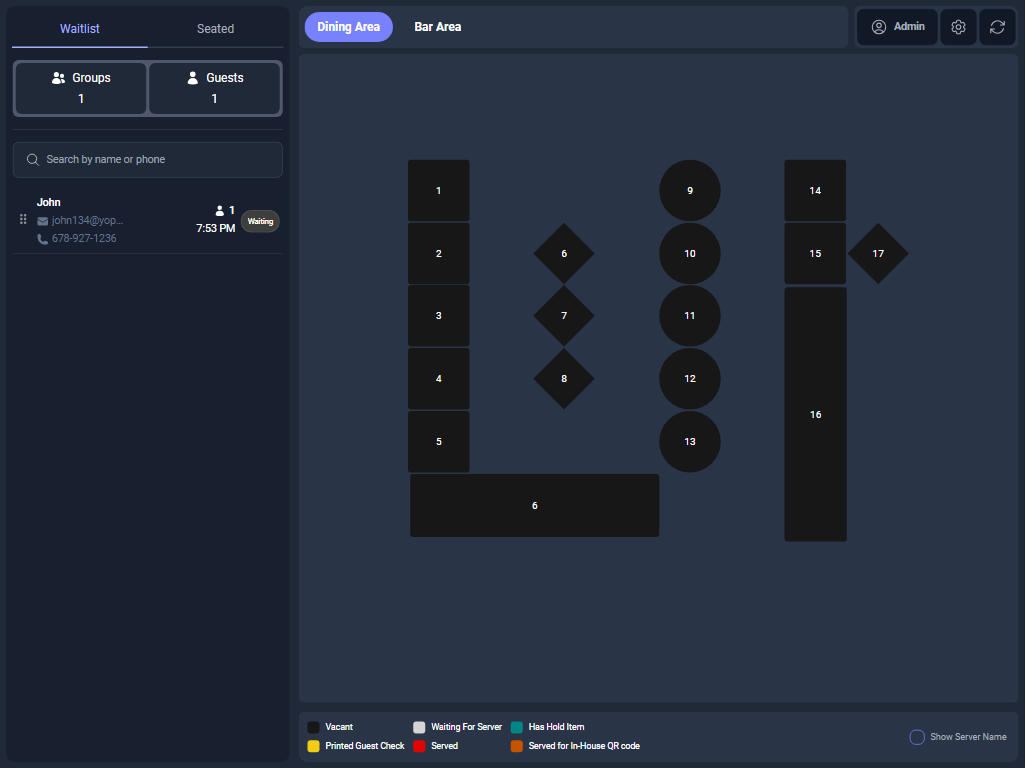
- After successfully creating the waitlist, the newly created waitlist will appear in the BLogic Wait and Order app (in real-time updates as changes occur to the waitlist).
- In the waitlist section, all customer information will be displayed, including name, email, phone number, guest count, and status.
- When the waitlist is first created, the status will be ‘Waiting.’
Step 3: Using the Dynamic QR Code
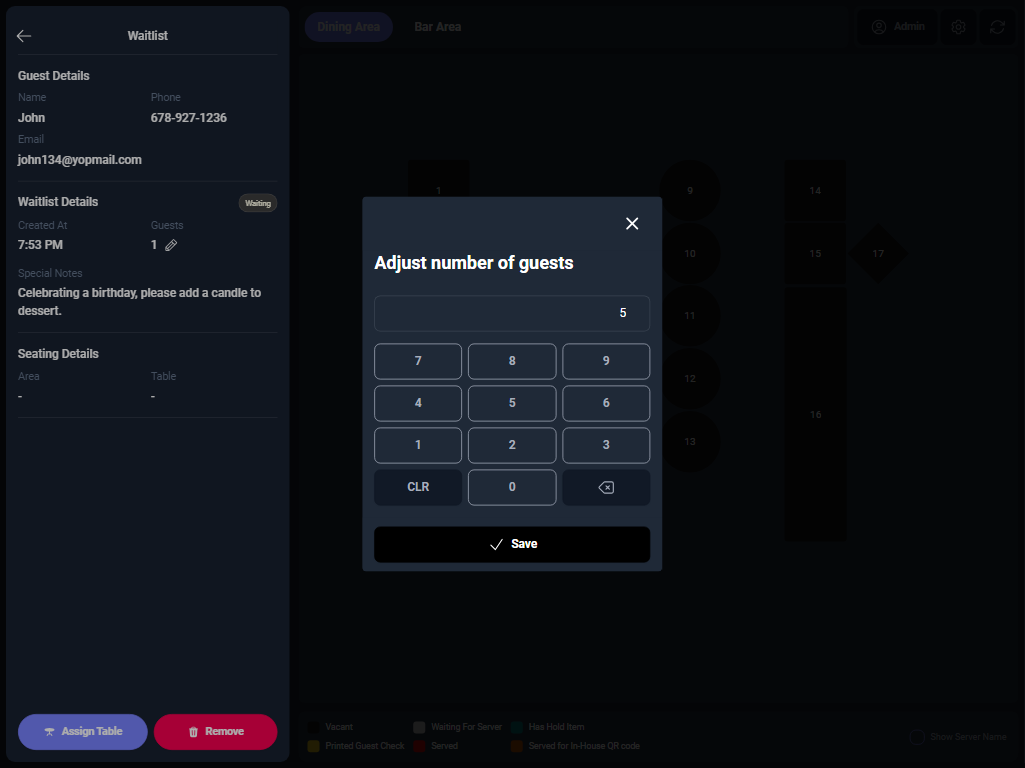
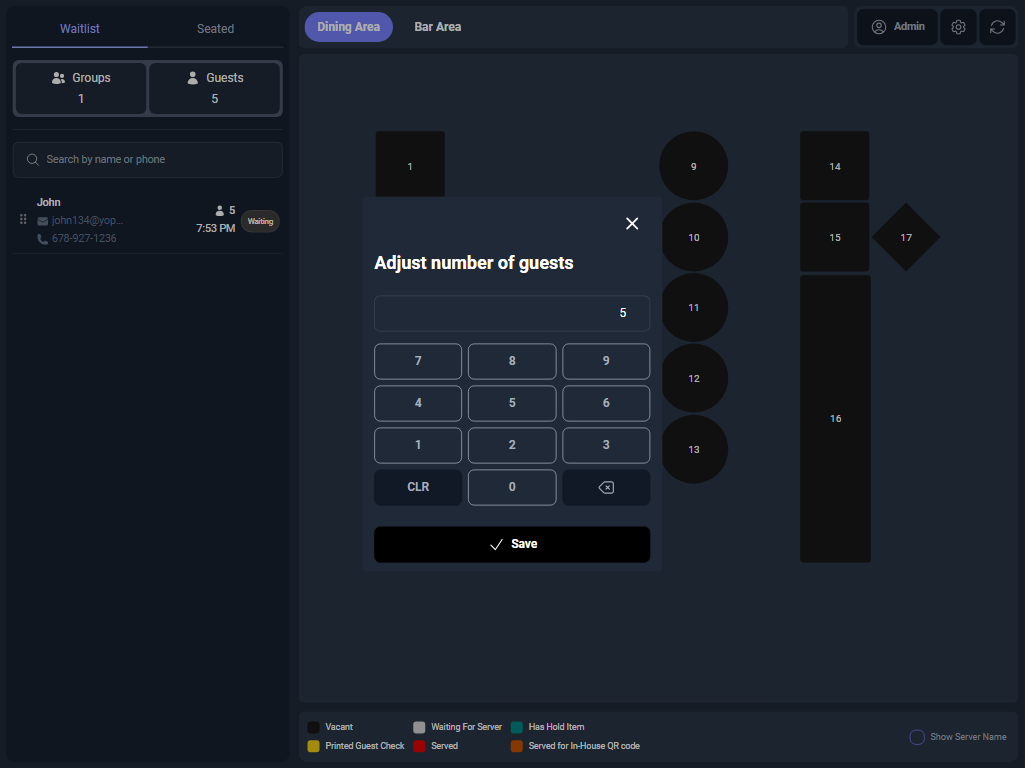
Click on the waitlist to view its details. Here, we can also update the number of guests.

Select ‘Edit Guest’ icon to open a dialog for adjusting the number of guests. Enter the new guest count and click ‘Save’ to complete the update.
- In this section, there are two buttons: ‘Assign Table’ and ‘Remove.’
- Assign Table: Select an appropriate table to assign to the customer.
- Remove: Remove the customer from the waitlist.
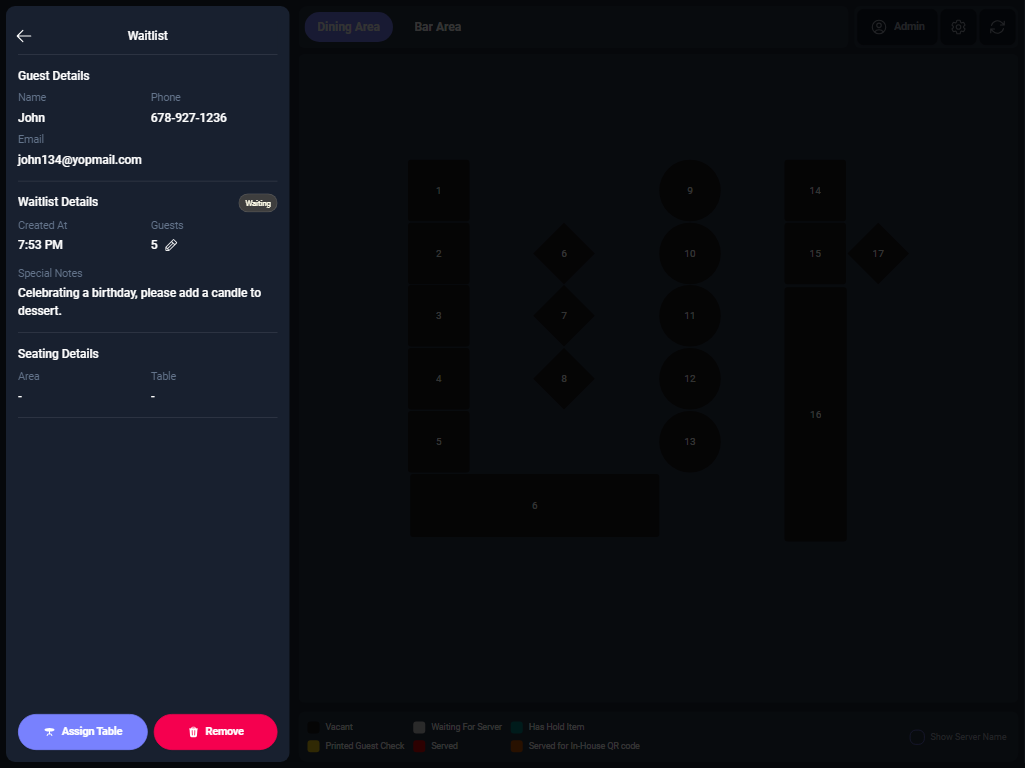
- To assign a table, click the ‘Assign’ button and select the appropriate table.
- Alternatively, you can drag the waitlist entry from the waitlist screen and drop it onto the suitable table.
- After successfully creating the waitlist, the system will redirect to the menu screen, where customers can select their favorite dishes to pre-order.
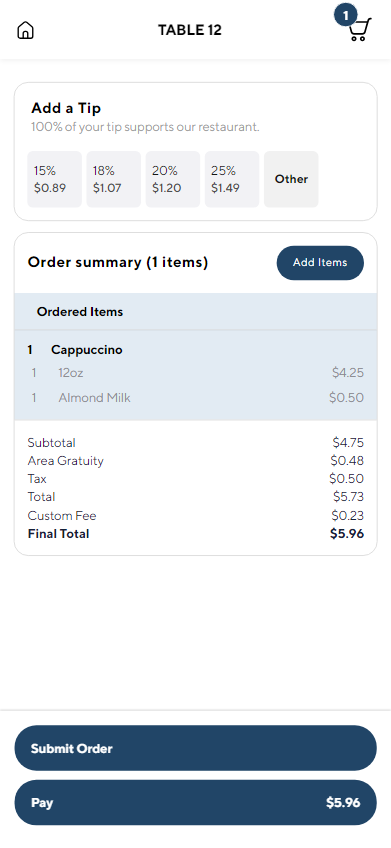
- After selecting their dishes, customers can click the cart icon to be redirected to the review order page.
- If everything looks good, they can press the ‘Pre-Order’ button to complete the process.
- Customers can continue to pre-order multiple times by adding new items.
Step 4: Configurations for Efficiency
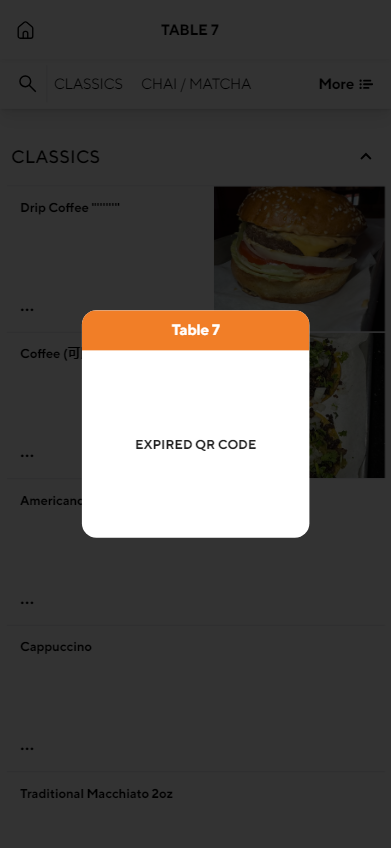
1. QR Code Expiration
- Set the dynamic QR code to expire after a specified time.
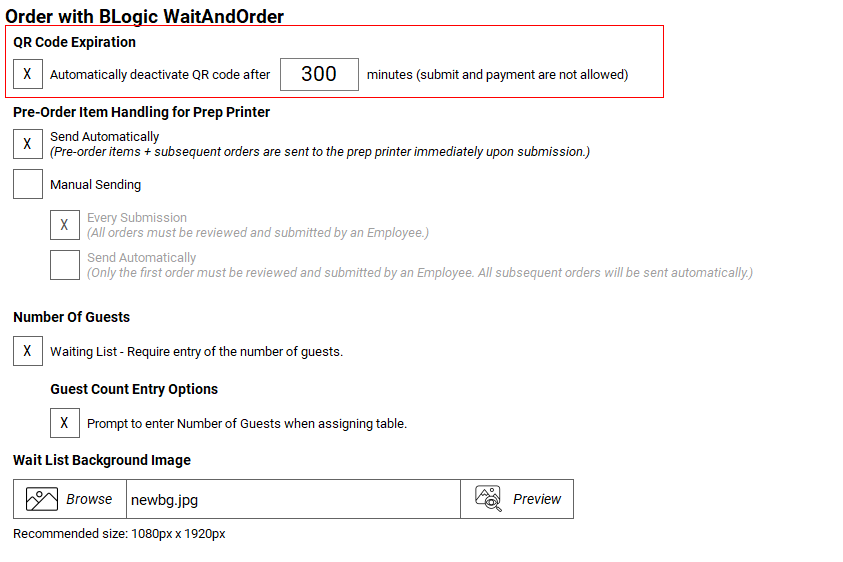
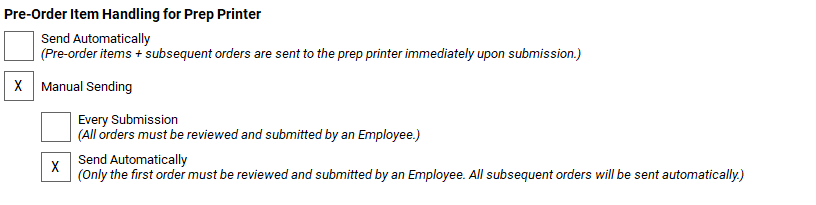
2. Pre-Order Item Handling
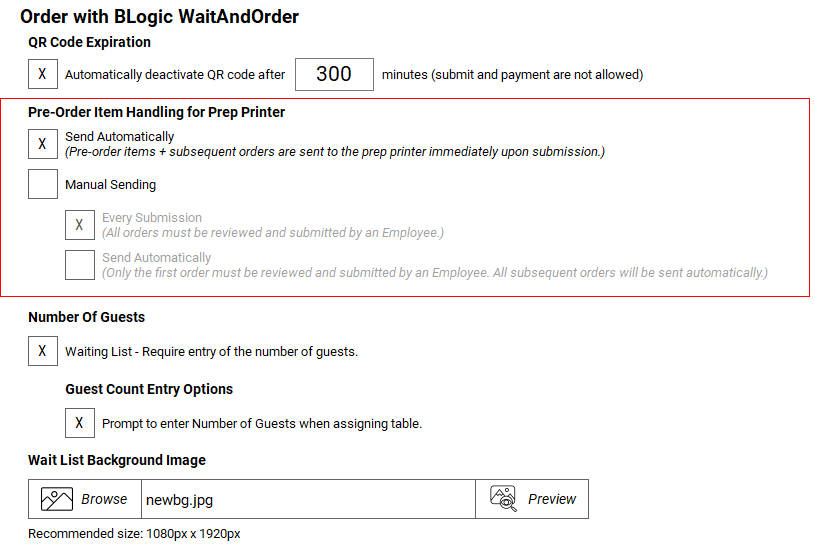
- Automatic Sending: Items are sent directly to the kitchen upon submission.
- Manual Sending: Items are held for staff review before being sent.
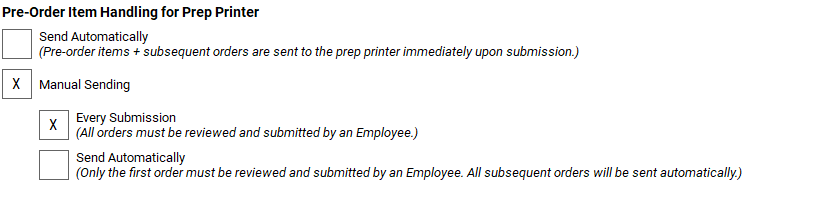
Manual Sending Options
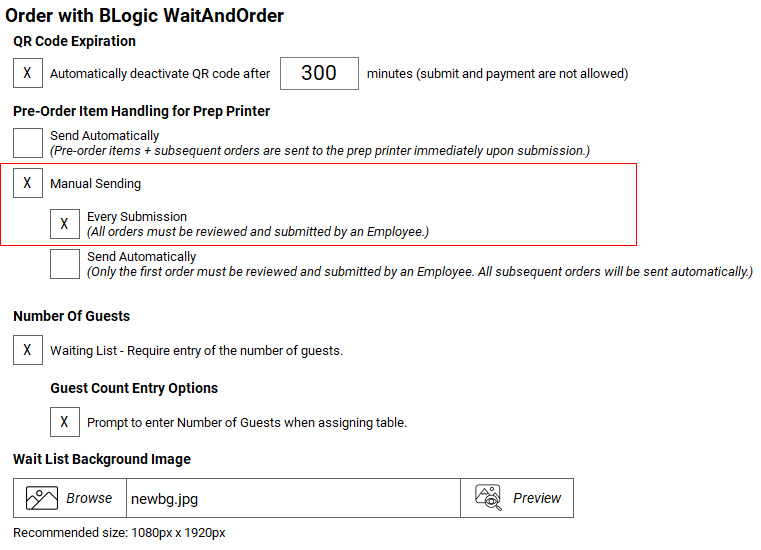
- Every Submission: All items require review.
- First Order Only: Only the first order needs manual review; subsequent orders are sent automatically.
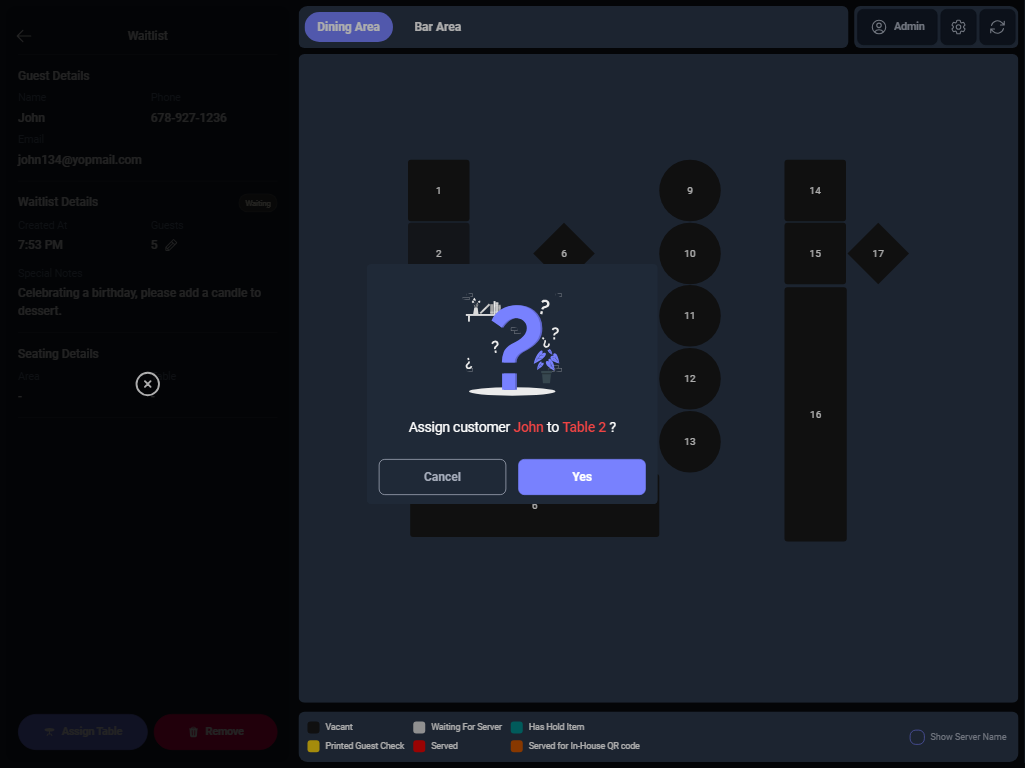
3. Guest Count Entry Options
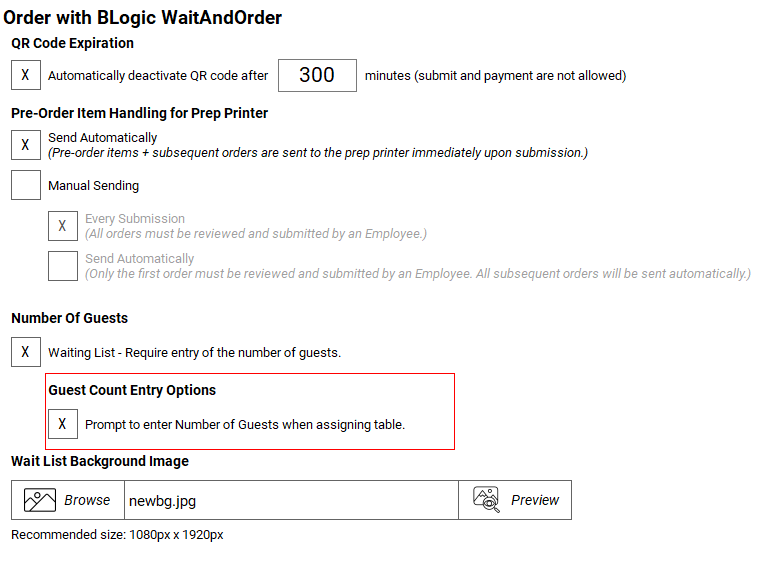
- During table assignment, employees are prompted to enter or confirm the guest count.
- This prompt can be configured to automatically display an edit dialog, allowing for accurate guest count tracking and table management.

With the example below, we use the Send Automatically configuration. This means that after the table is assigned, the ticket will be automatically sent to the kitchen for printing.
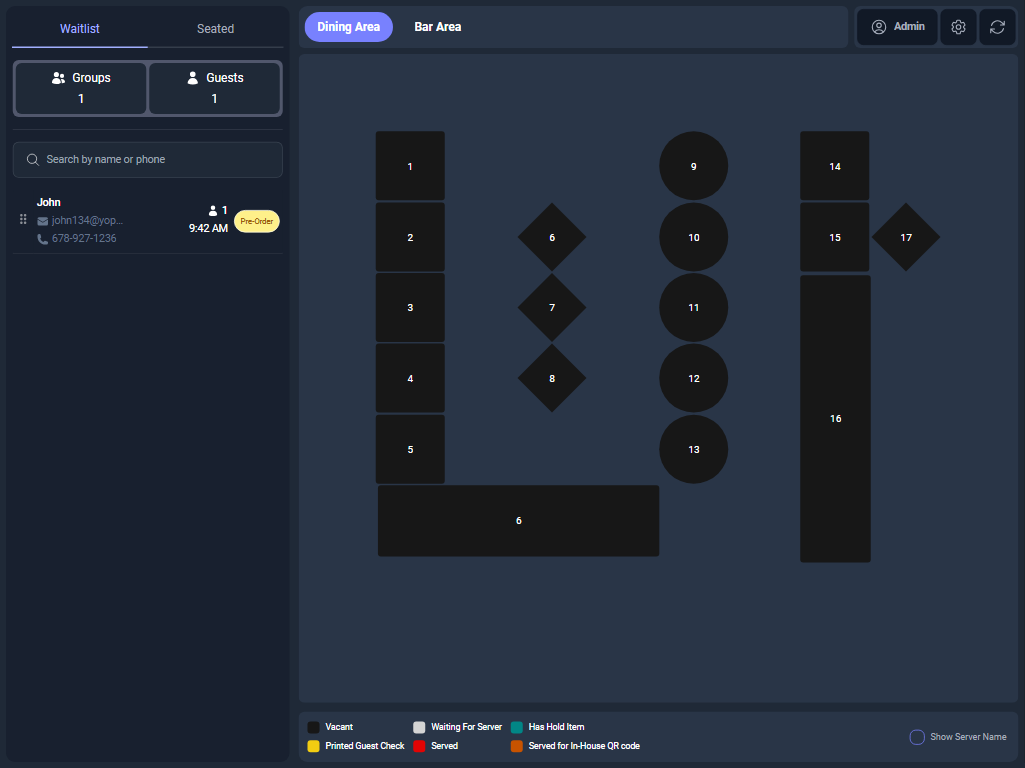
- When a customer pre-orders a dish, the waitlist in the BLogic Wait & Order app will instantly update in real-time, changing the status of that waitlist to Pre-Order.
- Next, we can assign tables to those waitlists. For waitlists with the status Waiting or Pre-Order, table assignment is allowed.
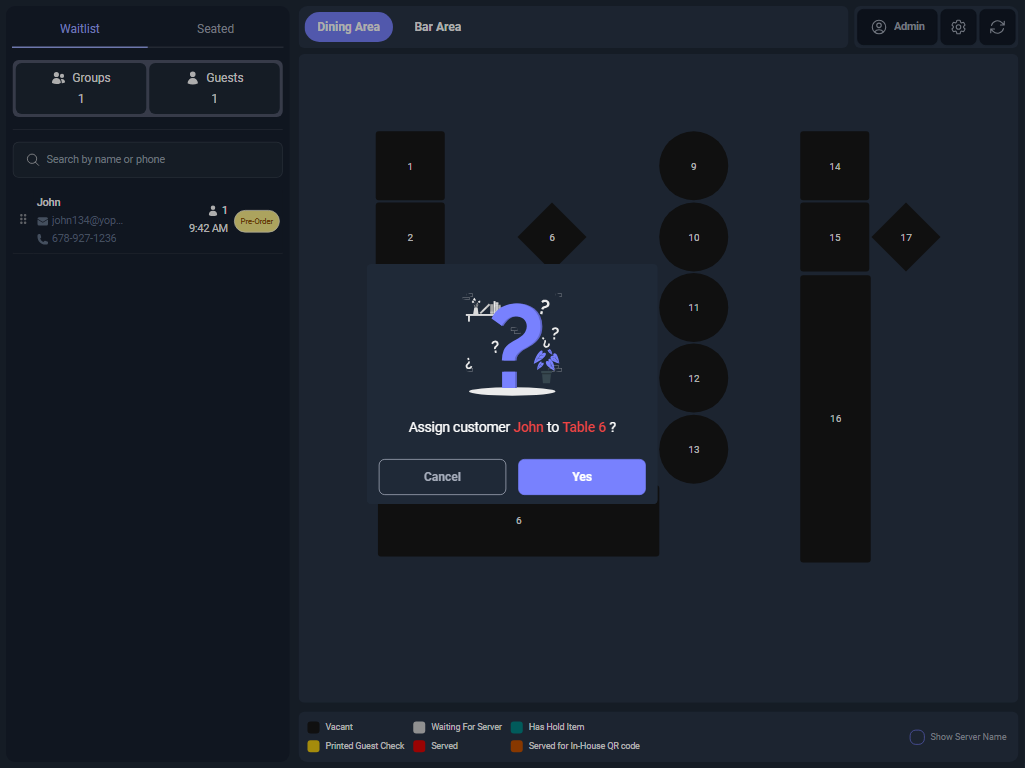
By dragging and dropping the waitlist onto a table or manually selecting the waitlist and choosing Assign Table, you can easily assign a table.
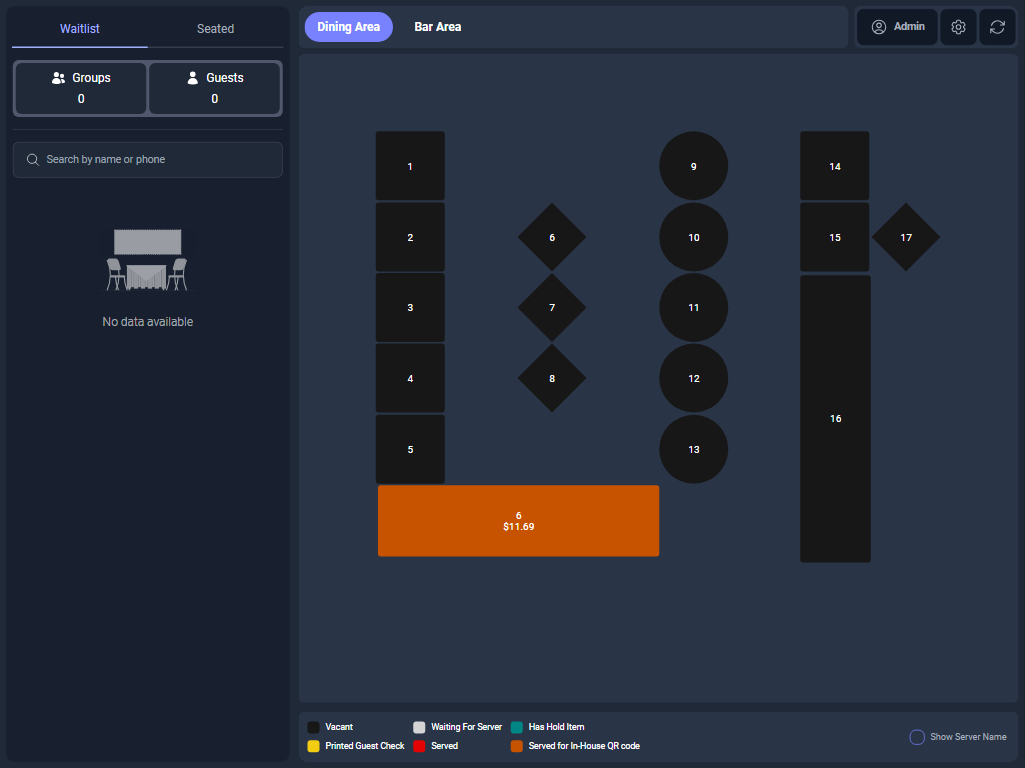
- Once the table is successfully assigned, with the configuration set to Automatically Print, the table will change to an orange color, indicating that it has been assigned.
- The items will be automatically printed in the kitchen, and a dynamic QR code will also be printed.
- The staff can provide this QR code to the customer, allowing them to continue ordering at the table.
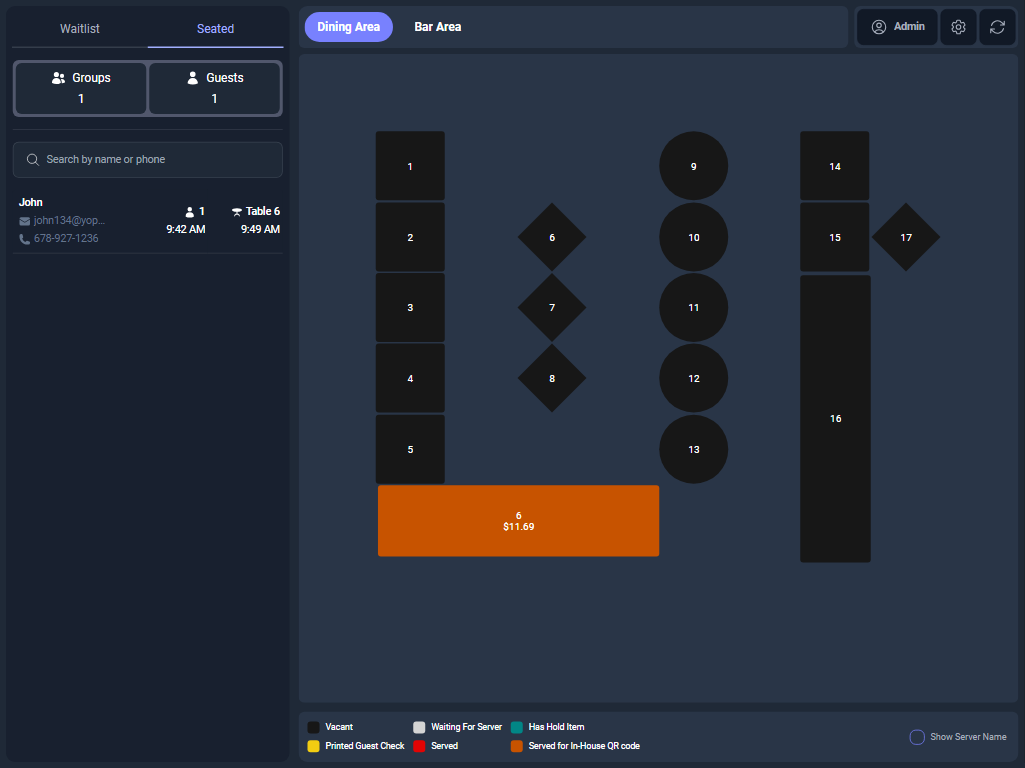
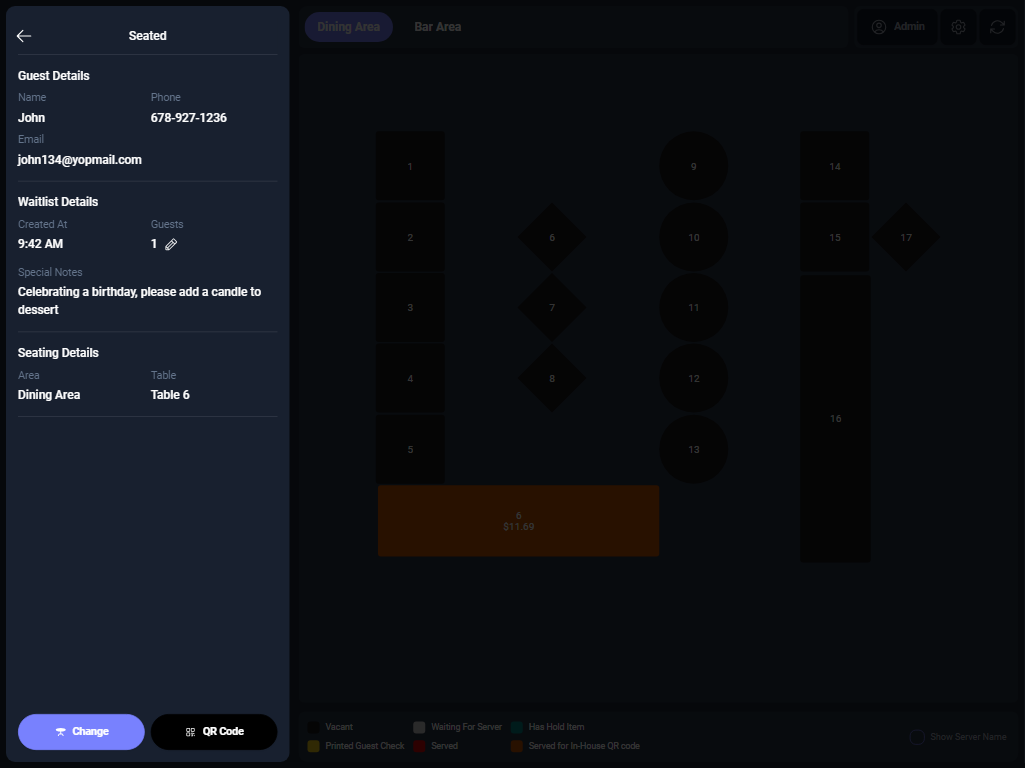
- Once a waitlist entry has been assigned to a table, the status of that waitlist changes to Seated.
- At this point, when clicking on the waitlist, you can either reassign the customer to a different table or allow the staff to provide the dynamic QR code for the customer to scan and continue ordering.
- The customer can continue by scanning the dynamic QR code and placing additional orders. They can either add more items or proceed to complete the payment and finalize the ticket.
Using the manual configuration
1. Manual Sending – Every Submission
- Continuing the steps from the previous examples: create a waitlist → pre-order → assign a table. At this point, when using the Manual Sending – Every Submission configuration, the items will be put on hold and will not be sent to the kitchen for printing.

- The table status will be indicated in blue, and in the POS, the items will also appear in blue to show their hold status.
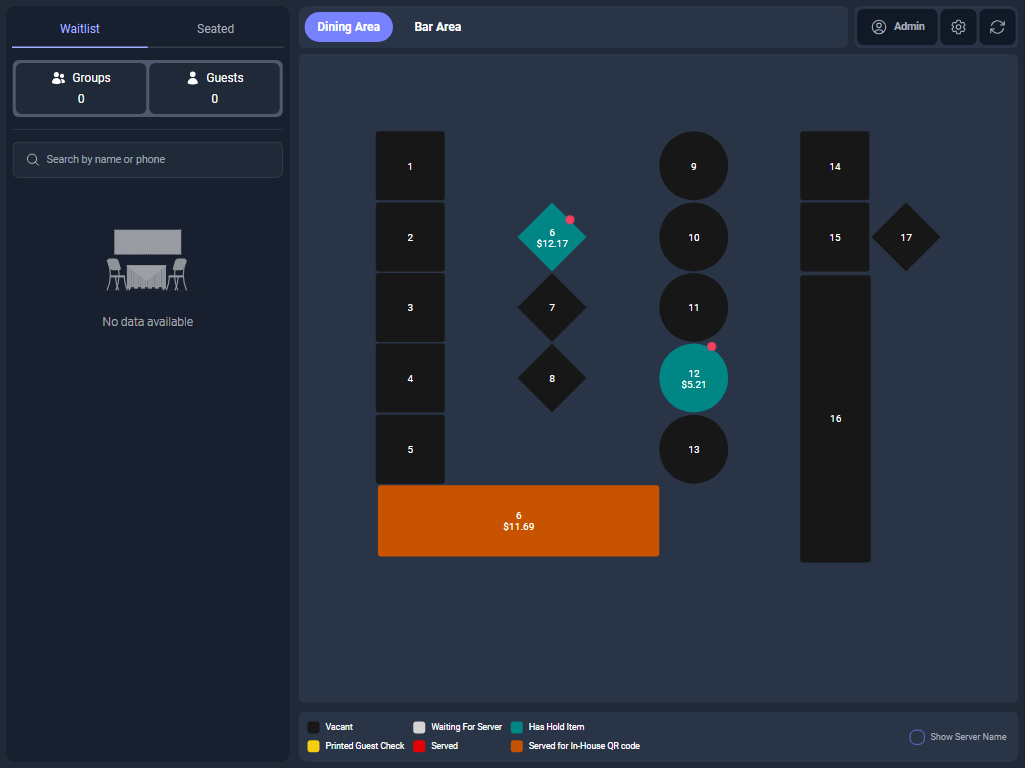
- In the BLogic Wait and Order app, the newly assigned table 12 will change to blue, indicating that it is on hold.
On POS
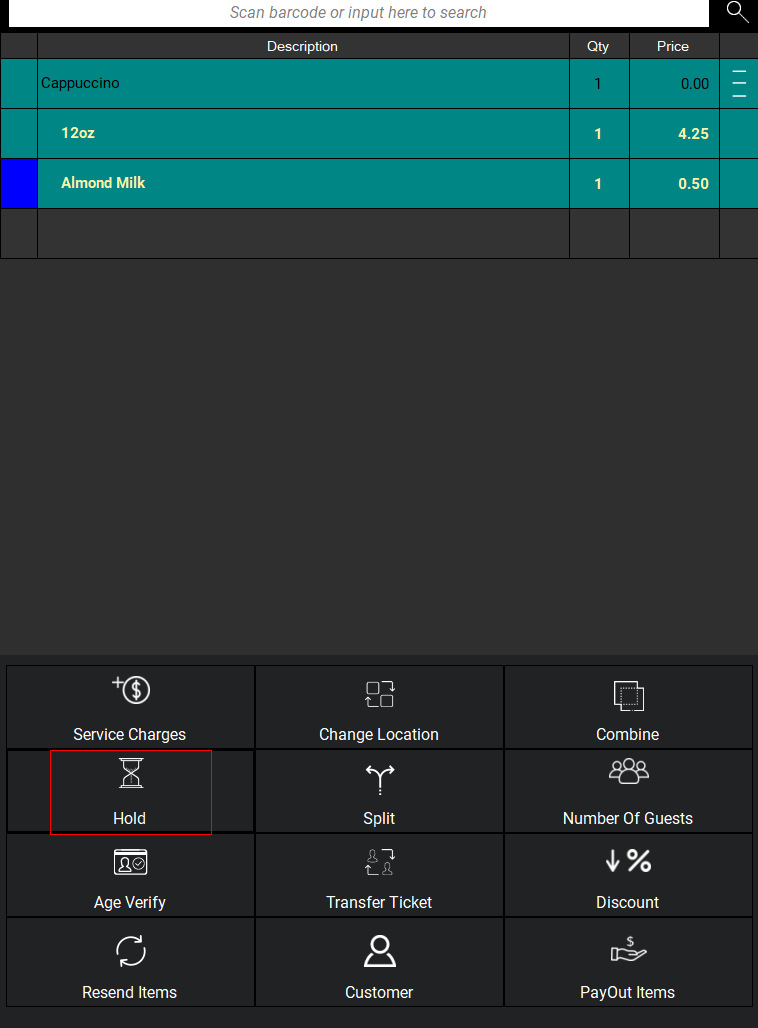

- To send the items to the kitchen for printing, follow these steps in the POS:
- Select the table that needs action.
- Look at the options below and select More.
- Choose Hold.
- A screen will appear for managing the items.
- The items currently on hold will be displayed. Select Send Now to send them to the kitchen.
- Click Submit to complete the review, and the items will be sent to the kitchen for printing.
- Each time a customer submits a new item, the review process will be repeated.
Manual Sending – Send Automatically
- With the Send Automatically (First Order Only) configuration, only the initial order requires manual review. Subsequent orders from the same customer will be sent automatically to the kitchen without needing any further approval or review.
- This streamlines the ordering process by reducing the workload on staff after the first order, allowing for faster service and improved efficiency.
Here’s a breakdown of how this configuration works:
- First Order: The staff must manually review the first order.This involves checking the items, ensuring everything is correct, and then sending the order to the kitchen for printing.
- Subsequent Orders:Any additional items submitted by the customer after the first order will bypass the manual review process.These items will be sent directly to the kitchen automatically, improving the speed of service.