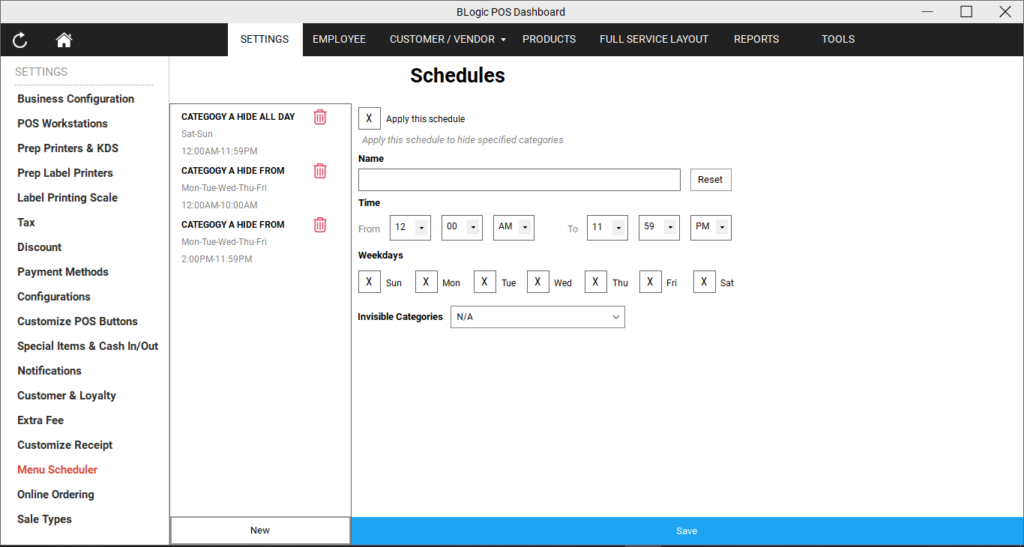
The Menu Scheduler is a powerful tool that allows you to create custom schedules for specific items in your POS system. For example, you can use it to manage promotions like Happy Hour or display a lunch menu during specific hours. The scheduler works by hiding selected menu items during the time slots you define.
Step-by-Step Instructions
- Name Your Schedule
- Enter a unique name for your schedule in the “Name” field. This will help you identify it later.
- Set the Time Slot
- Use the dropdown menus to select the FROM and TO times for your schedule. This defines the time period when the selected menu items will be hidden.
- Choose the Day(s) of the Week
- Select the specific day(s) when this schedule should apply. You can choose individual days or a range of days (e.g., Monday to Friday).
- Select the Menu Category to Hide
- Choose the category of menu items you want to hide during the specified time slot.
- Add Additional Time Slots (Optional)
- If you need to create multiple time slots for the same schedule, click the NEW button. This will open a new set of fields to define additional time ranges.
Example Scenario
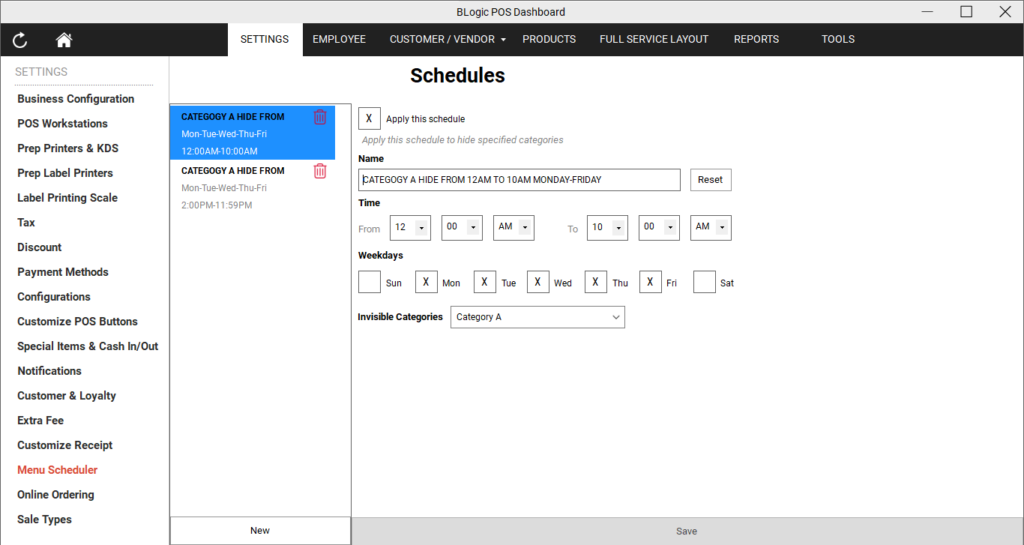
Let’s say you want to display a Lunch Menu (Category A) from 10:00 AM to 2:00 PM, Monday to Friday. To achieve this, you’ll need to create two separate schedules:
- First Schedule
- From: 12:00 AM
- To: 10:00 AM
- Days: Monday to Friday
- Category: Lunch Menu (Category A)
- Second Schedule
- From: 2:00 PM
- To: 11:59 PM
- Days: Monday to Friday
- Category: Lunch Menu (Category A)
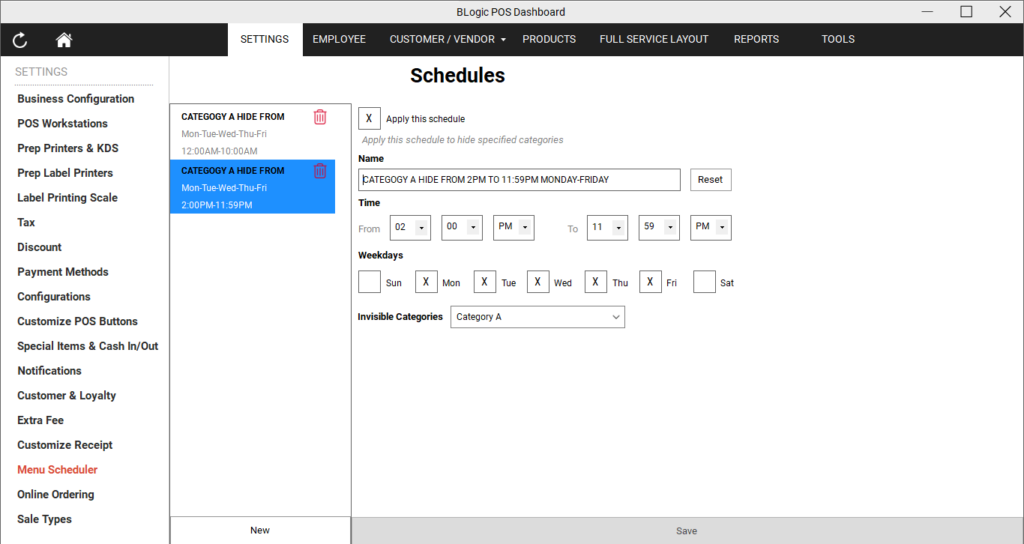
With these schedules in place, the Lunch Menu will only be visible from 10:01 AM to 2:00 PM on the selected days.
TIP
To temporarily hide a created menu schedule, you can set the time from 12AM to 11:59PM.
When hiding menu items during a specific time window, always ensure you create two schedules: one to hide the items before the desired time and another to hide them after. This ensures the items are only visible during the exact time frame you want.
By following these steps, you can easily manage your menu visibility and create a seamless experience for your customers!