Introduction
- The Employee List feature in the Point of Sale (POS) system allows administrators and staff to manage employee assignments, track sales, and handle transactions efficiently.
- This guide provides step-by-step instructions on how to access and use the Employee List, assign employees to a working list, create tickets.
Table of Contents
- Accessing the Employee List
- Understanding the Employee List Interface
- Managing the Working List
- Creating and Managing Tickets
- Handling Payments, Receipts, Voids, and Refunds
- FAQs
1. Accessing the Employee List
To begin using the Employee List feature in the POS system:
- Open the POS System: Launch the POS application on your device.
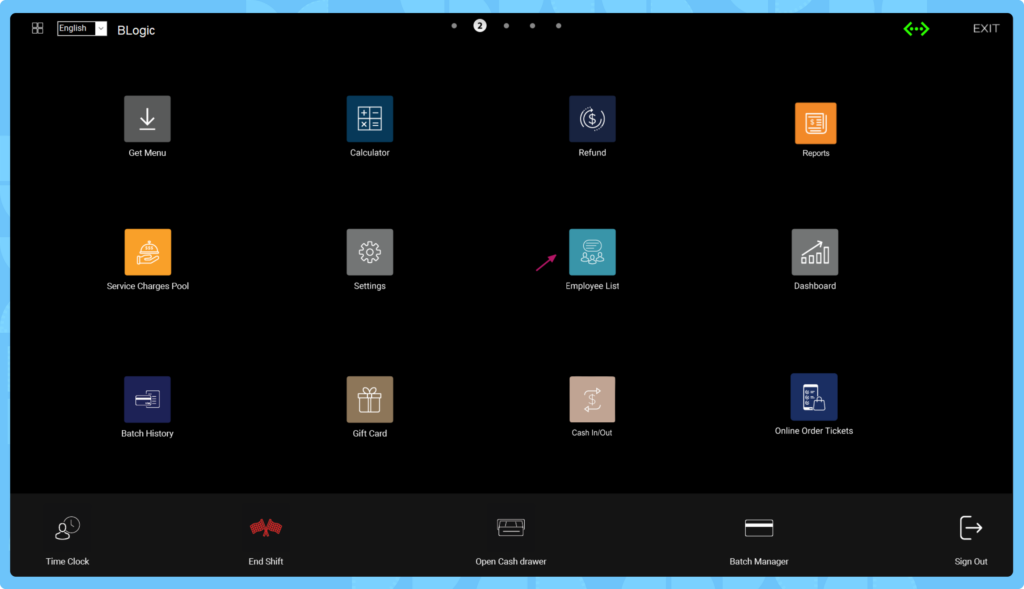
- Find the Employee List Button: On the main screen, locate the “Employee List” button (typically labeled as “EMPLOYEES” or similar).
- Click the Button: Click on the “EMPLOYEES” button to access the Employee List interface.
2. Understanding the Employee List Interface
Once you access the Employee List, you’ll see a list of employees on the left side with their names and current totals (e.g., $0.00 if no sales are recorded). On the right side, there are items or tickets associated with each employee, such as drinks or food items (e.g., Sky, Herradura, Mimosa, etc.), along with their prices and table numbers (e.g., Table 408, Nasty Boiz).
- Yellow Items: Indicate unpaid tickets. These need to be submitted or paid.
- Gray Items: Indicate paid tickets. Clicking on a gray item displays the corresponding receipt.
- Voided/Refunded Items: If a ticket is voided or refunded, it will not appear in the Employee List to keep the interface focused on active tickets.
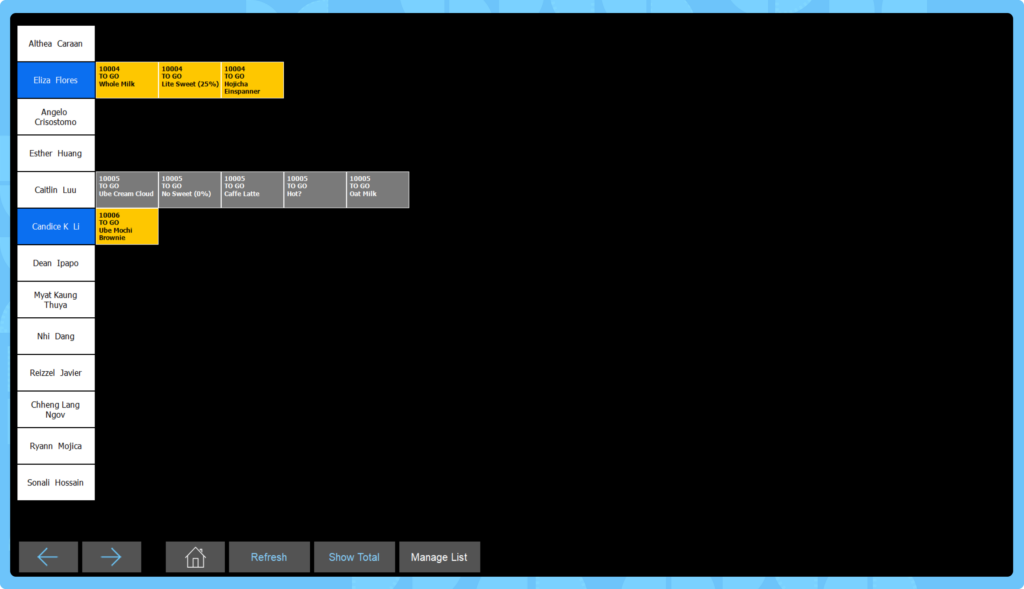
At the bottom of the screen, there are six buttons:
- Navigation Buttons (<-, ->): Use these to scroll through the list of employees if the list is long.
- Home Button: Returns you to the main POS home screen.
- Refresh Button: Refreshes the Employee List to update any changes or new tickets.
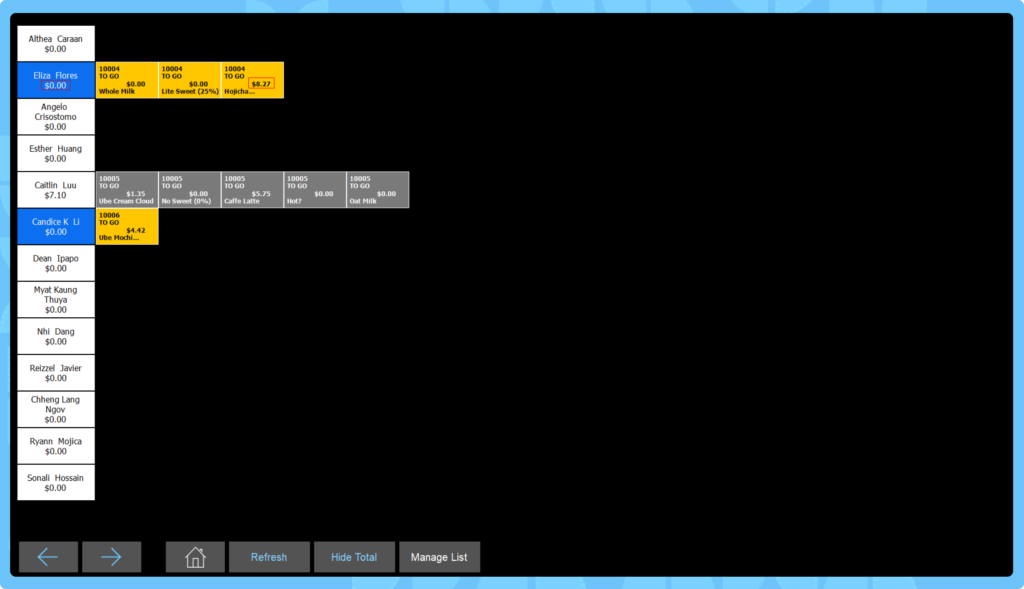
- Show Total Button: Toggles the visibility of the total price for items in the list.
- Manage List Button: Opens a new screen to assign employees to the working list.
Toggles the visibility of the total price for items in the list.
3. Managing the Working List
To assign employees to the working list:
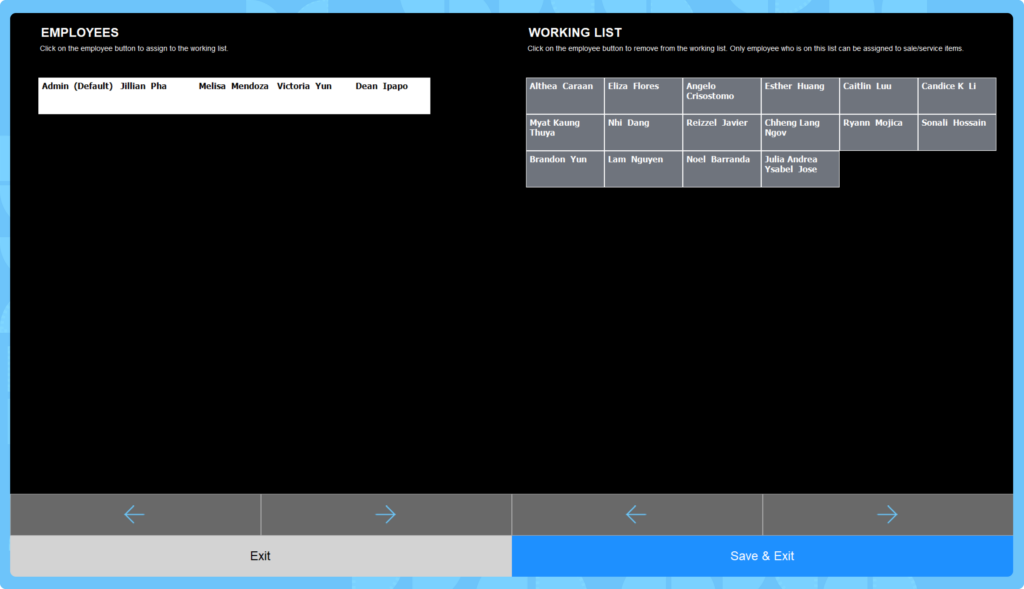
- Click on Manage List: This opens a two-sided screen.
- Left Side: Displays a list of employees who are not yet assigned to the working list (e.g., Abel Medrano, Abimael Yanes, etc.).
- Right Side: Shows employees already in the working list (e.g., Admin, Alejandro Juarez, etc.).
- Assign an Employee: Click on an employee’s name from the left side to add them to the working list on the right side.
- Remove an Employee: Click on an employee’s name from the right side to remove them from the working list (only employees in the working list can be removed).
- Save Changes: Once you’ve made your selections, click the “Save & Exit” button to return to the Employee List.
4. Creating and Managing Tickets
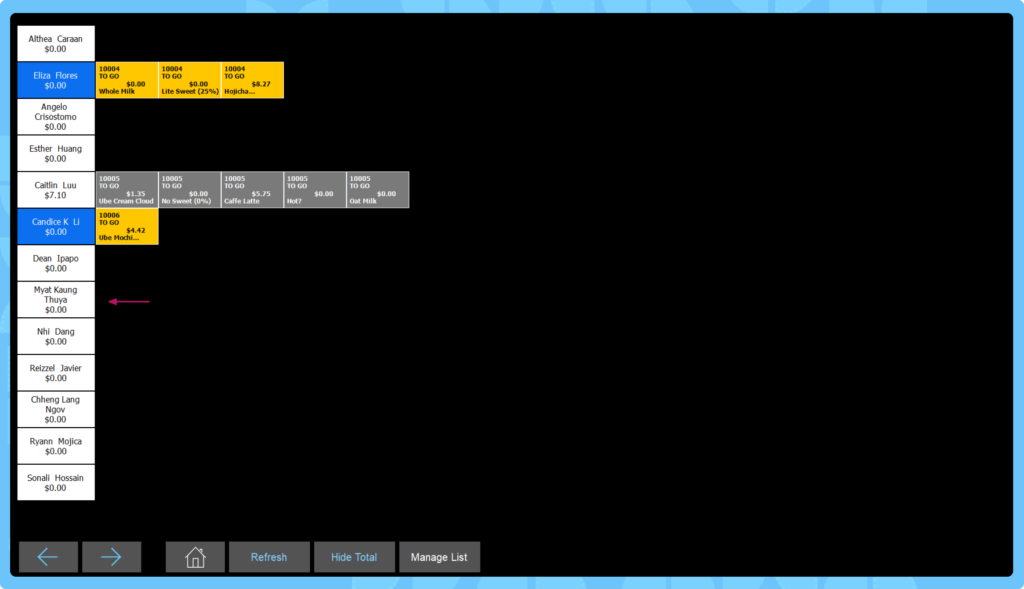
- Select an Employee: Click on an employee’s name in the Employee List (e.g., Alejandro Juarez).
- Create a New Ticket: Clicking on the employee’s name automatically creates a new ticket for them.
- View Existing Tickets: If the employee already has tickets, they will be displayed next to their name. Note that only active (unpaid or paid) tickets are shown—voided or refunded tickets are not displayed in this list.
5. Handling Payments, Receipts, Voids, and Refunds
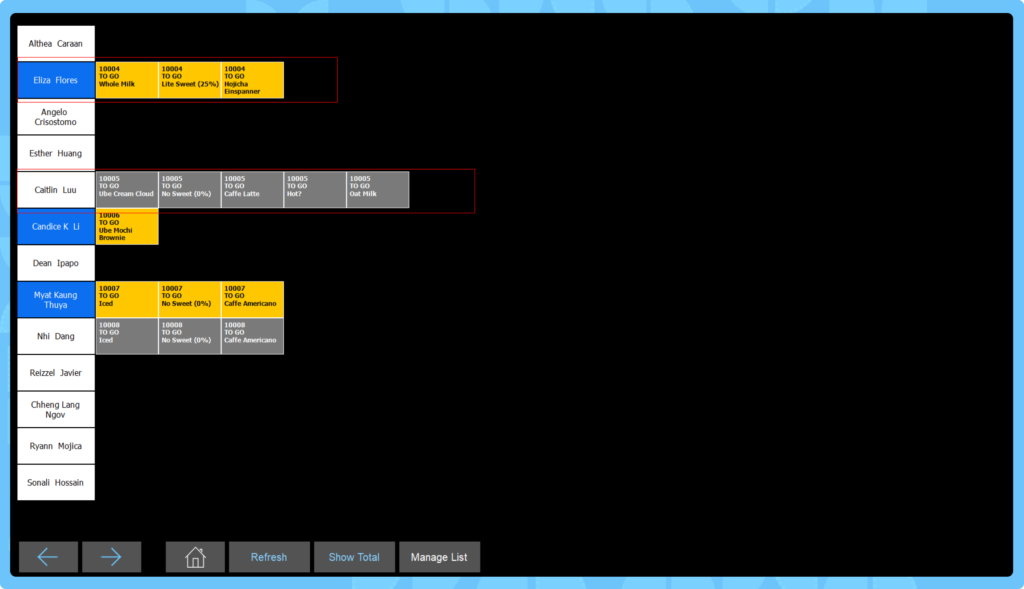
- Unpaid Tickets (Yellow): To submit or pay for an unpaid ticket:
- Click on the yellow item.
- This takes you to the Sale screen where you can submit the ticket or process payment.
- After submission, you’ll return to the Employee List, and the item will turn gray if paid.
- Paid Tickets (Gray): To view a receipt:
- Click on a gray item.
- The system will display the receipt for that transaction.
- Note on Voided/Refunded Tickets: Voided or refunded tickets are not shown in the Employee List to avoid clutter and keep the focus on active transactions. To view a history of voided or refunded transactions, check the transaction logs or reports in the POS system (if available).
FAQs
Q1: Why are some items yellow and others gray?
A: Yellow items represent unpaid tickets that still need to paid. Gray items indicate that the ticket has already been paid, and clicking on them will show the receipt.
Q2: What happens when I click on an employee’s name?
A: Clicking on an employee’s name creates a new ticket for them. Voided or refunded tickets will not be shown.
Q3: How do I assign employees to the working list?
A: Click the “Manage List” button at the bottom of the Employee List screen. On the left side, you’ll see unassigned employees. Click on an employee’s name to add them to the working list on the right side, then click “Save & Exit.”
Q4: How do I return to the main POS screen?
A: Click the “Home” button at the bottom of the Employee List screen to return to the main POS home screen.
Q5: What does the “Hide Total” button do?
A: The “Show Total” button toggles the visibility of the total price for items in the Employee List. This can help declutter the screen if you don’t need to see the totals.
Q6: Why don’t I see voided or refunded tickets in the Employee List?
A: Voided or refunded tickets are automatically removed from the Employee List to keep the interface clean and focused on active tickets.