This guide will walk you through the process of setting up the payment terminal and printer on your self-ordering kiosk device.
1. Setting Up the Payment Terminal
To enable payment processing on the kiosk, you’ll first need to add the terminal to the license and configure it in the kiosk settings.
Steps to Add the Payment Terminal to the License

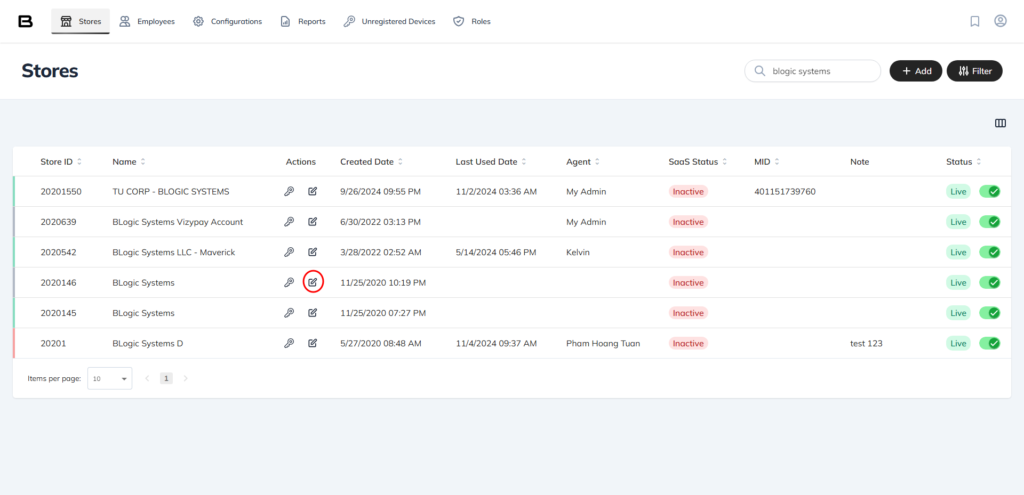
- Select Your Store: Choose the store location associated with the kiosk.
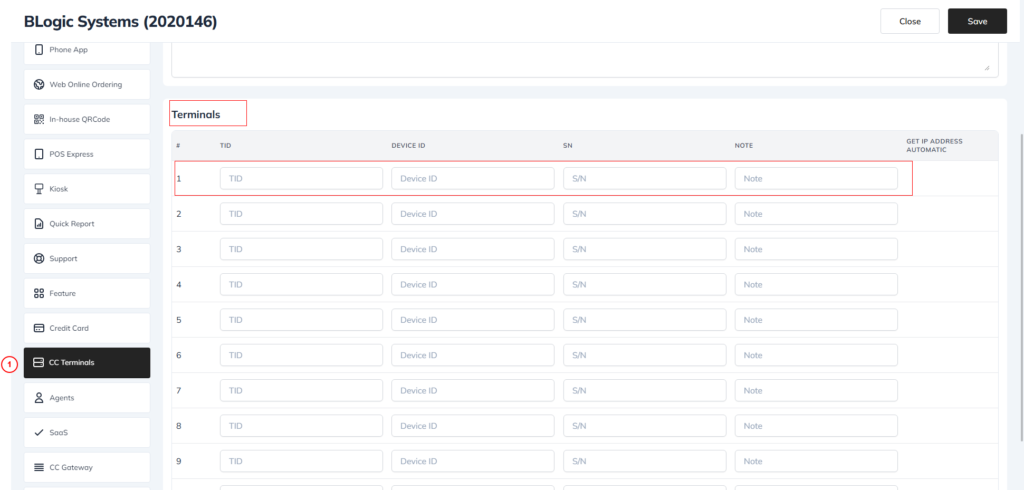
- Access the CC Terminals Tab: Go to the CC Terminals tab.
- Enter Terminal Information: Input the necessary details, including the serial number (S/N) of the terminal device.
- Save Changes: Click on Save to confirm the terminal details.

Note: Make sure to enter the correct serial number (S/N) of the terminal device to avoid setup issues.
Configuring the Payment Terminal in Kiosk Settings
- Access Settings on the Kiosk: Tap 5 times on the footer of the start screen to enter settings mode.
- Open Settings: Select the Settings button.
- Sign In: Log in with your credentials.
- Go to Devices Tab: Within Devices, click on Payment Terminals and follow the prompts to configure the terminal.


2. Setting Up the Printer
To enable printing capabilities for receipts or order confirmations, configure the printer within the kiosk settings.
Steps to Configure the Printer
Accessing Printer Settings
- Enter Settings Mode: Tap 5 times on the footer of the start screen to access kiosk settings.
- Open Settings: Select the Settings button.
- Sign In: Enter your login credentials to access advanced settings.

Configuring the Printer
- Navigate to Devices: In the Devices tab, select Printer.
- Choose Printer: From the list, select the printer model you’re setting up.
- Save Settings: Click Save to confirm your printer selection.

Performing a Test Print
After saving your printer settings:
- Print Test Page: Look for the Print Test option (this may be labeled as Test Print or similar, depending on your kiosk model). Click this option to print a test page.
- Verify Output: Check the test print for clarity and correct alignment. Ensure all elements are printed as expected.

Note: If the test print doesn’t work or the output is unclear, check the printer connection and settings or contact support for further troubleshooting.
With these steps, your kiosk printer should be set up and fully operational, ready to provide receipts and order confirmations.