This guide provides detailed instructions on setting up and using DoorDash delivery through the Web Online Ordering system, from initial configuration to tracking the order.
Step 1: Placing a Delivery Order
Access the Web Order Portal
- Open the Web Order Link
- Visit your store’s designated Web Online Ordering URL.
- Choose Order Type
- When DoorDash delivery is enabled for a store, a dialog box titled Choose Order Type will appear.
- Select DELIVERY to proceed with a delivery order.

Enter Delivery Details

- Enter Delivery Address
- After selecting DELIVERY, a dialog box will prompt for the delivery address.
- Some fields, like State, City, and Zip Code, may automatically fill based on the store’s license settings.
- Provide Accurate Information
- Your Name: Enter the recipient’s full name.
- Your Phone: Provide a valid phone number. This is critical as the Dasher will contact this number during delivery.
- Street Address: Enter the full and accurate address where the order should be delivered.
- Apartment Number or Suite: Add additional location details, such as apartment or suite numbers, if applicable.
- Address Verification
- Click Next to proceed. The system sends the address to DoorDash to verify if delivery is available for that location.
- If the address is valid, you will see a confirmation message. If invalid, you will be prompted to adjust the address.
Configure Delivery Options
- Confirm Address and Delivery Preferences
- Once the address is verified, the system will display the Confirm Address page with the following sections:
- Dropoff Options:
- Hand it to me: The Dasher delivers directly to the recipient.
- Leave it at my door: The Dasher leaves the package at the specified location.
- Delivery Options:
- Standard: Delivery is completed as soon as possible.
- Schedule for Later: Allows customers to specify a delivery time.
- Delivery Instructions:
- Provide additional notes for the Dasher, such as gate codes or specific building entry points.
- Dropoff Options:
- Once the address is verified, the system will display the Confirm Address page with the following sections:
- Save Preferences and Proceed
- After configuring the options, click Save to confirm the delivery setup.

Complete the Order


- Add Items to Cart
- Browse the menu and add desired items to your order.
- Review Delivery Fee
- The system will display the delivery fee during checkout.
- Checkout and Payment
- Review your cart and proceed to checkout.
- Enter payment details to complete the transaction.

- Order Confirmation
- After successful payment, the system will navigate to the Confirm Order page.
- The page displays two options:
- Track Order: Monitor the delivery process in real-time.
- Continue Ordering: Place an additional order.

Step 2: Delivery Process and Status Updates
Real-Time Status Notifications
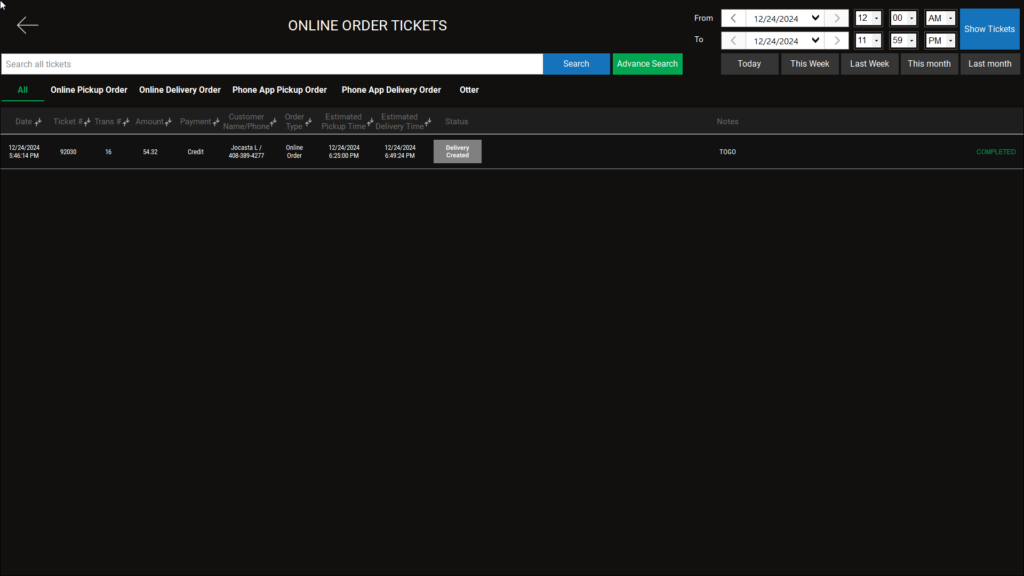
- Delivery Created: The delivery request is created and awaiting assignment to a Dasher.
- Dasher Confirmed: A Dasher is assigned and has accepted the delivery.
- Dasher Arrived at Pickup: The Dasher has arrived at the restaurant to collect the order.
- Delivery Picked Up: The Dasher has picked up the order and is en route to the drop-off location.
- Dasher Arrived at Dropoff: The Dasher has reached the delivery address.
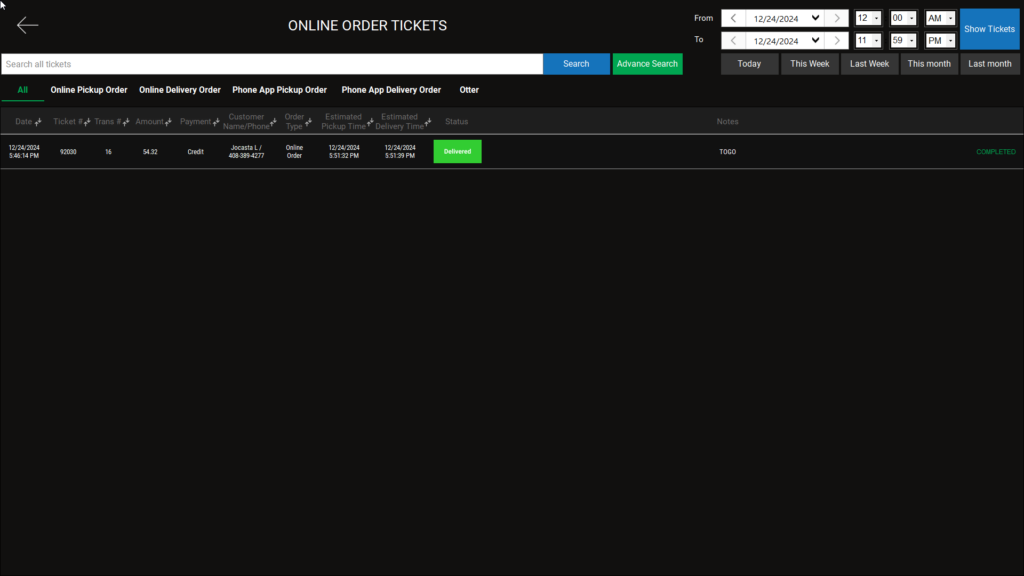
- Delivered: The order has been successfully delivered to the recipient.
- Cancelled: The delivery has been canceled, either by the customer or due to unforeseen issues.

Video
Step 3: Monitor Orders in Point of Sale (POS)
Manage Online Orders on the POS Dashboard
- Check the Status column to see the current state of each order.
Access the Online Paid Ticket Page
- This page allows you to manage all orders placed online.
Order Type and Status
- Use the Order Type column to differentiate between pickup and delivery.

