Introduction
This article shows you how to turn on the Print button on KDS tickets and print only the items you need. Printing from a ticket never fulfills items, so you can print or reprint at any time without changing the ticket.
Version Support
| Product / Module | Supported Version |
|---|---|
| KDS app | v2.1.6 or later |
| POS | v7.11.11.2026 |
Note: If you do not see this option, please contact Support to confirm your store is on a supported version.
Table of Contents
- Turn on the Print button
- Print selected items from a ticket
- Print partially or fully fulfilled items
- Where to view or confirm the result
- FAQ
Turn on the Print button
The Print button is off by default. Turn it on separately on each KDS device that needs it.
Step 1: Open Print Settings
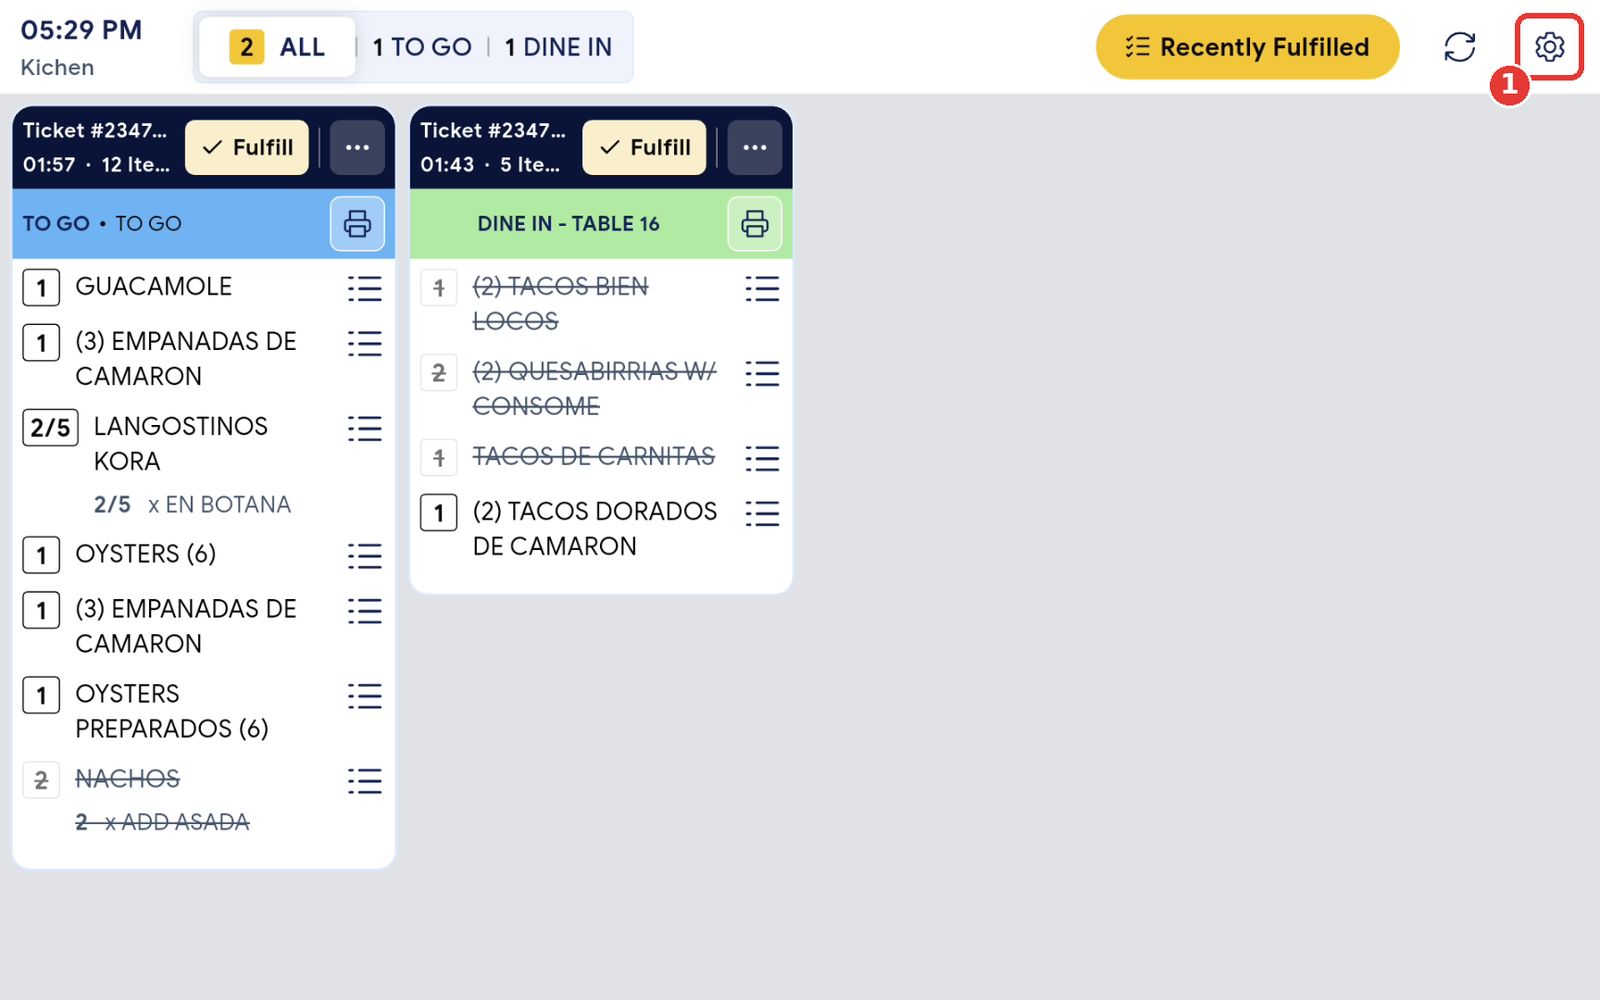
- On the KDS, tap the Settings icon at the top right.
- Select Fulfillment & Printing.
- Scroll to Print Settings.
Step 2: Turn on Show Print button on tickets
- Turn on Show Print button on tickets. It sits directly below Auto-print on fulfill.
- Tap Save.
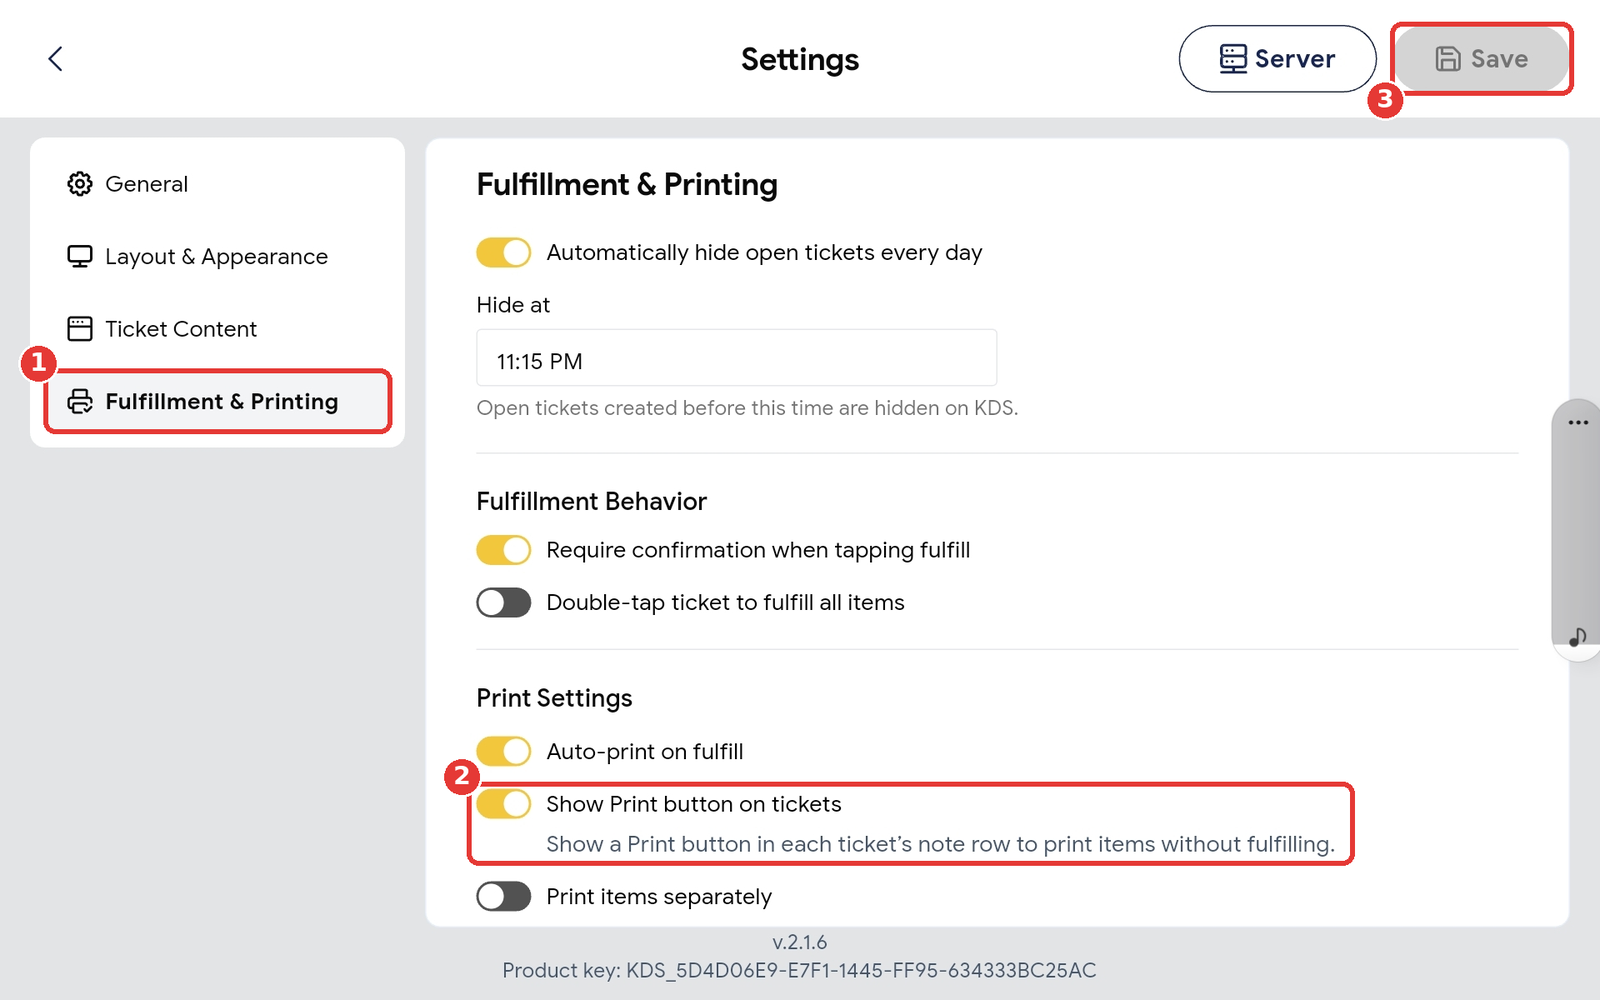
Note: This setting only adds a Print button. It does not change Auto-print on fulfill, so tickets still print on fulfill exactly as before.
Tip: The setting is saved per device. If your kitchen has more than one KDS, repeat these steps on each one.
Print selected items from a ticket
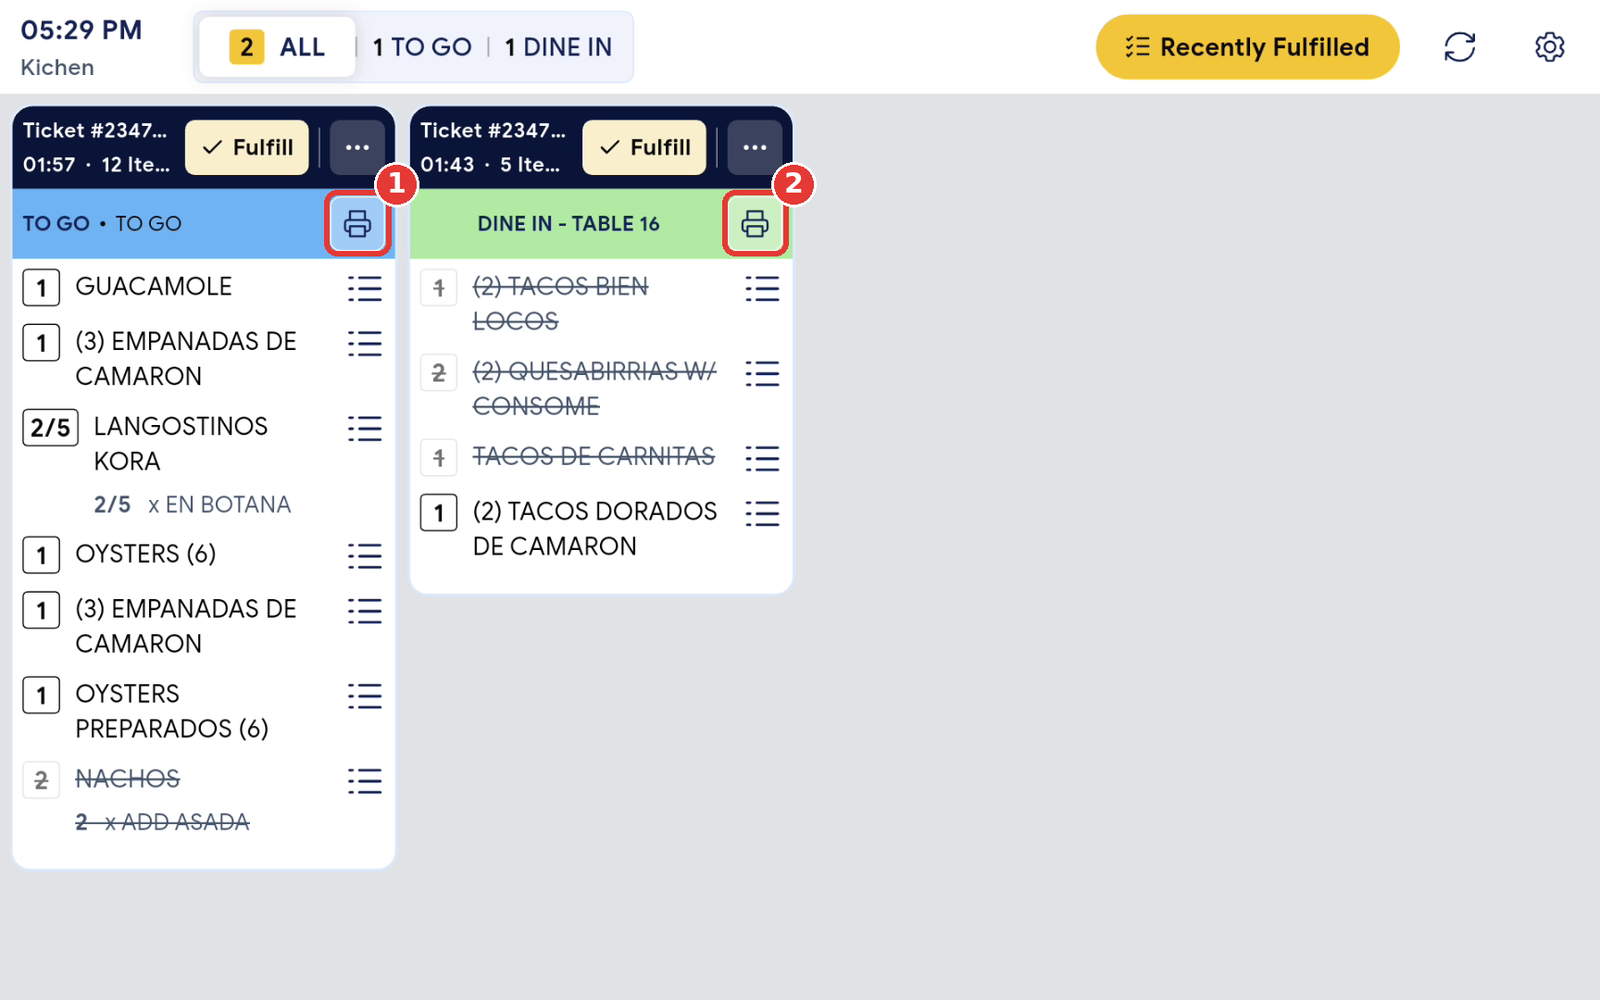
Once the setting is on, every ticket shows a Print button at the right of its note row (the blue To go row or the green Dine in row).
Step 1: Open the Print dialog
- Find the ticket on the KDS board.
- Tap the Print button in the ticket’s note row.
Step 2: Choose the items to print
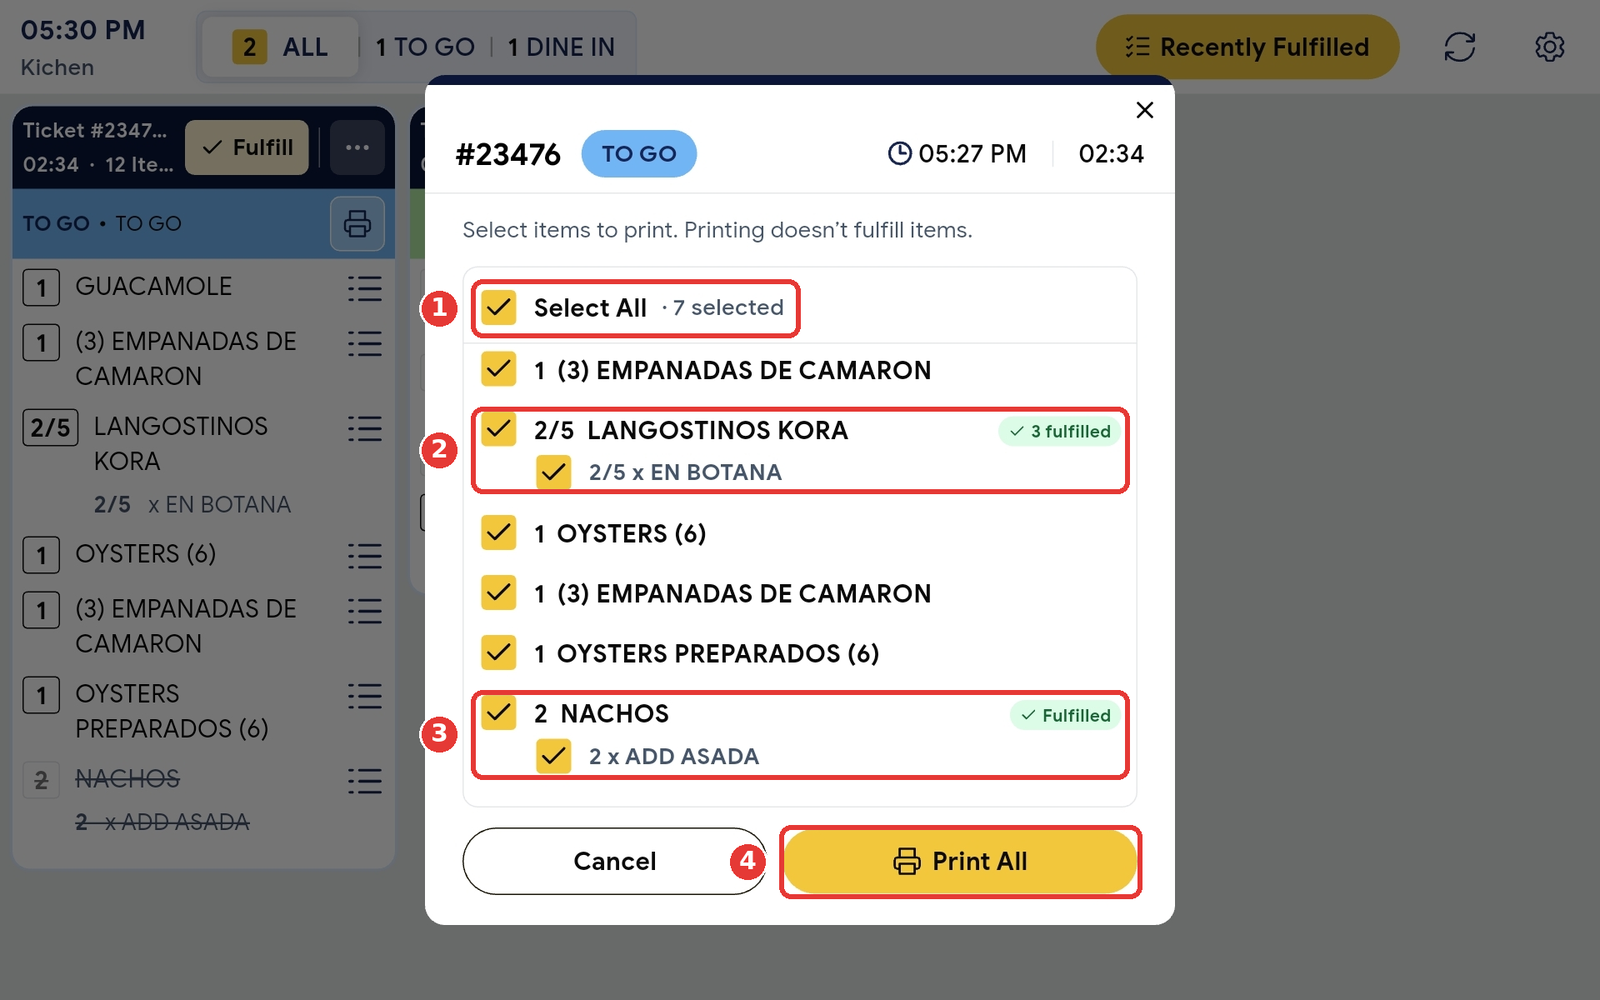
- All items on the ticket are selected for you, including fulfilled items.
- Untick any item you do not want to print, or tick Select All to choose everything.
- Check the count next to Select All (for example, 2 selected).
Step 3: Print
- Tap Print (n) to print the selected items, or Print All when every item is selected.
- The dialog closes and the slip prints. The items stay open on the ticket.
Note: Each item prints with its modifiers. Your Print items separately and Ticket count settings still apply.
Warning: The Print button is greyed out on Not Submitted tickets. Submit the order first, then print.
Print partially or fully fulfilled items
The Print dialog always lists every item on the ticket, so you can see what is done and what is left.
| On the ticket | In the Print dialog | What prints when ticked |
|---|---|---|
| Not started (for example 3 Taro Smoothie) | 3 Taro Smoothie, selected | All 3 |
| Partially fulfilled (for example 1/3 Taro Smoothie) | 1/3 Taro Smoothie with a 2 fulfilled badge, selected | Only the 1 still open |
| Fully fulfilled (for example Beef Stew Noodles) | 1 Beef Stew Noodles with a Fulfilled badge, selected | The full quantity again (reprint) |
Note: To reprint the part of an item that is already fulfilled (for example the 2 finished Taro Smoothies), use Recently Fulfilled.
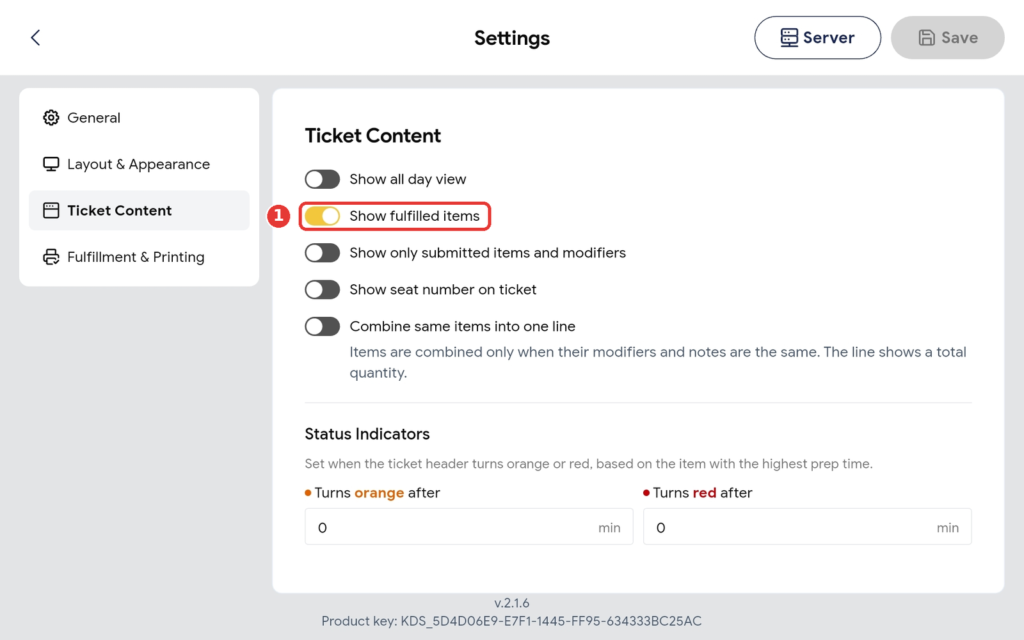
Tip: The Print dialog shows fulfilled items even when Show fulfilled items is turned off in Ticket Content, so you can always reprint from the ticket.
Where to view or confirm the result
- Kitchen printer: the slip lists only the items you selected, with their modifiers.
- KDS board: the printed items are still open on the ticket. Nothing moves to Recently Fulfilled.
- Settings: Show Print button on tickets stays on for that KDS until you turn it off.
FAQ
1. Why can’t I see the Print button on my tickets? Check that Show Print button on tickets is turned on and saved on this KDS. The setting is per device. If you still cannot see it, contact Support to confirm your version.
2. Does printing from a ticket fulfill the items? No. Printing never fulfills items. They stay open on the ticket until you fulfill them.
3. Does this change Auto-print on fulfill? No. Auto-print on fulfill works exactly as before. The Print button is an extra way to print.
4. Why is the Print button greyed out on some tickets? The ticket is Not Submitted. Submit the order first, then print.
5. How do I reprint items that are already finished? Fully fulfilled items can be ticked in the Print dialog. For the finished part of a partially fulfilled item, use Recently Fulfilled.
Closing
If you still need help, please contact Support for further assistance.