Step 1: Access License Settings
- Open the License section in your POS system.
- Select the store you wish to configure.
Step 2: Navigate to Online Ordering Settings
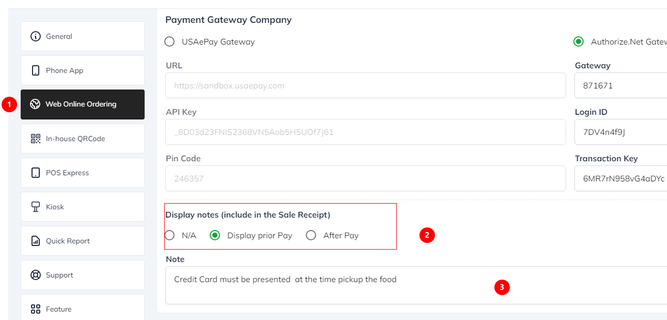
- Click on the Web Online Ordering tab.
Step 3: Configure Display Notes

- In the Display Notes (Include in the Sale Receipt) section, you will find three options:
N/A: Select this option if you do not want to display any notes.
Display Prior to Payment: Choose this option to show the note before the payment process begins.

Display After Payment: Select this option to show the note after the payment has been successfully completed.

Customize the note as needed in the provided field.
Step 4: Save Changes
Click Save to apply your settings.