Step 1: Open the POS Dashboard.
- Log into your POS system and navigate to the main dashboard.
Step 2: Select Products.
- From the dashboard menu, click on “Products” to view the list of available items.
Step 3: Choose the item you want to edit.
- Browse or search for the specific item you need to update, and click on it to open its details.
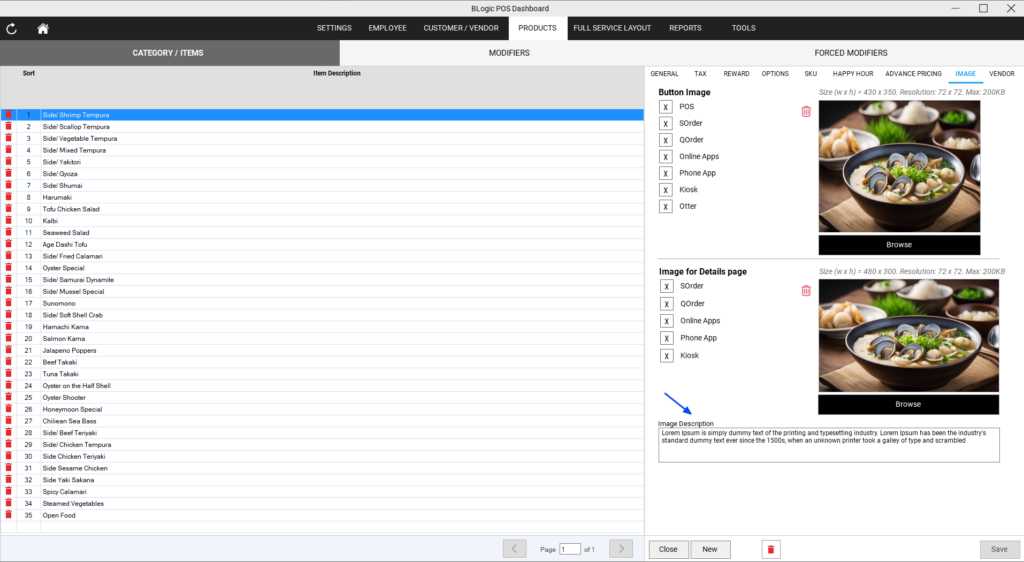
Step 4: Click on the Image section.

- Find and select the “Image” tab or section in the item details screen.
Step 5: Enter information in the Image Description text area.
- The image section will have a text area labeled “Image Description.” Enter the detailed description of the item in this field.
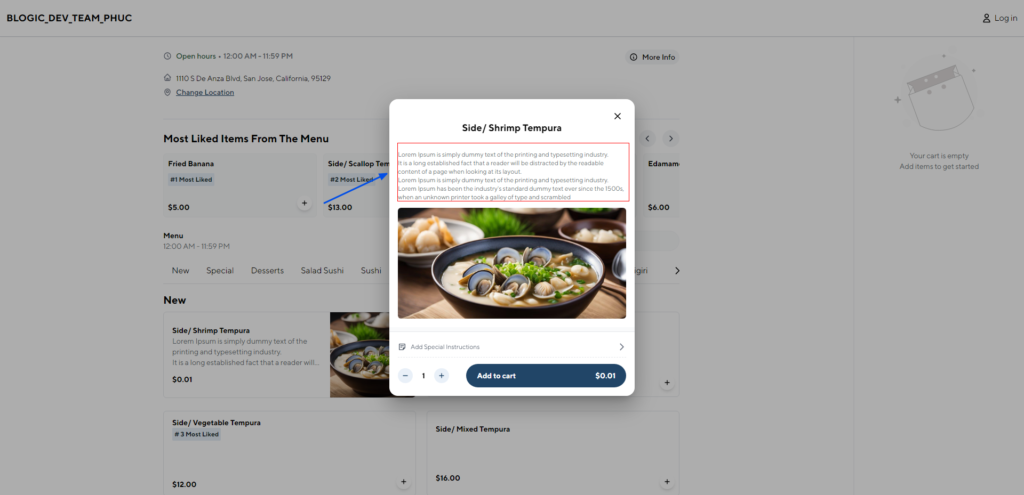
Step 6: Save and verify the changes.
- After entering the description, click Save.
- Go to the web interface and verify that the updated description is displayed correctly

Steps to Display Descriptions for an Item on the Menu List
- Open the POS Dashboard
- Log into your POS system and go to the main dashboard.
- Select Products
- From the dashboard menu, click on “Products” to view the list of items.
- Choose the Item to Edit
- Find the specific item you want to update and click on it to open its details.
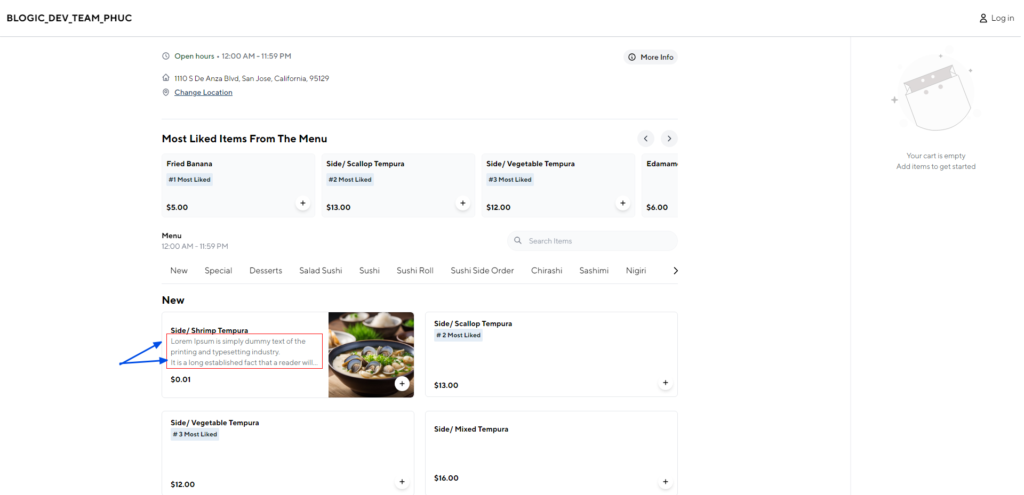
- Add Description to the Menu List
- Step 1: Click on the General tab.
- Step 2: In the General section, find the fields for Description 1 and Description 2.
- Step 3: Enter the desired information into these fields.
- Description 1 can be a short summary of the item.
- Description 2 can provide additional details or features.
- Save and Verify
- Once you have entered the descriptions, click Save.
- Verify that the descriptions are correctly displayed on the menu list on the web interface.

