This guide walks you through uploading images for menu items on your KIOSK. Follow the steps below for a smooth process.
Steps to Upload Images for Menu Items
1. Open POS Dashboard
Log in to your POS Dashboard.
2. Navigate to Products
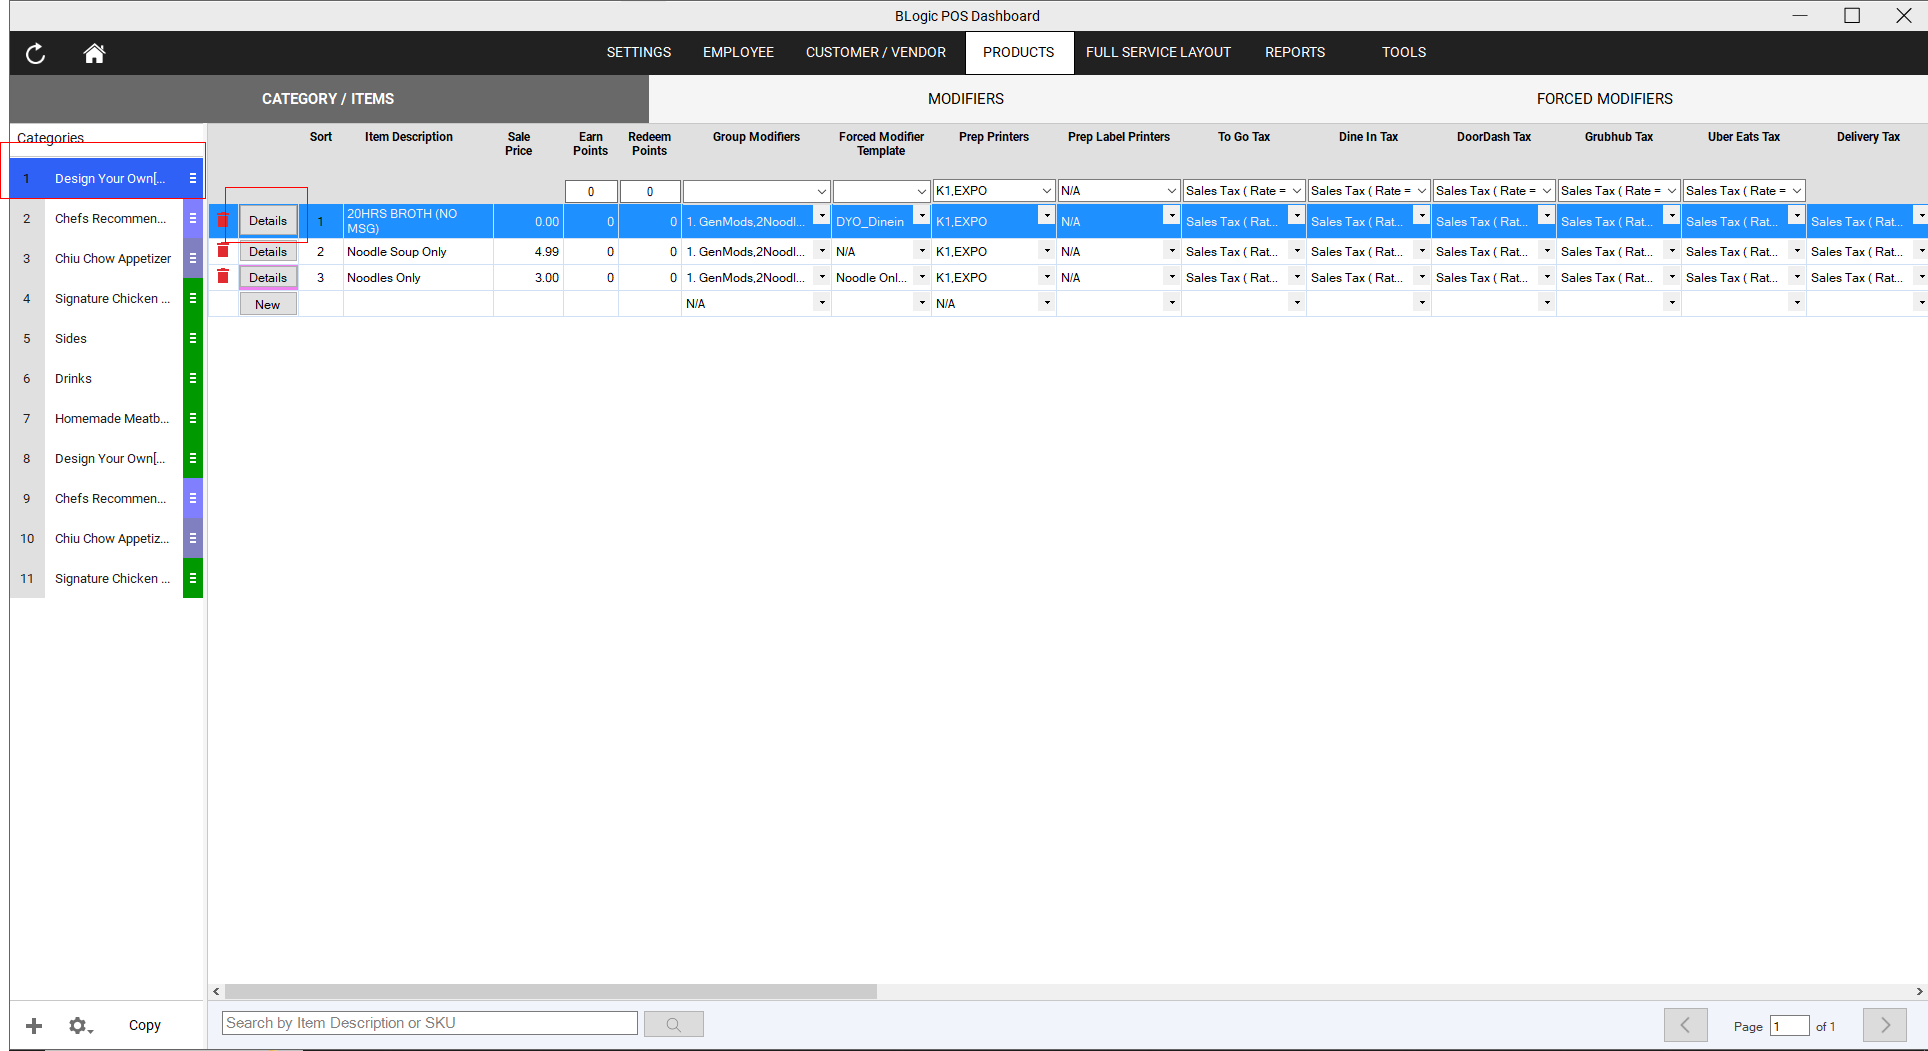
- On the dashboard menu, click Products.
3. Select the Desired Category
- Choose the category that contains the items you want to update.
4. Locate the Item
- Find the item you want to update.
- In each row, locate the Details button.
5. Open Item Details
- Click the Details button.
- Look at the right side of the screen to access all item settings.
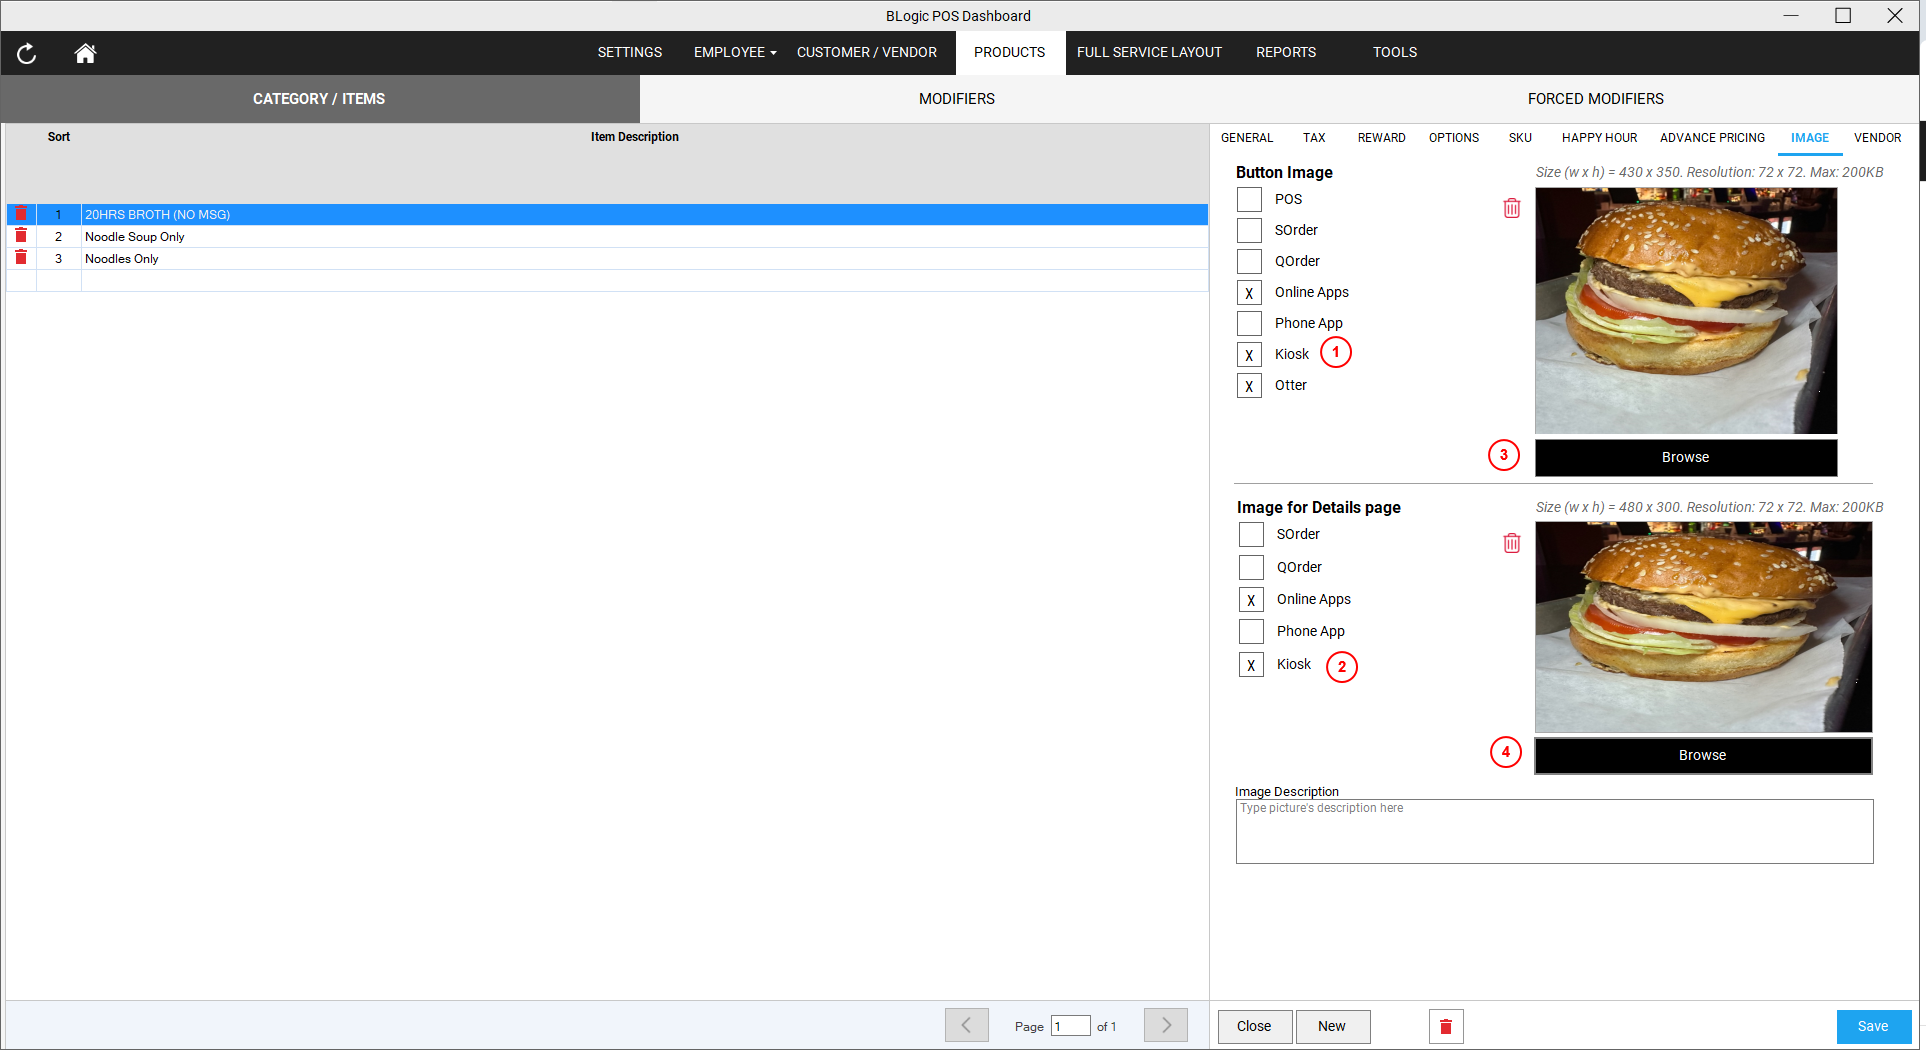
6. Go to the Image Tab

- Click on the Image tab.
- Here, you will find options for uploading images:
- Image: This is the primary image displayed on the menu.
- Image for Details Page: This image appears when customers click to view item details.
7. Check the KIOSK Checkbox
- Ensure the KIOSK checkbox is selected for both the Image and Image for Details Page options.
8. Upload Images
- Click Browse to upload your images.
- Choose images that meet the size requirements provided in the instructions.
9. Complete Upload and Setup
- Once the images are uploaded, save the changes.
10. Preview on KIOSK
- Check your KIOSK to ensure the images display correctly on the menu and details page.
Image Size Guidelines
- Use images that are clear and appropriately sized to meet the KIOSK display standards.
- Follow any specific size instructions mentioned in the POS Dashboard.
By completing these steps, your menu items will have updated, visually appealing images displayed on the KIOSK.