Introduction
This article covers everything you need to know about the Customer Survey feature. You will learn how to configure the survey form in BLogic View, how customers see and submit the form on Online Ordering, and how to review and export submitted survey responses. This feature helps you collect customer feedback directly at the point of ordering and review it all in one place.
Version Support
| Product / Module | Supported Version |
|---|---|
| BLogic View – Survey | 2026.06.04 |
| Online Ordering (Web Order) |
Note: If you do not see this option, please contact Support to confirm your store is on a supported version.
Table of Contents
- Configure the Survey Form
- Manage Predefined Fields
- Add and Manage Custom Questions
- Save or Cancel Changes
- How the Form Appears to Customers
- View Survey Responses
- FAQ
Configure the Survey Form
The survey form is configured from the BLogic View dashboard. Only Store Owners and Managers can access and edit this configuration.
Step 1: Open the Survey Form configuration screen
- Log in to your BLogic View dashboard.
- Go to the Survey module from the main navigation.
- Select the Survey Form or Configuration tab.
Step 2: Understand the two-panel layout
The configuration screen is divided into two sections:
- Left panel — Configure Customer Survey Settings: Controls general settings for the survey.
- Right panel — Survey Form Preview: Shows how the form looks to customers. This panel is in view-only mode by default — you cannot edit it directly here.
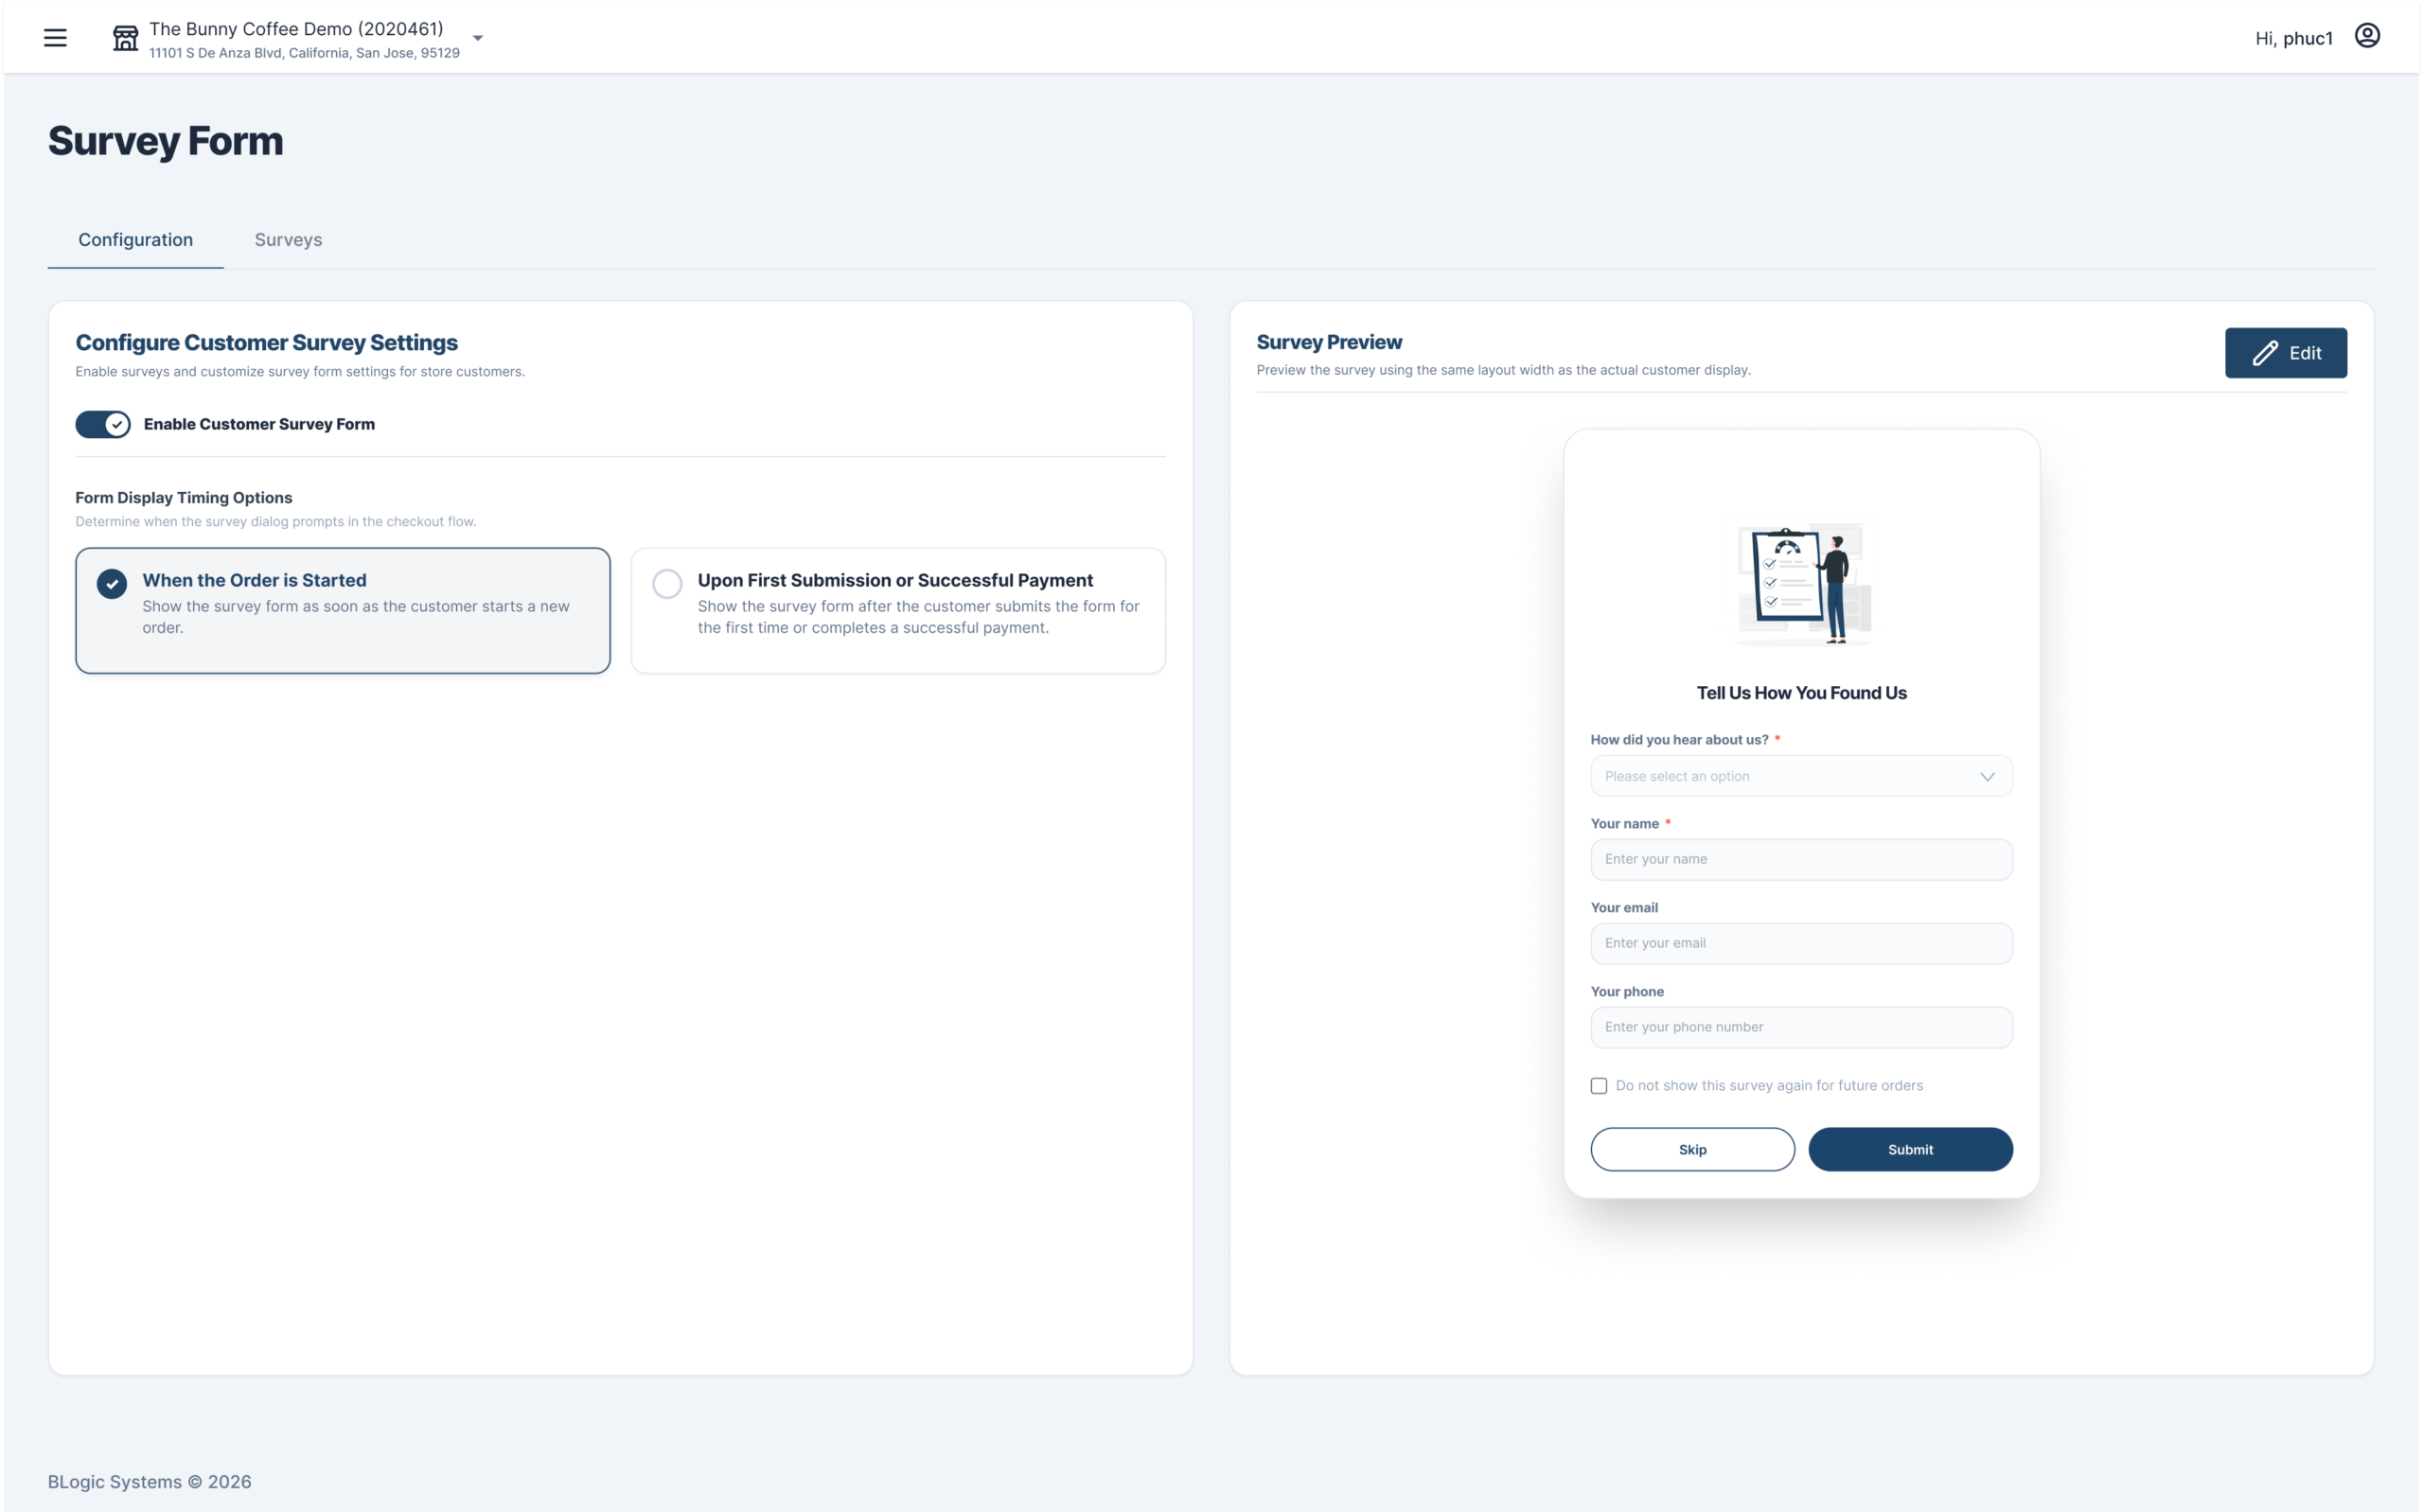
ℹ️ Note: To make changes, you must click Edit on the preview panel. You cannot edit the form from view-only mode.
Step 3: Enter edit mode
- On the Survey Form Preview panel (right side), click the Edit button.
- The system opens the survey form in edit mode.
- All previously saved fields and questions are displayed.
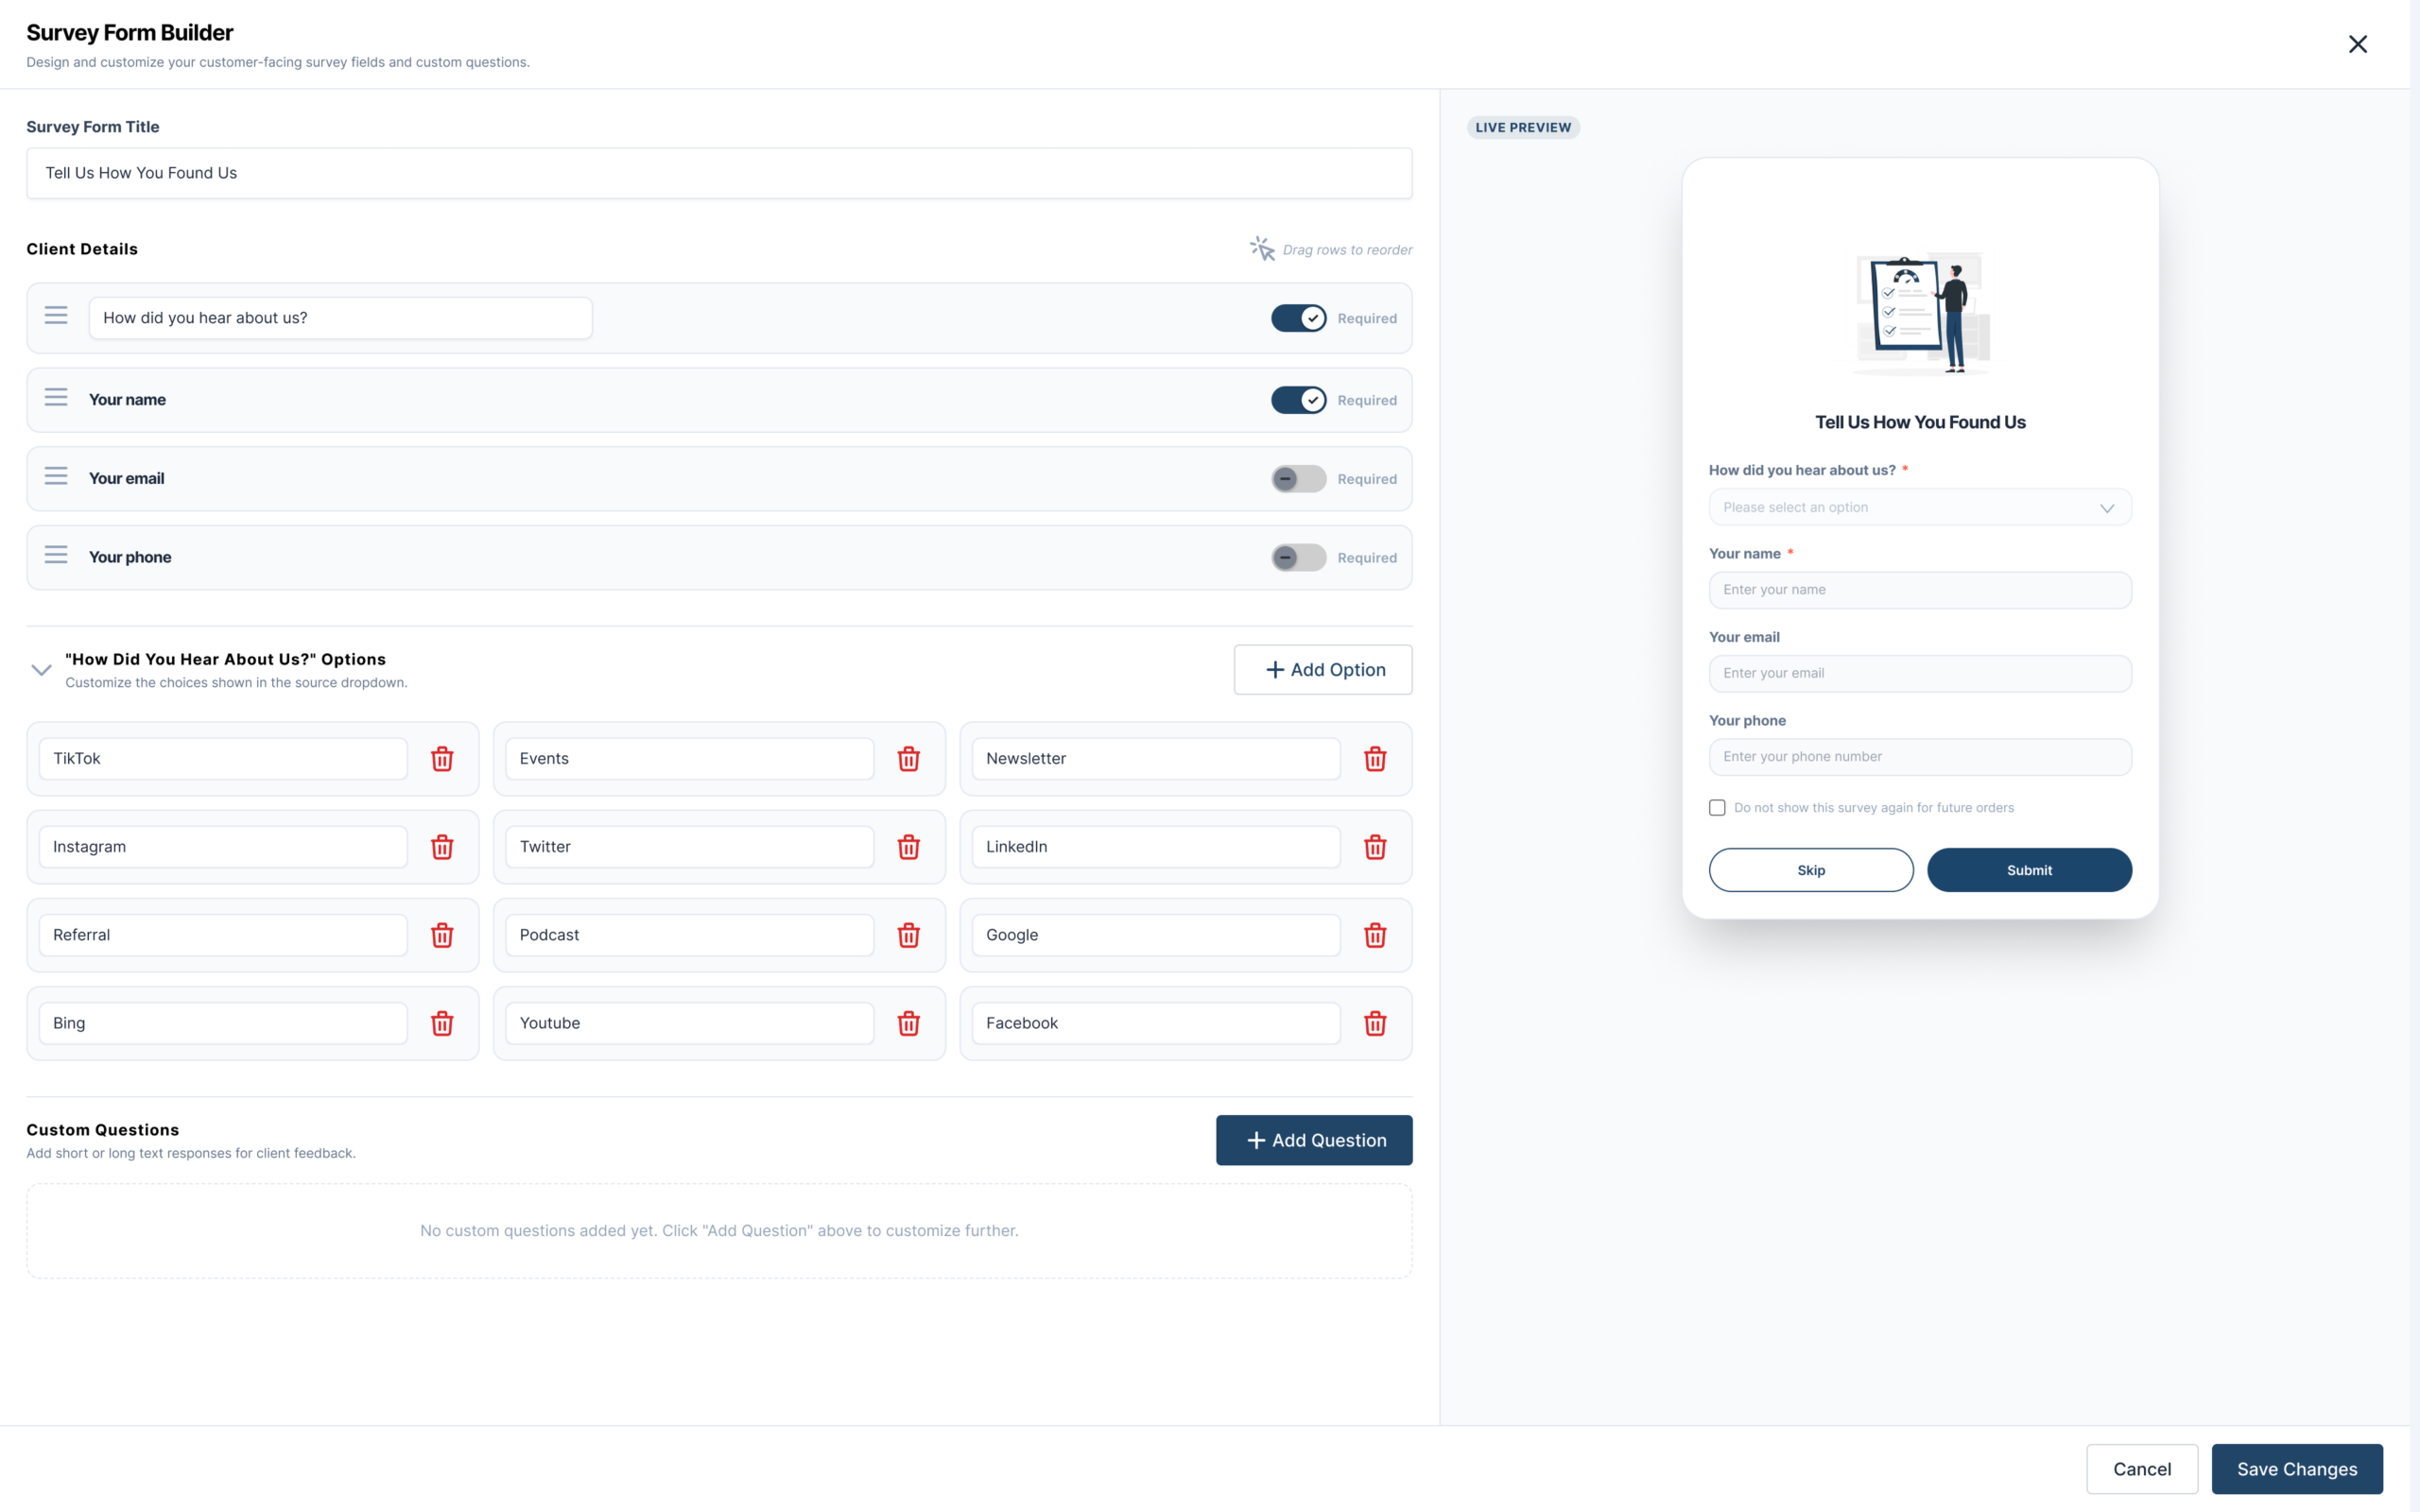
Manage Predefined Fields
The following fields are always included in the survey and cannot be deleted:
| Field | Default Status | Can Change to Un-required? |
|---|---|---|
| Your name | Required | ❌ No — always Required |
| How did you hear about us? | Required | ❌ No — always Required |
| Your email | Un-required | ✅ Yes |
| Your phone | Un-required | ✅ Yes |
⚠️ Warning: The Required toggle for Your name and How did you hear about us? is permanently locked. These two fields will always be Required and cannot be changed.
Step 1: Reorder predefined fields
- In edit mode, locate the predefined fields section.
- Drag and drop each field to your preferred order.
- The order you set here is the order customers will see on the survey form.

Add and Manage Custom Questions
You can add extra questions to collect specific feedback from your customers.
Step 1: Add a new custom question
- In edit mode, scroll to the Custom questions section.
- Click Add question.
- A new question row appears with:
- Default type: Short answer
- Default required status: Un-required
- Enter your question text.
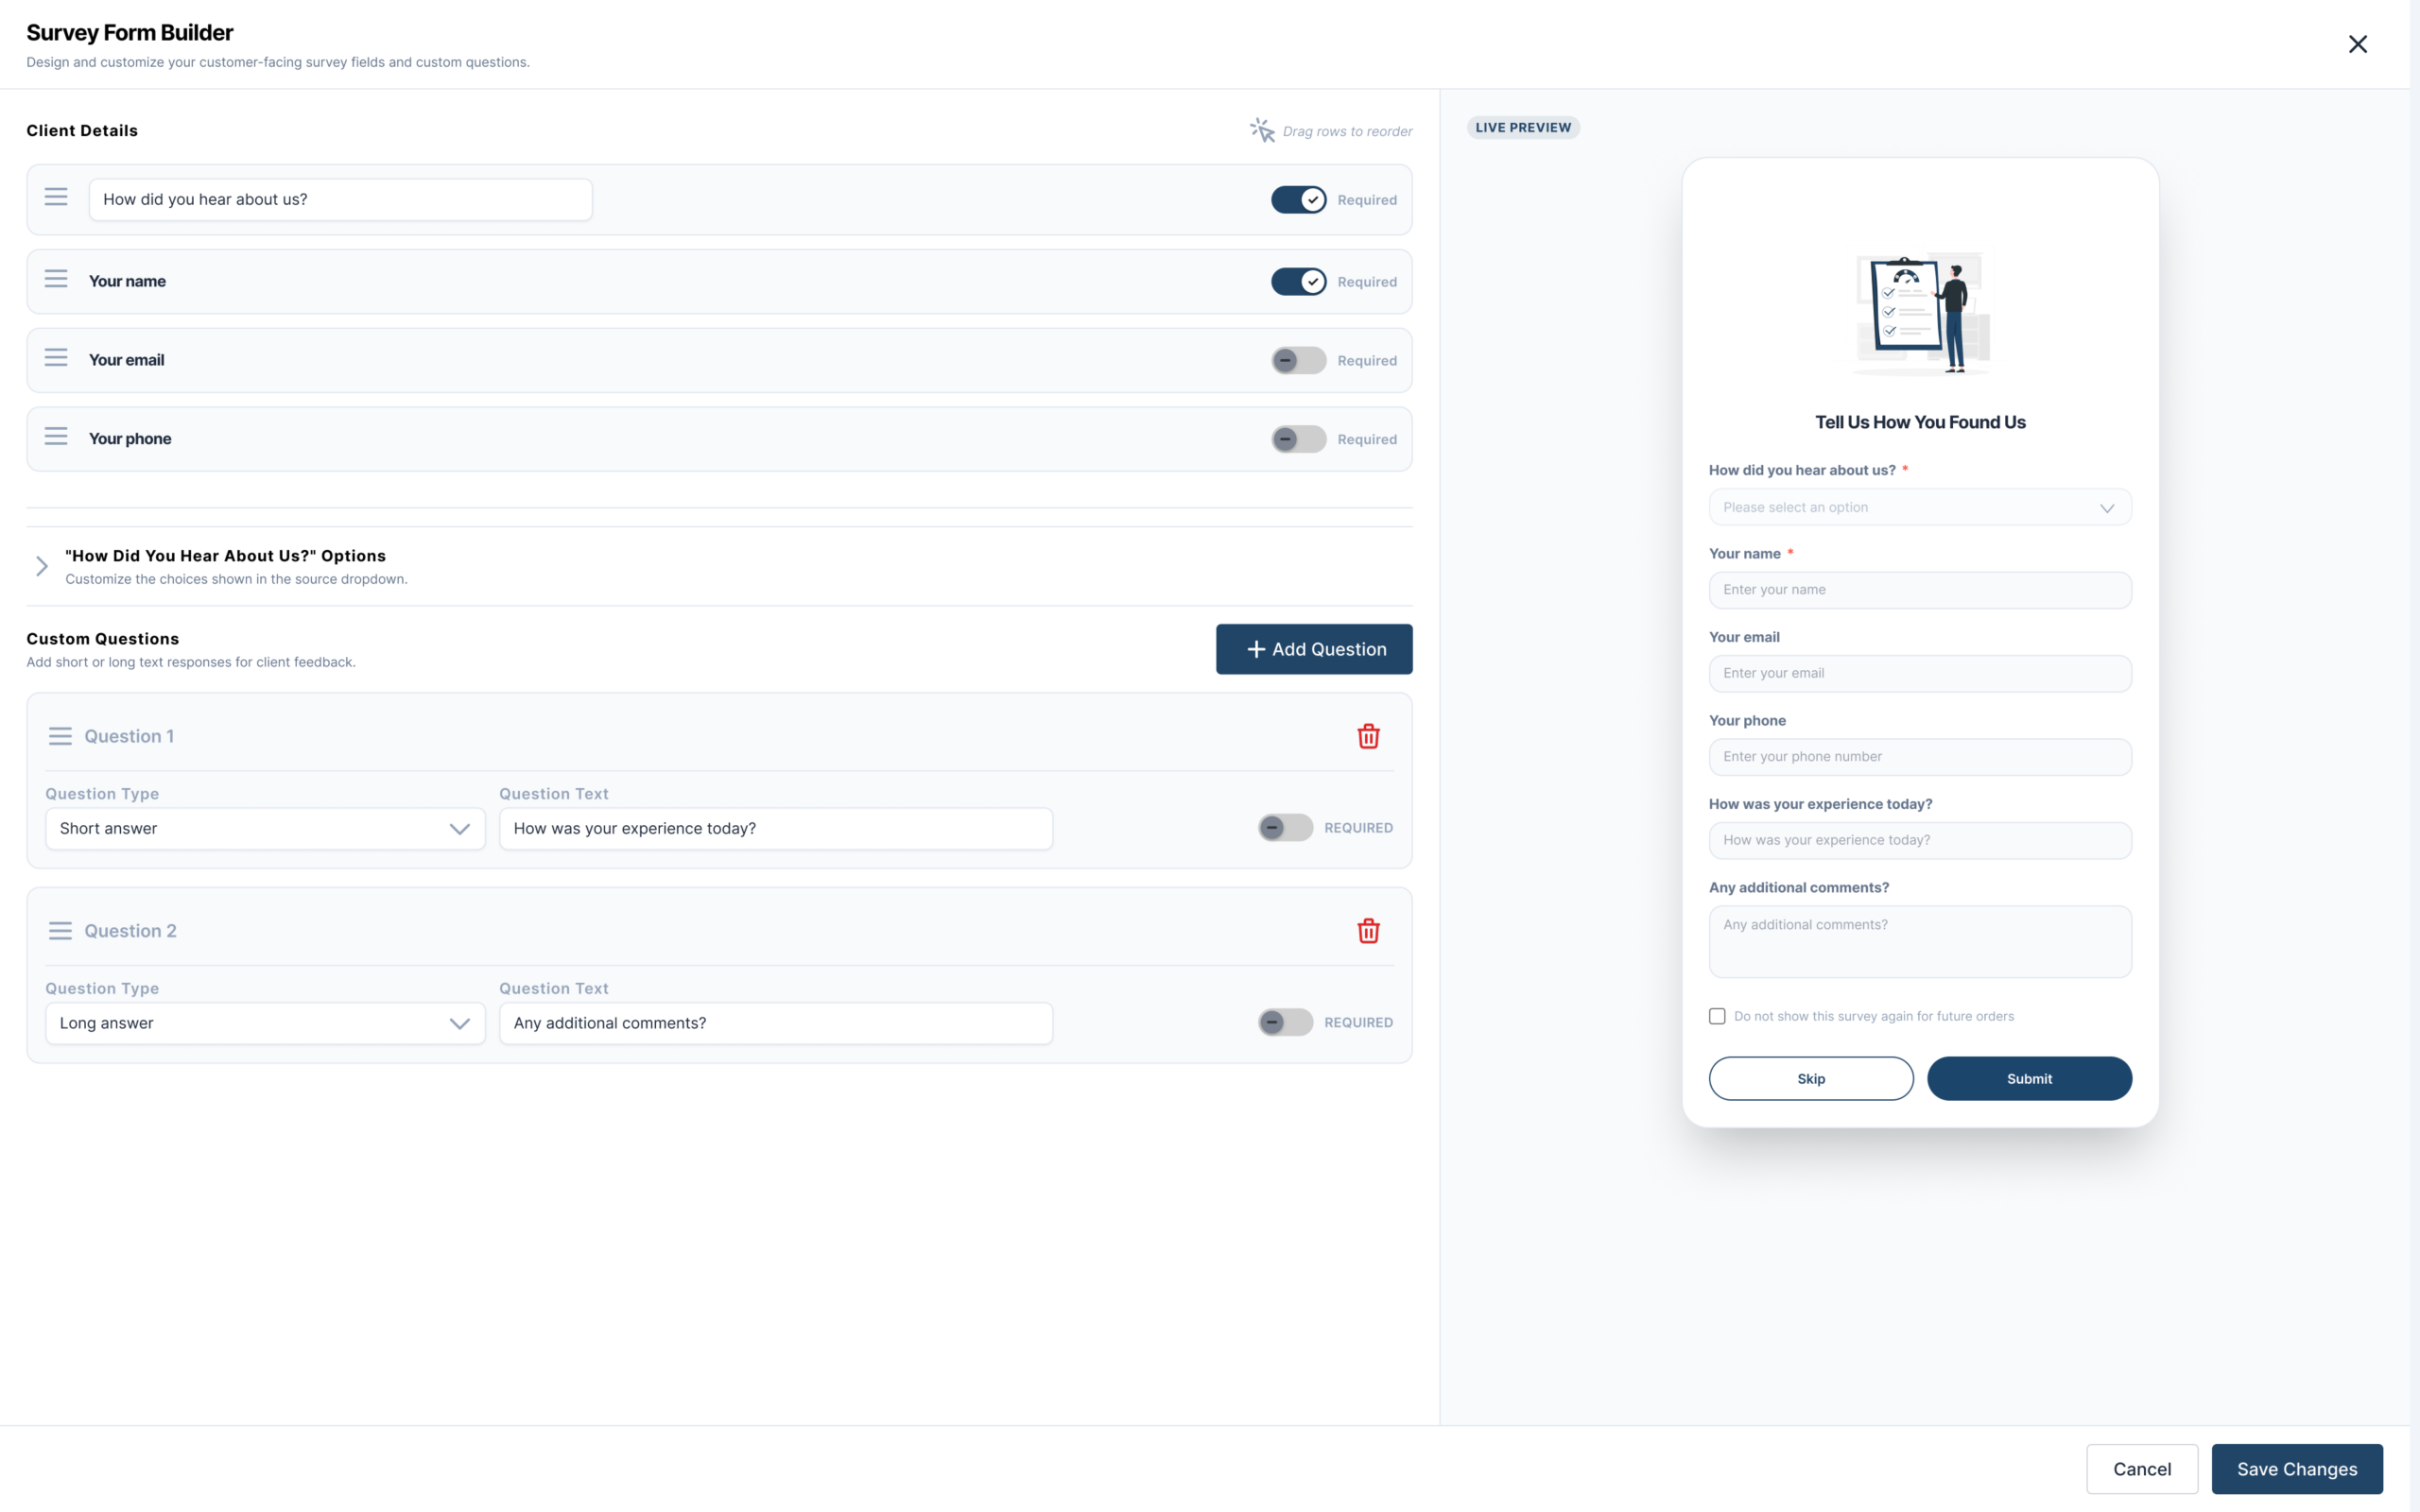
Step 2: Set a custom question as Required (optional)
- Locate the question you want to update.
- Toggle the Required switch to On.
- The customer will see a red
*next to this question on the survey form.
Step 3: Reorder custom questions
- Drag and drop questions to rearrange them as needed.
Step 4: Delete a custom question
- To delete a single question, click the Delete icon next to it.
- To remove all custom questions, click Delete all questions.
✅ Tip: Only custom questions can be deleted. Predefined fields (Your name, Your email, Your phone, How did you hear about us?) are permanent and cannot be removed.
Save or Cancel Changes
Step 1: Save your changes
- After completing your edits, click Save changes.
- The system saves the configuration and refreshes the Survey Form Preview to reflect the latest saved version.
Step 2: Cancel without saving
- Click Cancel or close the edit popup without clicking Save changes.
- All unsaved changes are discarded.
- The Survey Form Preview continues to display the last saved configuration — it is not affected by cancelled changes.
How the Form Appears to Customers
Once the configuration is saved, customers will see the updated survey form the next time the survey popup appears during the Online Ordering experience.
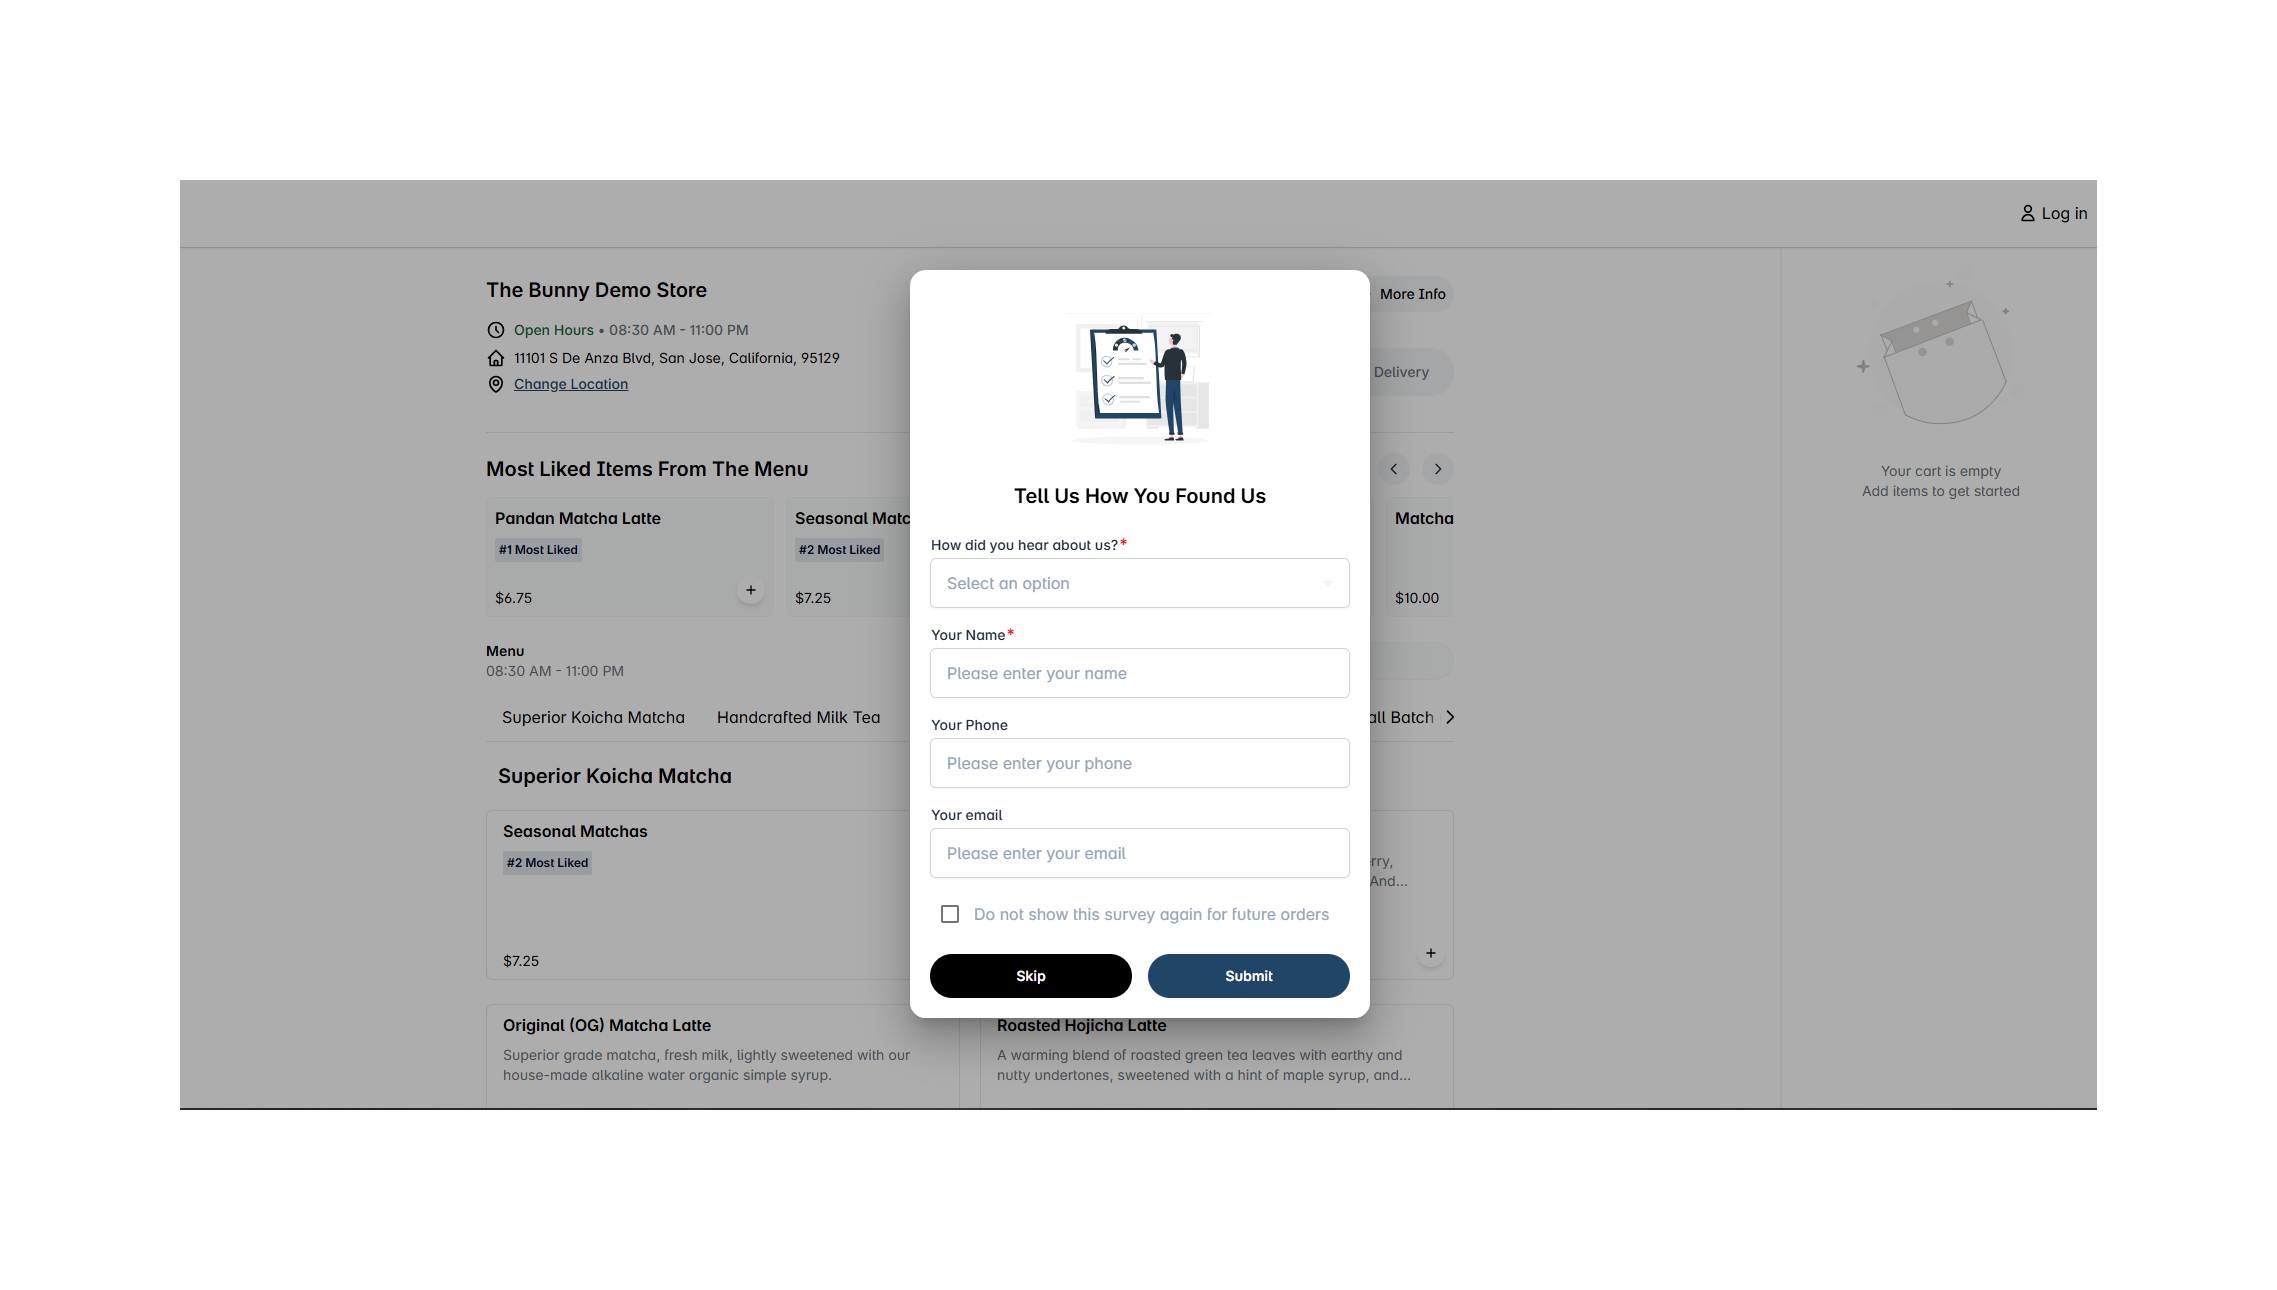
What the customer sees:
- Fields and questions are shown in the exact order configured by the Store Owner.
- Fields configured as Required display a red
*next to the label. - Fields configured as Un-required have no
*. - Custom questions appear below the default fields if they have been configured.
- If no custom questions are set up, that section is not shown to the customer.
When the customer submits the form:
- The customer fills in all required fields (marked with
*). - The customer clicks Submit.
- The system validates all required fields before saving.
- If any required field is empty, the form cannot be submitted and a validation message appears next to the missing field.
- If all required fields are completed, the response is saved to the database and the popup closes.
ℹ️ Note: Customers can also click Skip to dismiss the form without submitting, or select Do not show this survey again to stop the popup from appearing in future sessions.
View Survey Responses
All submitted survey responses are available in the Surveys tab in BLogic View.
Step 1: Open the Surveys tab
- Log in to your BLogic View dashboard.
- Go to the Survey module.
- Click the Surveys tab.
ℹ️ Note: A tip message is displayed at the top of this screen to help explain the data in the table.
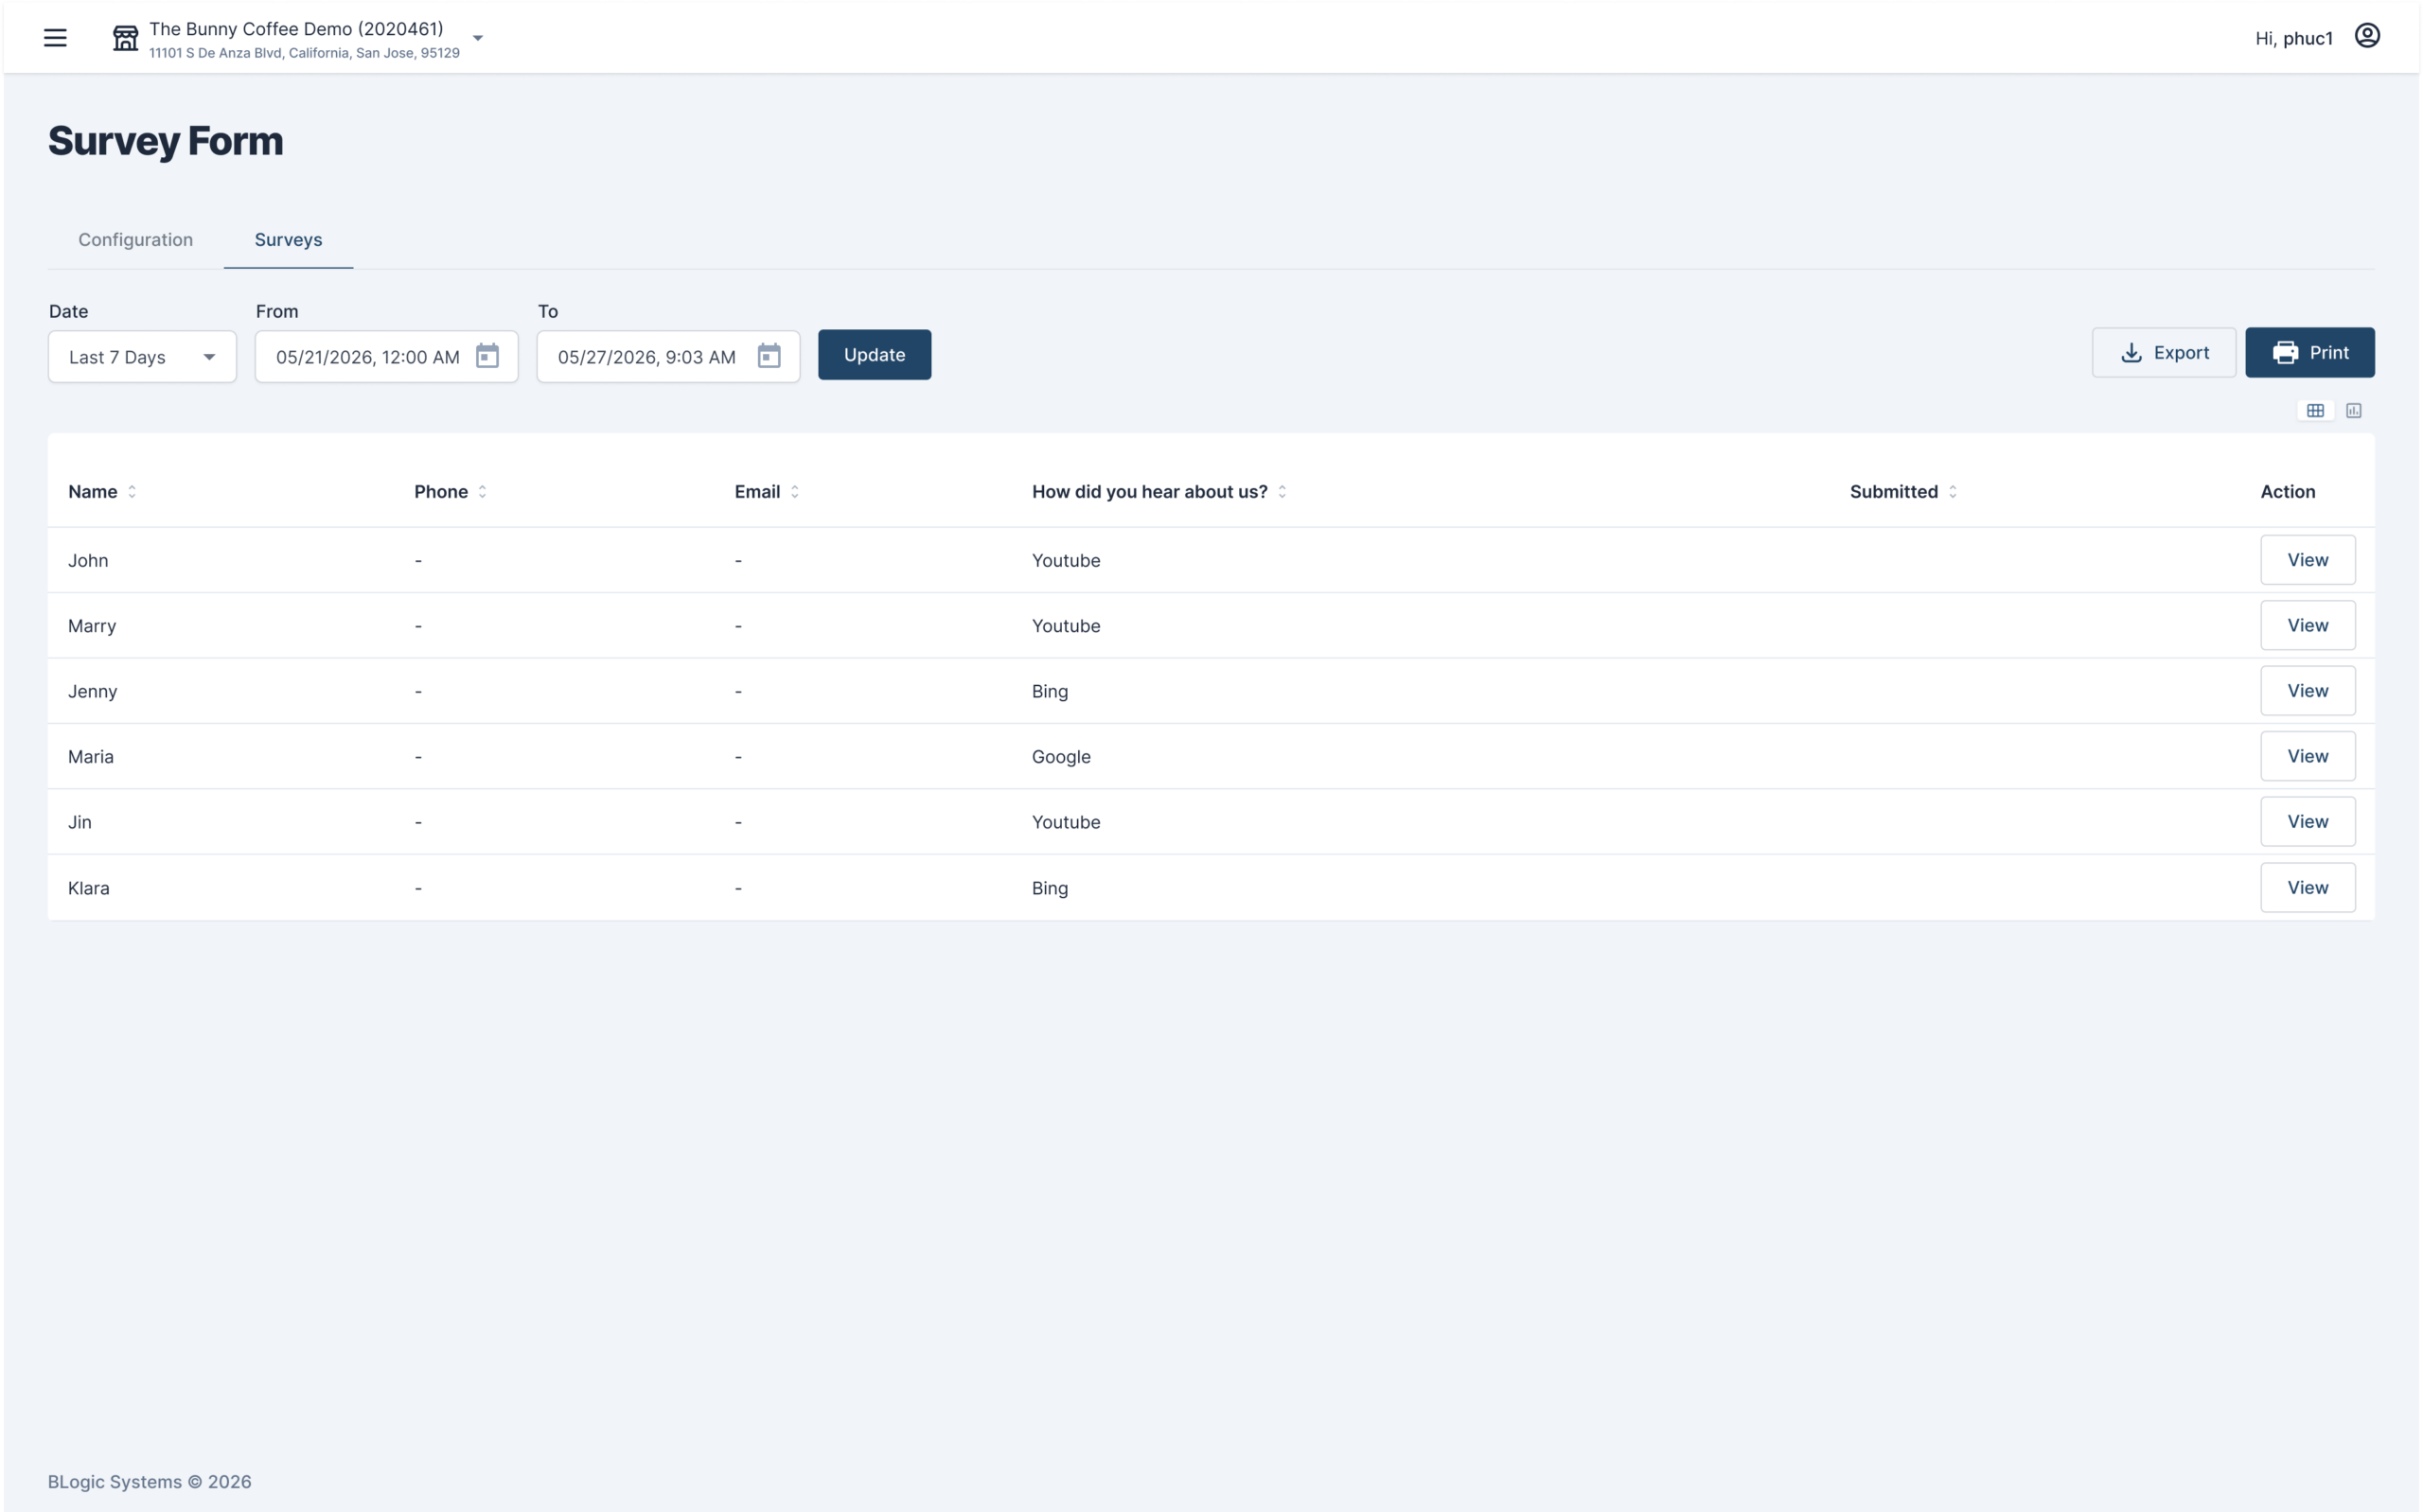
Step 2: Read the response table
The table displays submitted responses in the following column order:
| Column | What It Shows |
|---|---|
| Name | Customer name submitted in the survey |
| Phone | Customer phone number |
| Customer email address | |
| How did you hear about us? | The customer’s selected answer |
| Submitted | Date and time the survey was submitted |
| Action | View button to open full survey details |
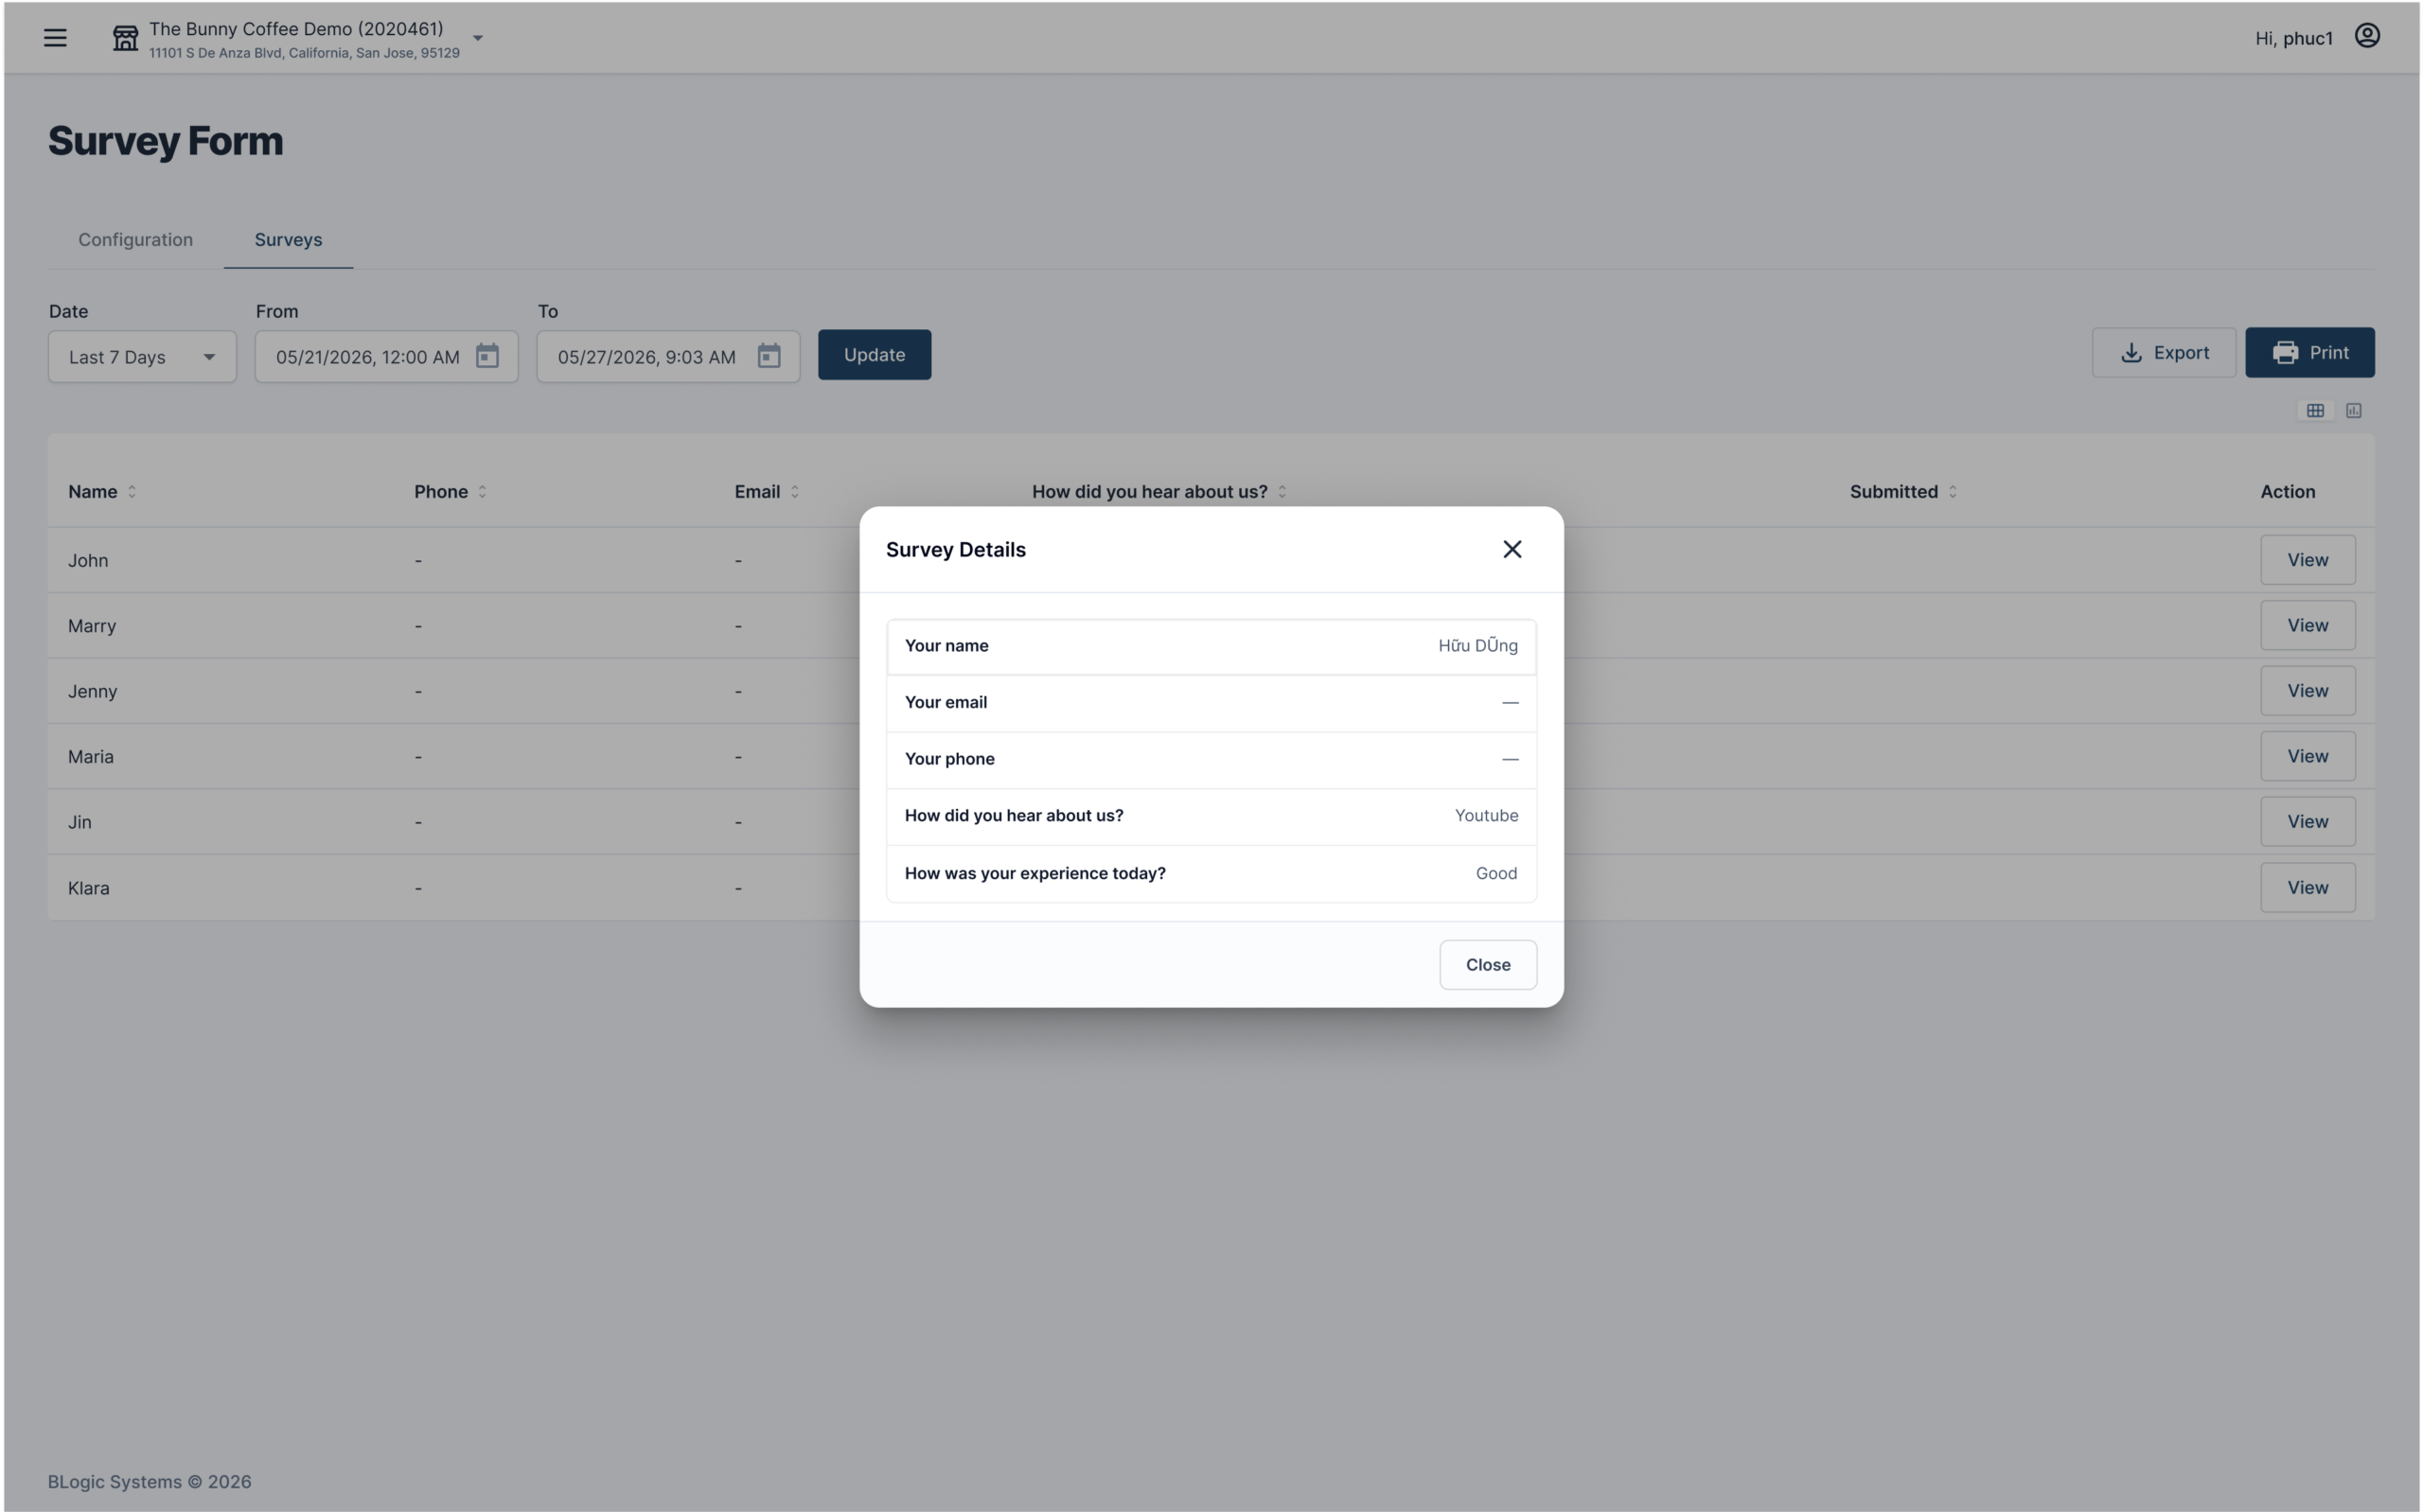
Step 3: View a submitted survey in detail
- Locate the response you want to review.
- Click the View button in the Action column.
- A Survey Details popup opens and shows:
- Submitted date and time
- Customer details: name, email, phone, and “How did you hear about us?” answer
- Custom question answers (if any were submitted)
- Click Close or the close (×) icon to dismiss the popup.
Step 4: Filter and search responses
- Use the From and To date fields to select a date range.
- Use the Search field to find responses by customer name, phone, or other details.
- Click Update to apply the filters.
- The table updates to show only matching responses.
FAQ
1. Why can’t I change the Required status of “Your name” or “How did you hear about us?”? These two fields are locked as Required by system rules. They ensure minimum customer information is always collected and cannot be made optional.
2. Can I delete predefined fields like “Your email” or “Your phone”? No. Predefined fields cannot be deleted. You can only reorder them or update their Required status (where allowed).
3. If I save a configuration change, when will customers see it? The updated form is applied the next time the survey popup opens for a customer. Changes take effect immediately after saving.
4. Why is the survey response table empty? No survey responses match your current date range or filter. Try expanding the date range or clearing the search field, then click Update to refresh.
5. Does the exported Excel file include custom question answers? The standard export includes Name, Phone, Email, How did you hear about us?, and Submitted. Custom question answers may not be included. Please contact Support to confirm the current export behavior for custom questions.
6. What should I do if the survey form is not appearing on Online Ordering? Confirm the survey feature is enabled for your store and that the configuration has been saved in BLogic View. Contact Support if the form still does not appear.
7. What should I do if a feature described here is not visible? You may not be on a supported version, or your user account may not have the required permissions. Please contact Support for assistance.
Closing
If you still need help with the Customer Survey feature, please contact Support for further assistance.