Introduction
This article explains how to control which payment methods each user role can use. You will learn how to configure payment permissions in the POS Dashboard.
Version Support
- Supported Versions: POS v7.2026.05.16 or later
- Modules: POS Dashboard – Permission
ℹ️ Note:
If you do not see the Other payment methods permission, please contact Support to confirm that your system is on a supported version.
Table of Contents
1. Before You Start
2. Open Permission Group Settings
3. Configure the Main Payment Permission
4. Configure Other Payment Methods
5. Save and Apply Changes
6. Default Behavior for New Payment Methods and Permission Groups
7. FAQ
1. Before You Start
You must have access to the POS Dashboard and permission to manage user roles or permission groups.
This setting helps managers control which payment methods staff can use during checkout. For example, you can allow a cashier to accept Cash and credit cards, but restrict other payment methods that require manager approval.
⚠️ Important:
Make sure each role is reviewed carefully. Incorrect settings may prevent staff from completing payments.
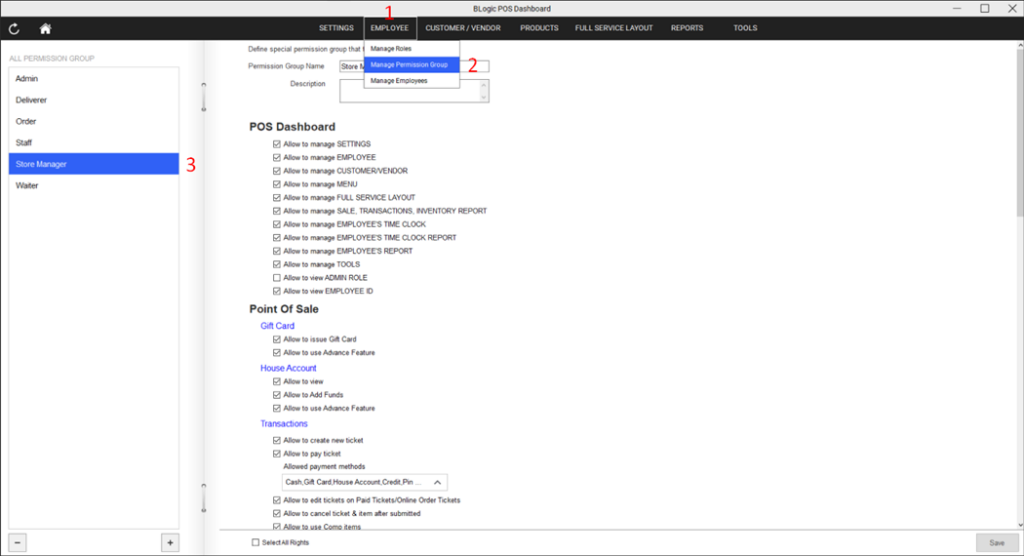
2. Open Permission Group Settings
1. Log in to the POS Dashboard.
2. Go to Employee.
3. Open Manage Permission Group.
4. Select the permission group you want to update.
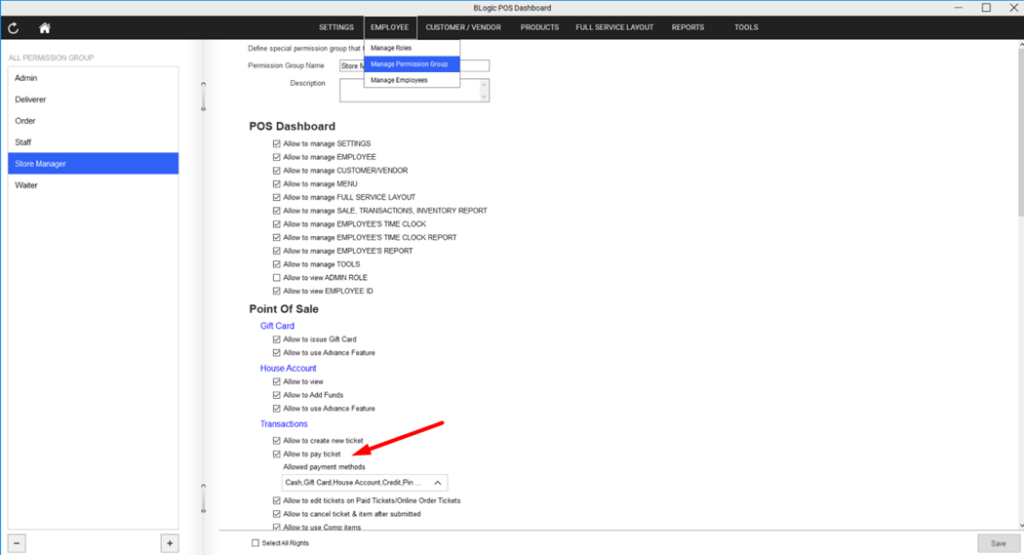
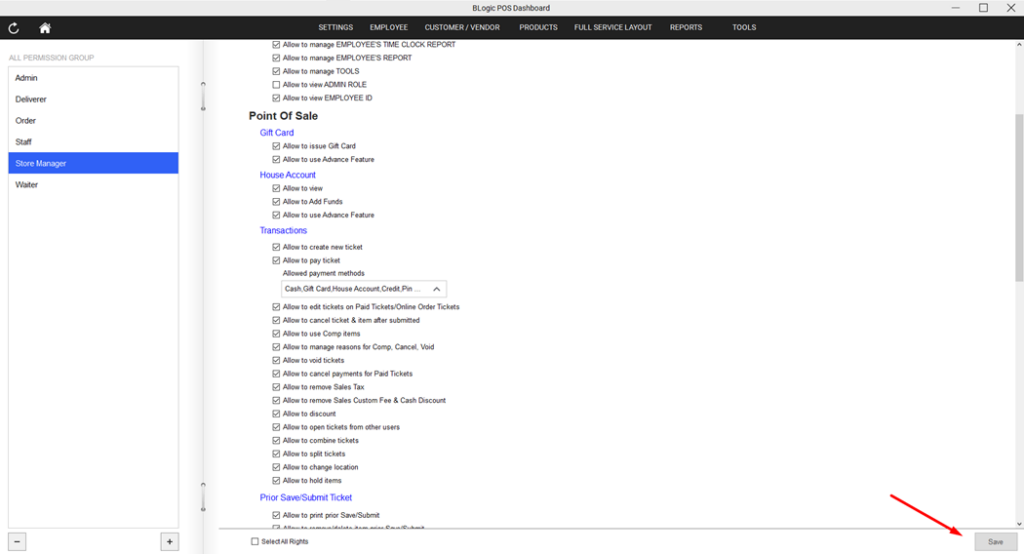
3. Configure the Main Payment Permission
1. Find the permission named Allow to pay ticket.
2. Turn this permission on if users in this role should be allowed to process payments.
3. Turn this permission off if users in this role should not be allowed to pay tickets.
ℹ️ Note:
If Allow to pay ticket is turned off, all related payment methods will also be disabled for that role.
⚠️ Important:
Users cannot process payments if the main payment permission is disabled, even if individual payment methods appear selected.
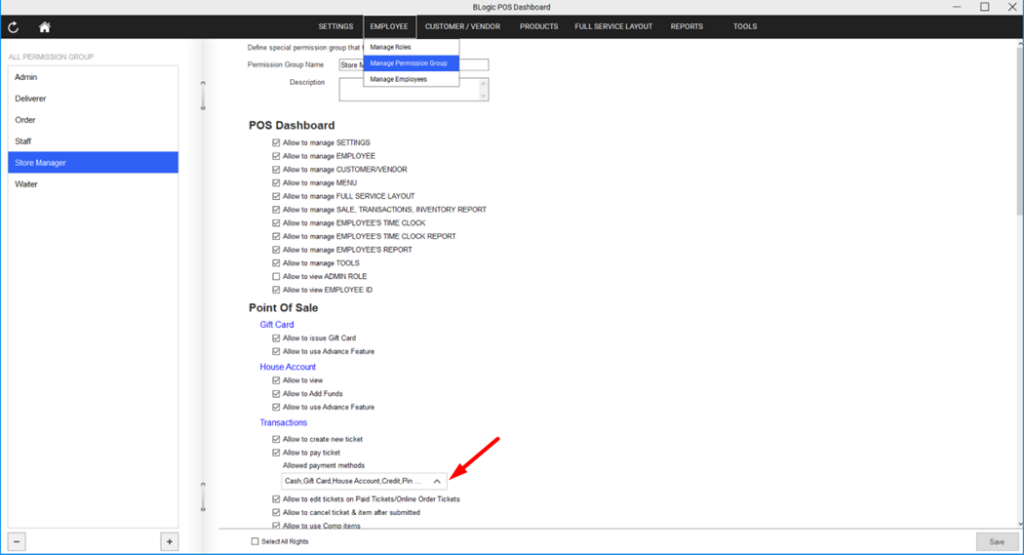
4. Configure Other Payment Methods
1. Find the permission named Other payment methods.
2. Open the payment method list.
3. Check the payment methods this role is allowed to use.
4. Uncheck any payment methods this role should not use.
The list of payment methods is loaded from your current store settings. It may change if payment methods are added or updated later.
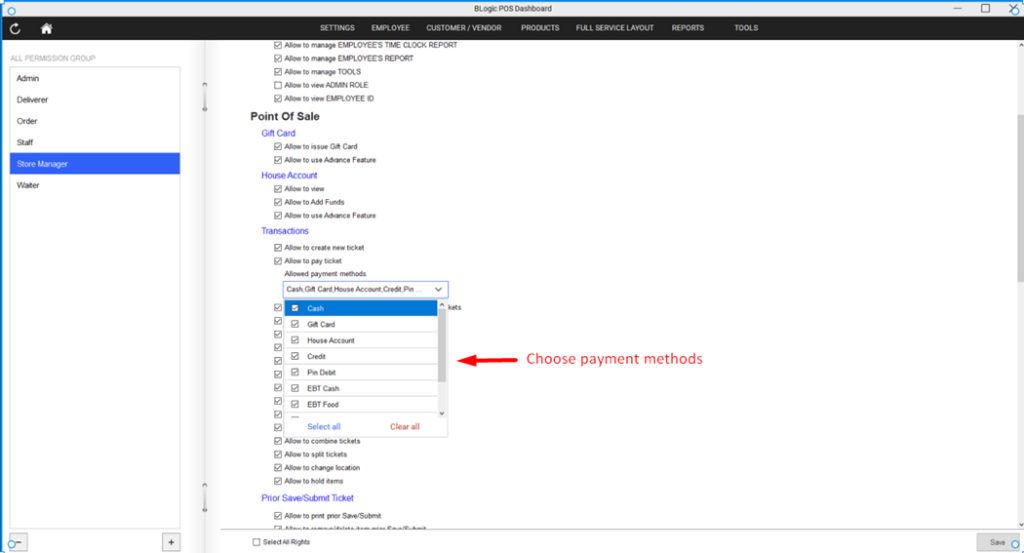
ℹ️ Note:
The dropdown preview only shows the payment methods that are selected. If no payment methods are selected, the preview shows N/A.
5. Save and Apply Changes
1. Review the selected payment methods.
2. Click Save.
3. Ask staff to refresh or reopen the POS app if the updated permission does not appear right away.
The updated permissions apply when users process payments in:
• POS
• QOrder
• SOrder
6. Default Behavior for New Payment Methods and Permission Groups
When a new payment method is added, it is enabled by default in permission settings.
When a new permission group is created, all payment methods are enabled by default.
ℹ️ Note:
Managers should review permission groups after adding new payment methods to make sure each role has the correct access.
7. FAQ
1. Why can’t a staff member use a payment method?
The staff member may not have permission for that payment method. Check the user’s permission group in the POS Dashboard and confirm that the method is selected under Other payment methods.
2. What happens if Allow to pay ticket is turned off?
The user cannot process payments. Individual payment method settings are also disabled when Allow to pay ticket is off.
3. Why does the payment method dropdown show N/A?
The dropdown shows N/A when no payment methods are selected for that permission group.
4. Are new payment methods enabled automatically?
Yes. New payment methods are enabled by default. You should review permission groups after adding a new payment method.
5. Does this setting apply to POS, QOrder, and SOrder?
Yes. Payment permission checks apply before payment processing in POS, QOrder, and SOrder.